This week my pistons came back from Polydyn for coating. On Wednesday night I checked them for clearance to the bore, and was surprised that the clearance was only about .002"! I thought I might have to have the block honed to fit the new pistons, but I was expecting more clearance than .002". However, I looked at the piston data that came with them and rather than the .0065" piston to bore clearance that I'm accustomed to seeing, these pistons specified .0035". Apparently they are a different aluminum alloy that expands less than other alloys normally used in forged pistons. In any case though, the block needed to be honed, so on Thursday I ran the block, crank, rods, and pistons, along with all the other reciprocating assembly stuff up to the machine shop for fitting the pistons to the bores and balancing the reciprocating assembly. My machinist said he would do his best to have everything ready by next Friday.
I still have some fabrication work to do on this engine before I can assemble it, so I got working on that this weekend. First job, and the biggest job, was building the oil pan. I already had the Mustang up on the lift, so I spent Friday night pulling the existing pan off the engine so I could fit the new pan on the car as I was building it. This was going to be necessary for a couple reasons. One was that the headers on the car have a somewhat unique design, and I wanted to keep them, so the pan was going to have to be made to fit. Second was that I wanted to run a deep sump for the full length of the motor, like the Super Stock guys do on their early Mustangs, and this meant that the pan had to have a tube running through it so that the drag link would fit.
The lower header tubes are a slip fit to make the oil pan removable without taking the headers loose from the car. After the oil pan was removed I put the two inside tubes back in place to get an idea of how wide the pan could be at the back of the engine; here's a photo:
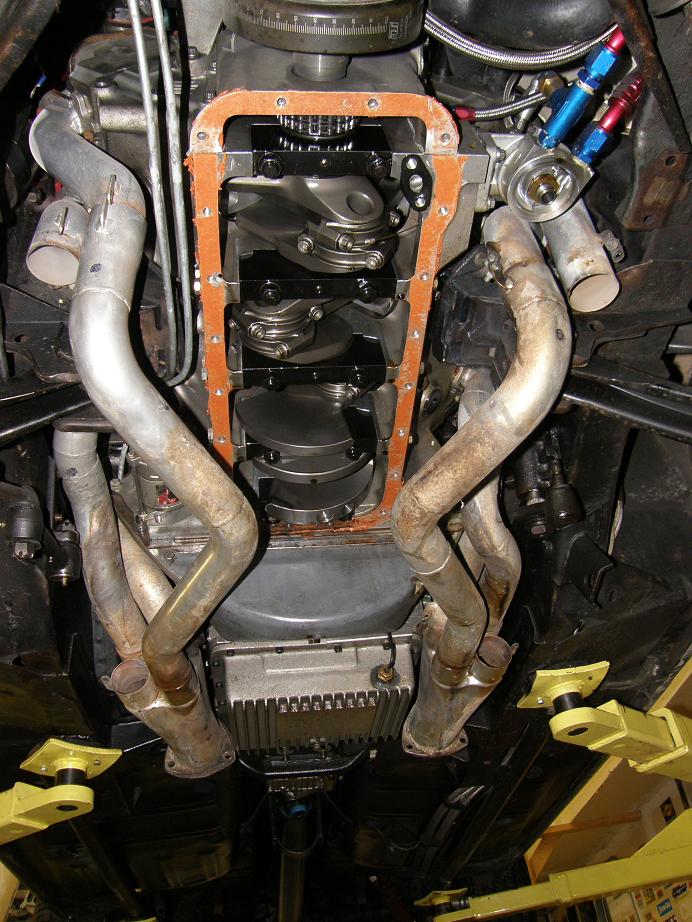
In this photo the drag link and tie rod ends have already been removed. They are the reason for the configuration of the tubes. The headers are a modified set of Hooker adjustable race headers with the 2 1/8" tubes, and those headers hang too far down to be practical for a street car, IMO. So when I got the headers I modified them to give more ground clearance. This involved making the lower tubes removable and kinking them to the inboard side of the car, so that the tie rods could move through their full travel without hitting the headers. Normally these two tubes hang down below the tie rods, and in addition to hitting the ground in a street application when you go over a bump they will hit the tie rods when the steering wheel is turned one way or the other. With the headers in this configuration I have zero ground clearance issues, but the primaries are no longer equal length.
After getting the existing oil pan off the car I took some measurements and started drawing up the design of the new pan in CAD. I wanted a kickout on the right side of the engine, but the headers and the drag link tube were going to get in the way to some extent. On the kickout I wanted to make the first wall at 45 degrees to the oil pan rail, so that the oil that was stripped off by the windage tray was deflected down into the pan, rather than bouncing back off a straight wall and back into the crank. As a result the pan rail itself didn't have the kickout.
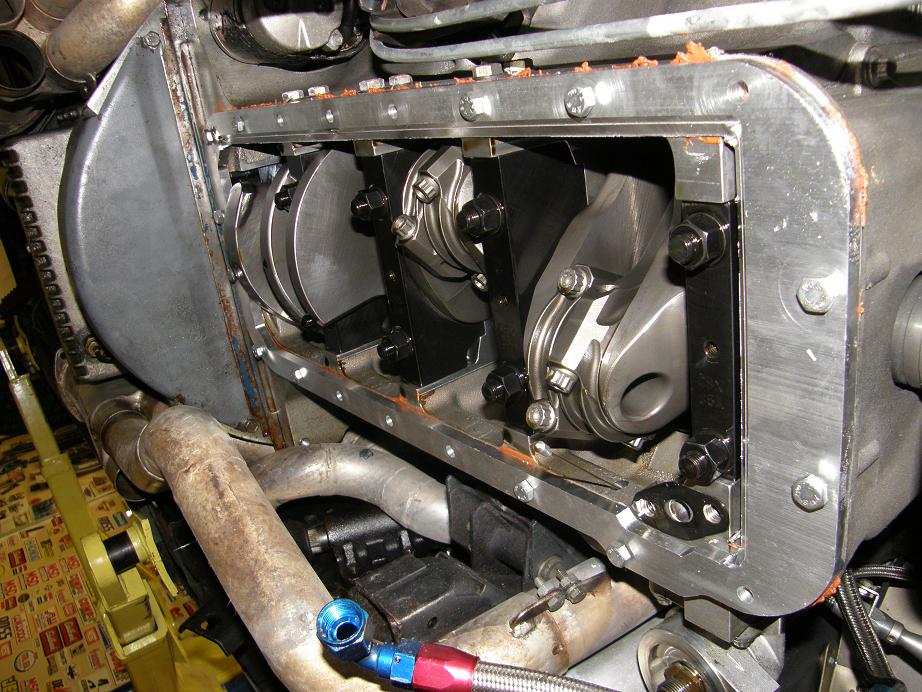
Saturday morning I programmed the pan rail into my CNC machine and cut it out from 3/8" aluminum that I happened to have on hand. Here's a photo of the pan rail bolted in place on the engine in the Mach 1:
From there I started cutting and bending 1/8" 5052 aluminum sheet to begin fleshing out the pan. By the end of the day Sunday I had a pretty good start, but it was fairly tedious work, especially once I got to the tube that the drag link has to go through. For each test fit I had to assemble the steering and run it through the tube, and then to make any modifications for fit or clearance I had to pull the steering all apart again, make the change, and then test the fit again. Here's some photos of the pan in various stages of construction.
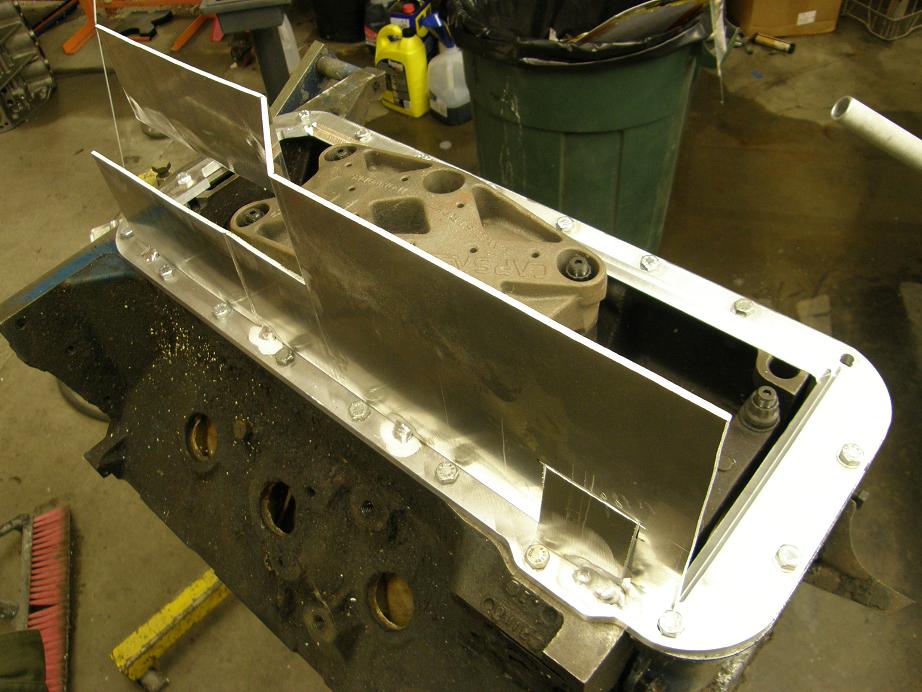
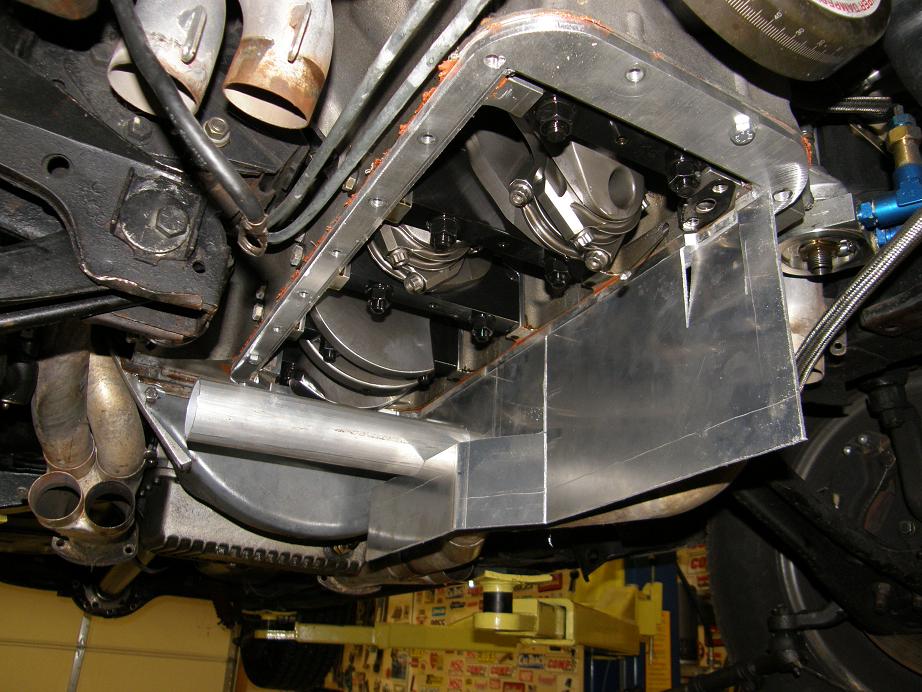
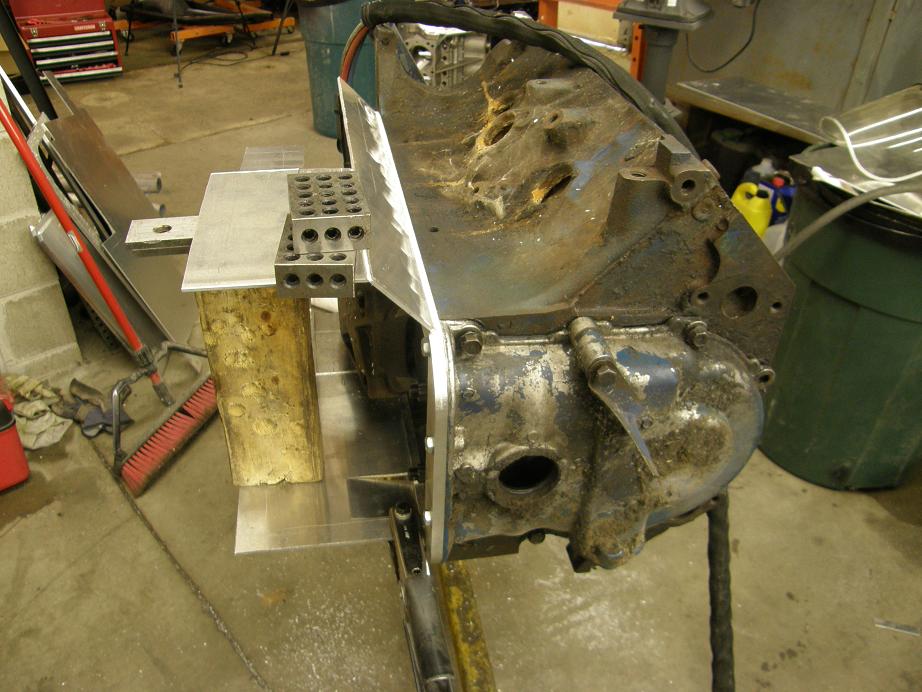
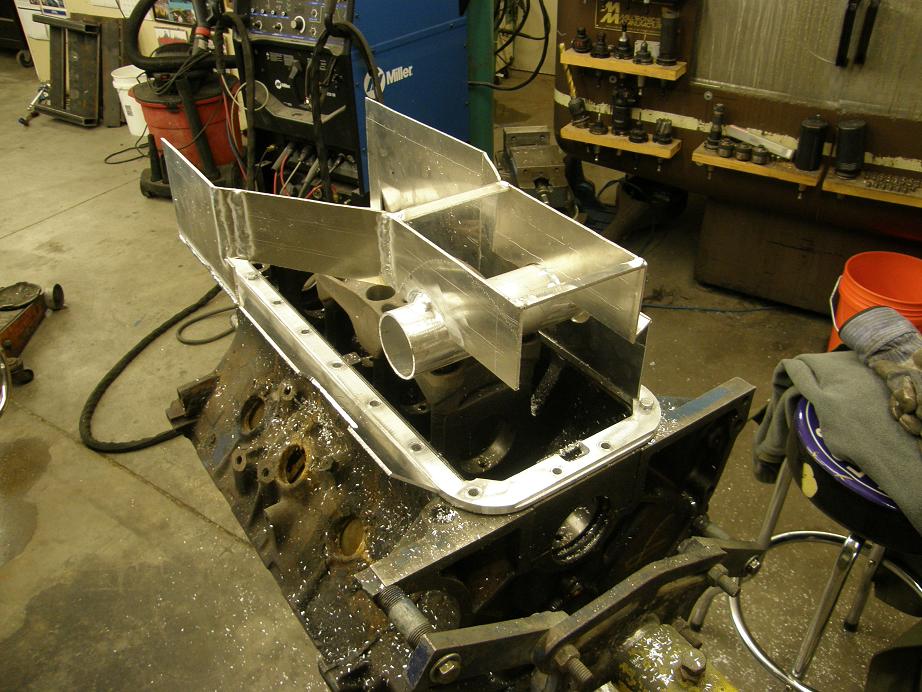
Despite spending most of the weekend on this project, I'm probably only about half way done with this pan. Hopefully I can get it finished up next weekend. Then I still have the oil pump mount and the alternator brackets to complete before all the fabrication work is done for this engine. I have to admit I'm getting kind of tired of the fabrication; I want to slam this engine together as soon as it comes back from the machine shop and get it on the dyno! Hopefully I can get the fab work done and get the engine running at the end of this month...