Author Topic: My FE Powered 1966 F100 "Project"  (Read 98103 times)

0 Members and 1 Guest are viewing this topic.

TimeWarpF100

  • Hero Member
  • *****
  • Posts: 683
    • View Profile
Re: My FE Powered 1966 F100 "Project"
« Reply #45 on: September 15, 2014, 10:25:21 PM »
Finally, Made a slight amount of progress on header build.

I have the first step in 1 7/8" done on right side and the left header is all in and tacked together. Just needs final weld.

Very pleased with how it fits.

Now for the much tighter  right side which has 2 1/2" less room including transmission and also the starter taking up a lot of space.

crappy cell phone pics . . .


TimeWarpF100

  • Hero Member
  • *****
  • Posts: 683
    • View Profile
Re: My FE Powered 1966 F100 "Project"
« Reply #46 on: September 27, 2014, 08:00:14 PM »
After 30 tough days I was finally able to get the headers tacked together in place.

That right side was a total booger. A lot of room where it exits the port but after that was very very tight. I had to rotate the collector in order for it to fit.
Engine is offset 2 1/2" to right side for steering box clearance.

Not enough room for 4 pipes to fit between trans and crossmember. Had to go up and over.

I still need to get the cooling lines in there some how.


jayb

  • Administrator
  • Hero Member
  • *****
  • Posts: 7406
    • View Profile
    • FE Power
Re: My FE Powered 1966 F100 "Project"
« Reply #47 on: September 27, 2014, 11:07:36 PM »
Really, really nice job on those headers!
Jay Brown
- 1969 Mach 1, Drag Week 2005 Winner NA/BB, 511" FE (10.60s @ 129); Drag Week 2007 Runner-Up PA/BB, 490" Supercharged FE (9.35 @ 151)
- 1964 Ford Galaxie, Drag Week 2009 Winner Modified NA (9.50s @ 143), 585" SOHC
- 1969 Shelby Clone, Drag Week 2015 Winner Modified NA (Average 8.98 @ 149), 585" SOHC


TimeWarpF100

  • Hero Member
  • *****
  • Posts: 683
    • View Profile
Re: My FE Powered 1966 F100 "Project"
« Reply #48 on: October 23, 2014, 12:24:11 PM »
Really, really nice job on those headers!

Thanks Jay!

Made a bit more progress. Headers pretty much done now just have to add a bit to collectors.

Quite the puzzle but was able to make them with only 2 welds after the 1 7/8-2' step

One pipe may have an extra weld as screwed up a cut . .


TimeWarpF100

  • Hero Member
  • *****
  • Posts: 683
    • View Profile
What headers look like bolted to engine
« Reply #49 on: November 02, 2014, 12:21:40 AM »
A little photo op since the manifold adaptor from Jay showed last week and I finally dragged my 390 soon to be 416 out of the cobwebs.

A good time to see what the Chromed Mercury valve covers looked like with Jays FE adaptor manifold along with my freshly built headers.

Really really impressed with the quality of the manifold adaptor! Thanks again Jay!


« Last Edit: November 02, 2014, 12:23:48 AM by TimeWarpF100 »

My427stang

  • Hero Member
  • *****
  • Posts: 3930
    • View Profile
Re: My FE Powered 1966 F100 "Project"
« Reply #50 on: November 02, 2014, 10:18:39 AM »
Very very nice!

Are you going to coat them?
« Last Edit: November 02, 2014, 12:07:15 PM by My427stang »
---------------------------------
Ross
Bullock's Power Service, LLC
- 70 Fastback Mustang, 489 cid FE, Victor, SEFI, Erson SFT cam, TKO-600 5 speed, 4.11 9 inch.
- 71 F100 shortbed 4x4, 461 cid FE, headers, Victor Pro-flo EFI, Comp Custom HFT cam, 3.50 9 inch

MustangGT

  • Jr. Member
  • **
  • Posts: 87
    • View Profile
Re: My FE Powered 1966 F100 "Project"
« Reply #51 on: November 02, 2014, 11:20:29 AM »
My hat off for the header work. Way to go! ;D

TimeWarpF100

  • Hero Member
  • *****
  • Posts: 683
    • View Profile
Re: My FE Powered 1966 F100 "Project"
« Reply #52 on: December 05, 2014, 11:19:21 AM »
Very very nice!

Are you going to coat them?

Could have sworn I answered this question . . . Gettin' Old!

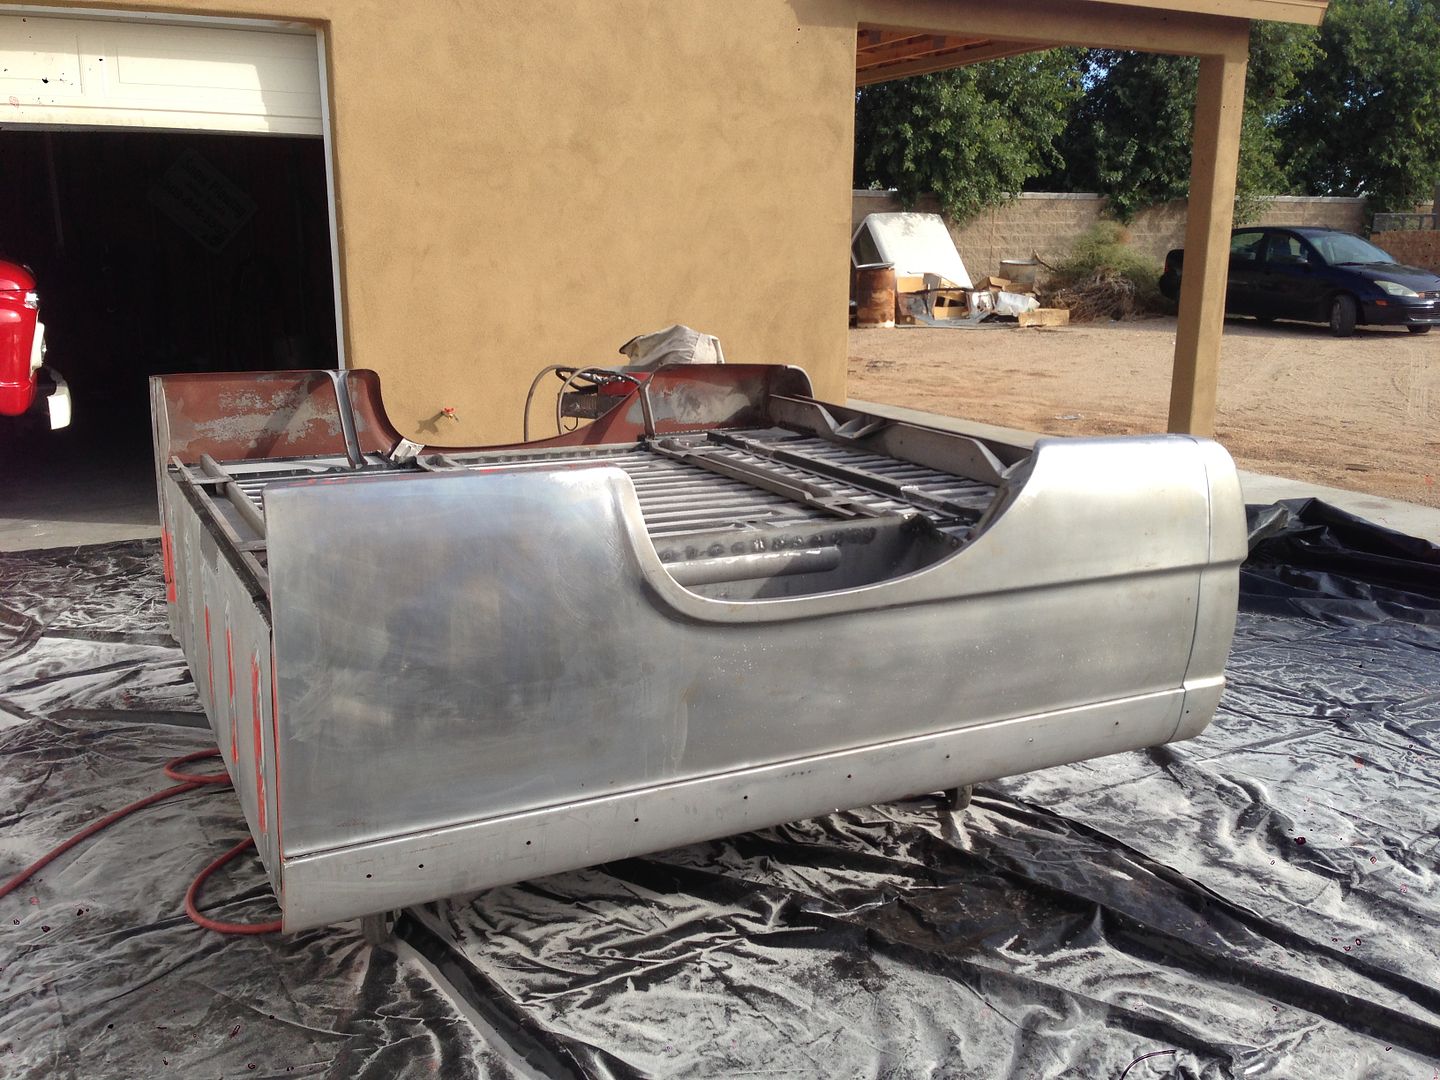
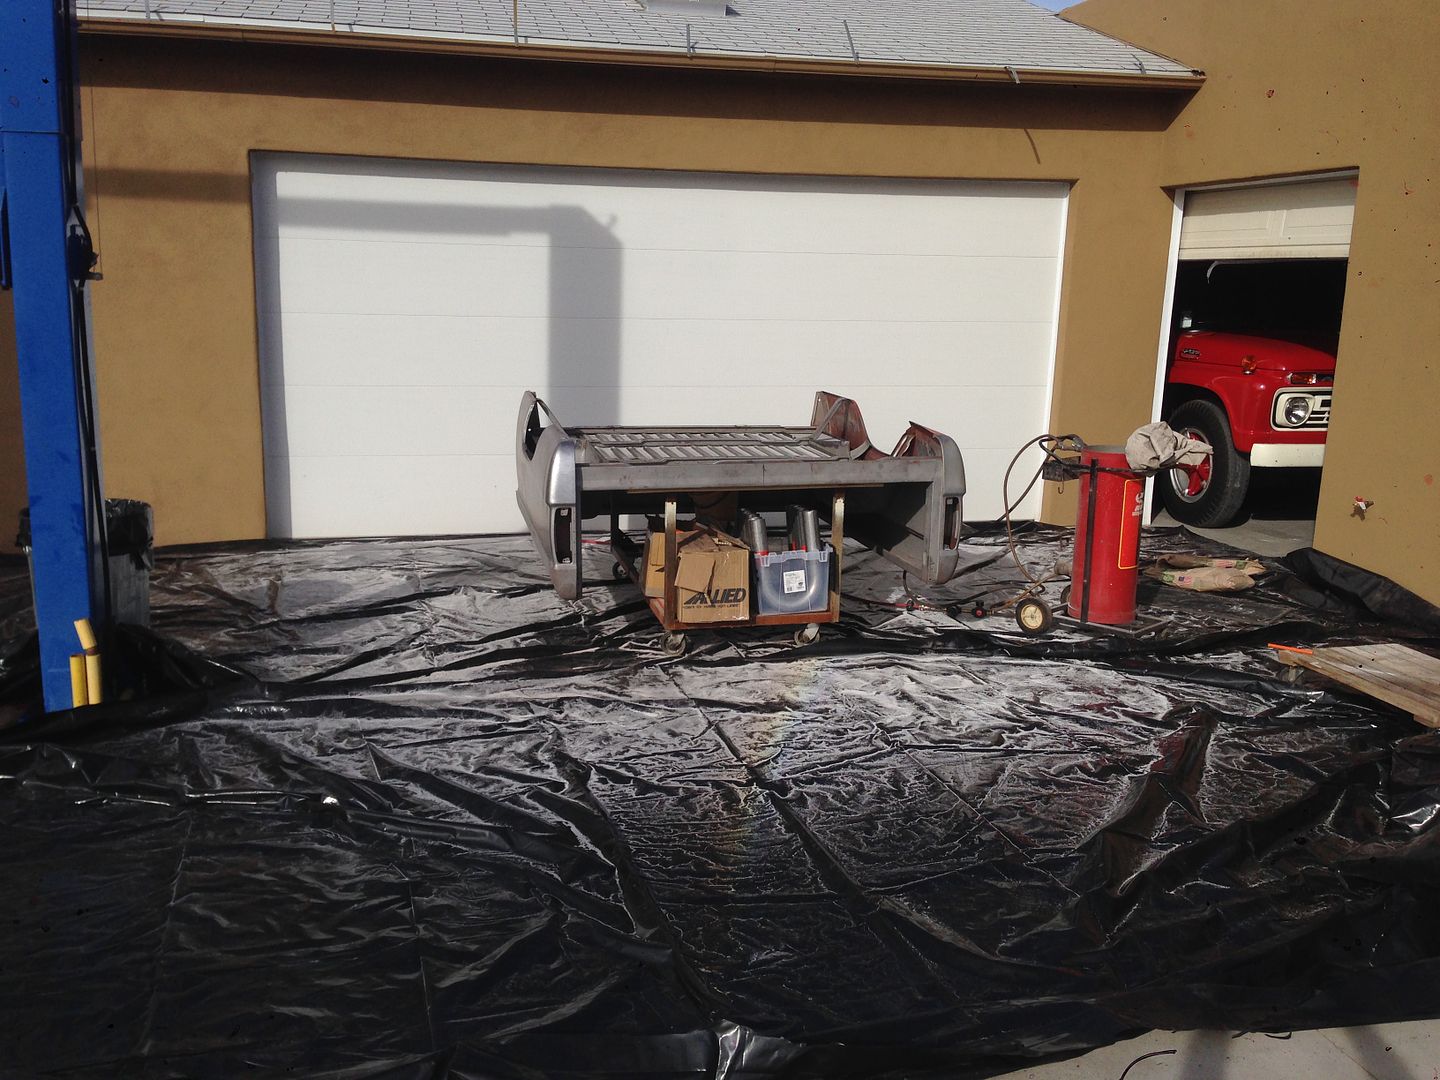
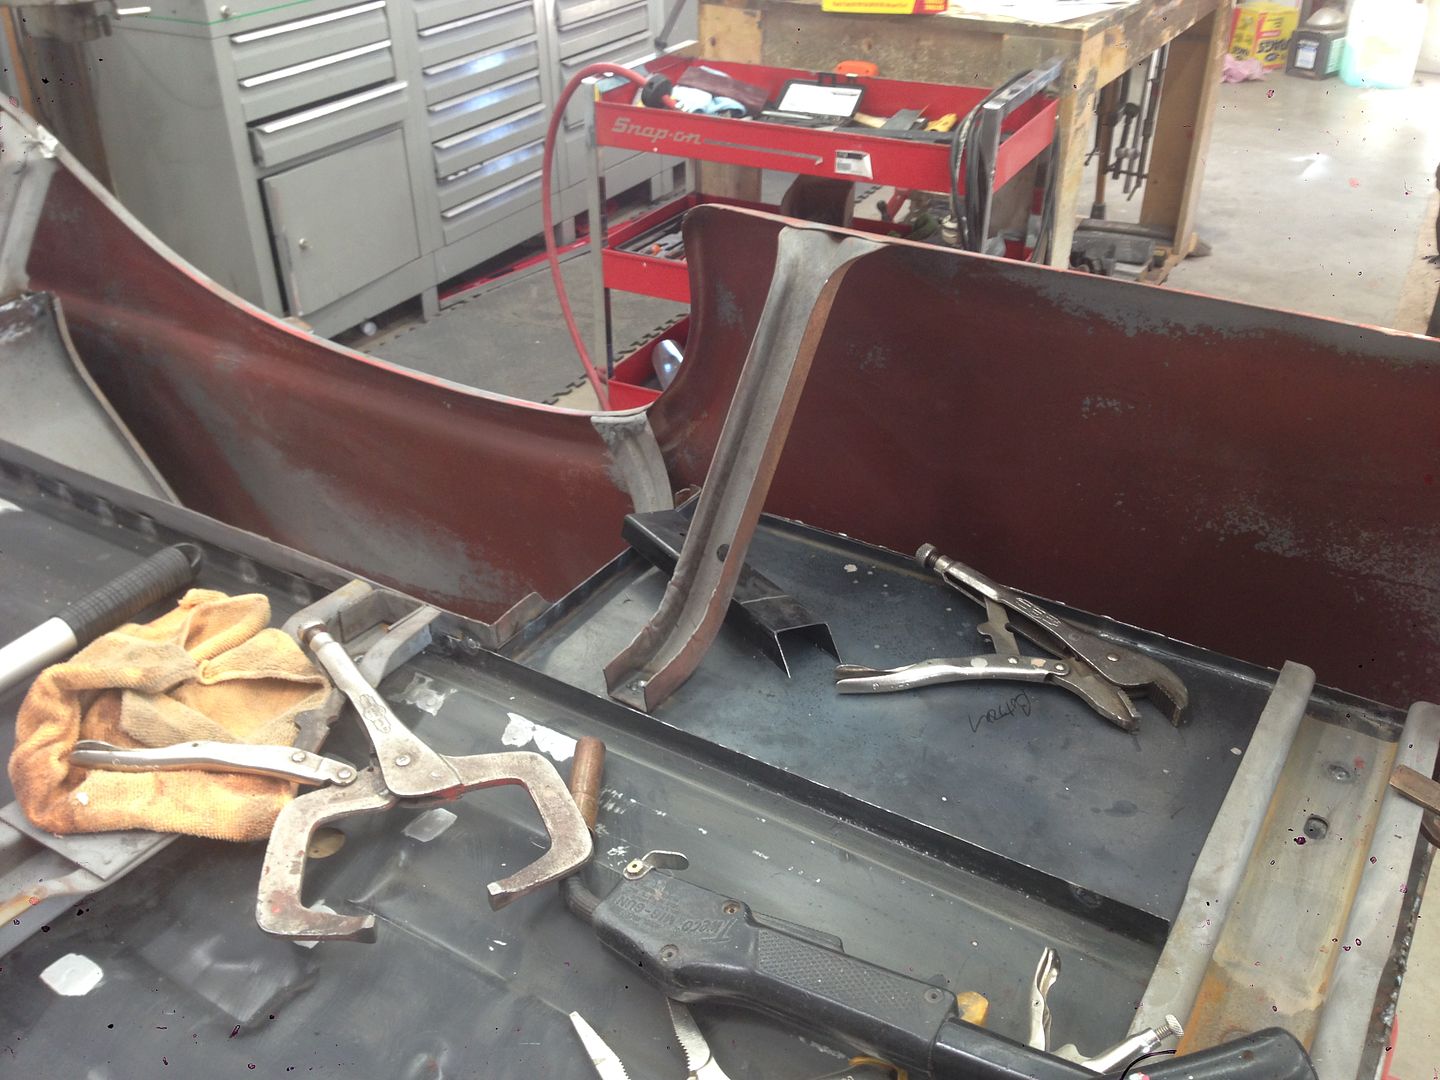
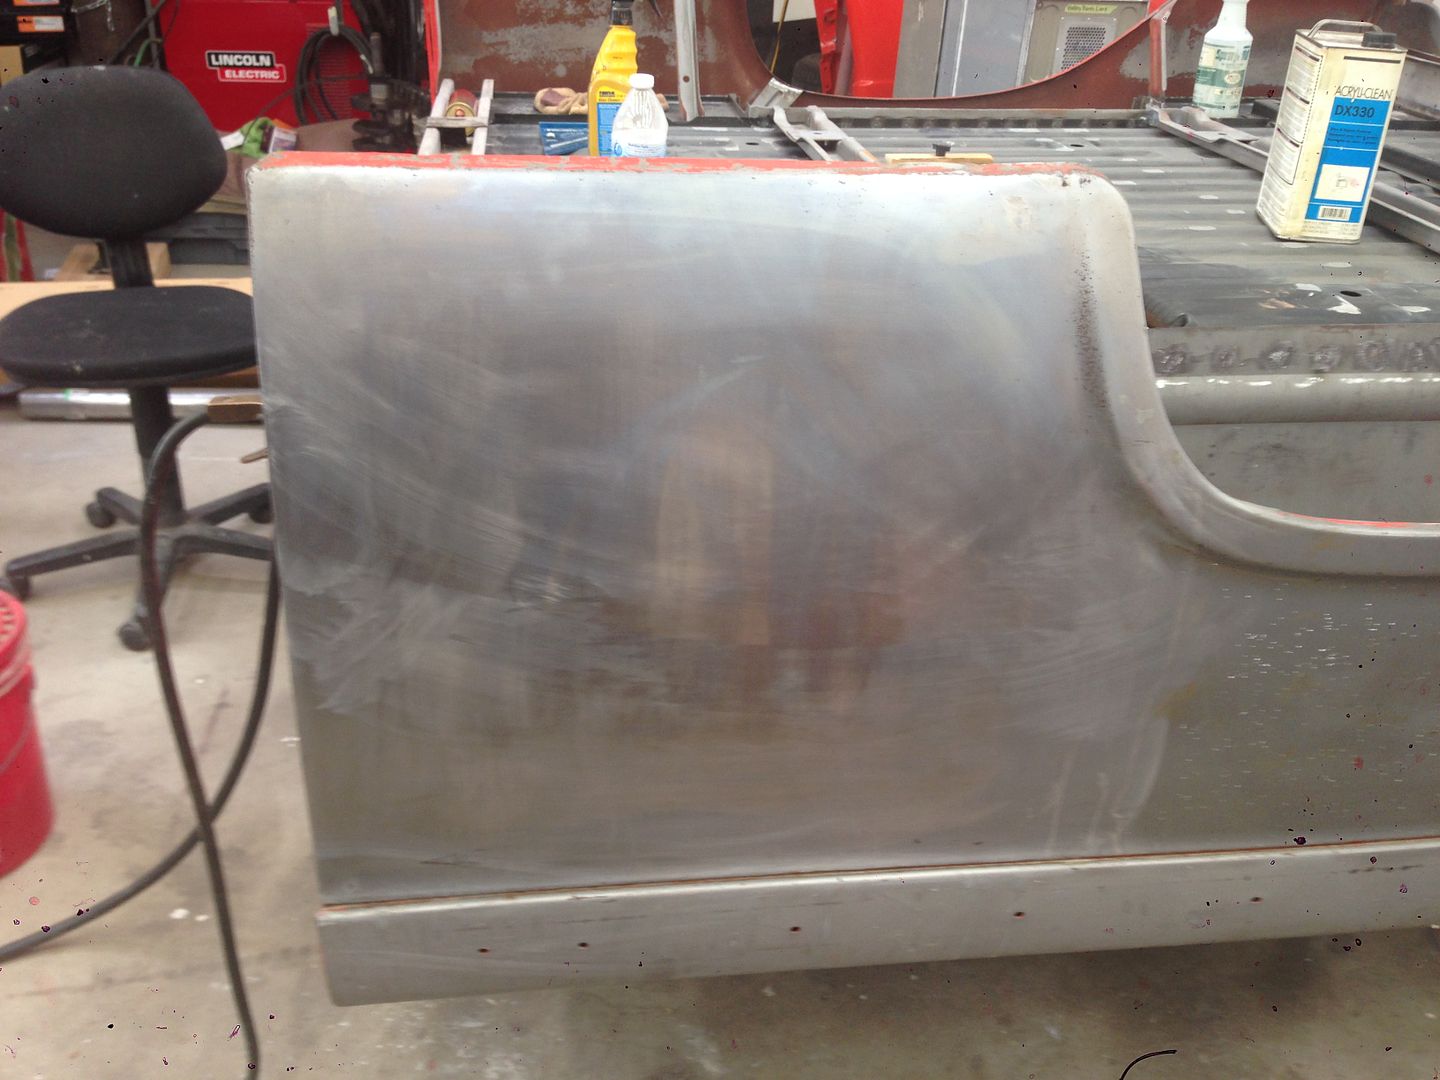
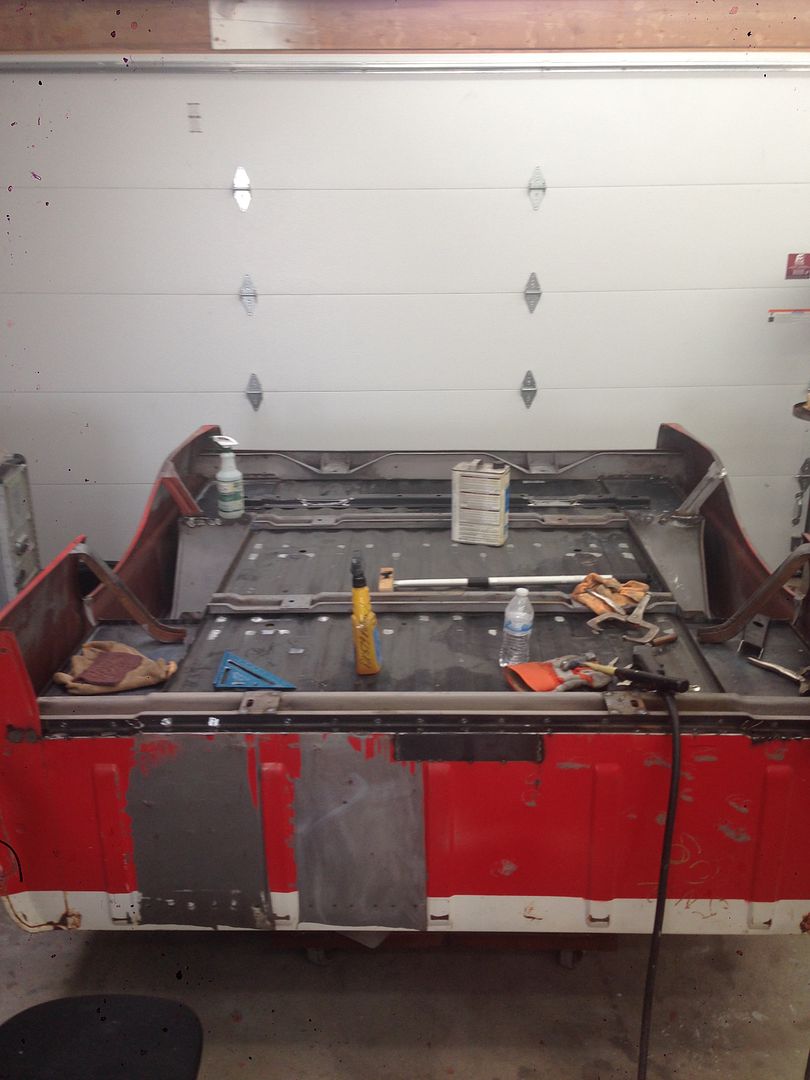
Yes, I do plan on having them coated. I put them in place and was going to build the exhaust system, bought all the components to do that. But, because I did extensive work on the box replacing the box floor with a new one from a F250 Super Duty I decided to drop the box in place for a test fit and also to make sure when I put the exhaust system in it would properly clear the exhaust.

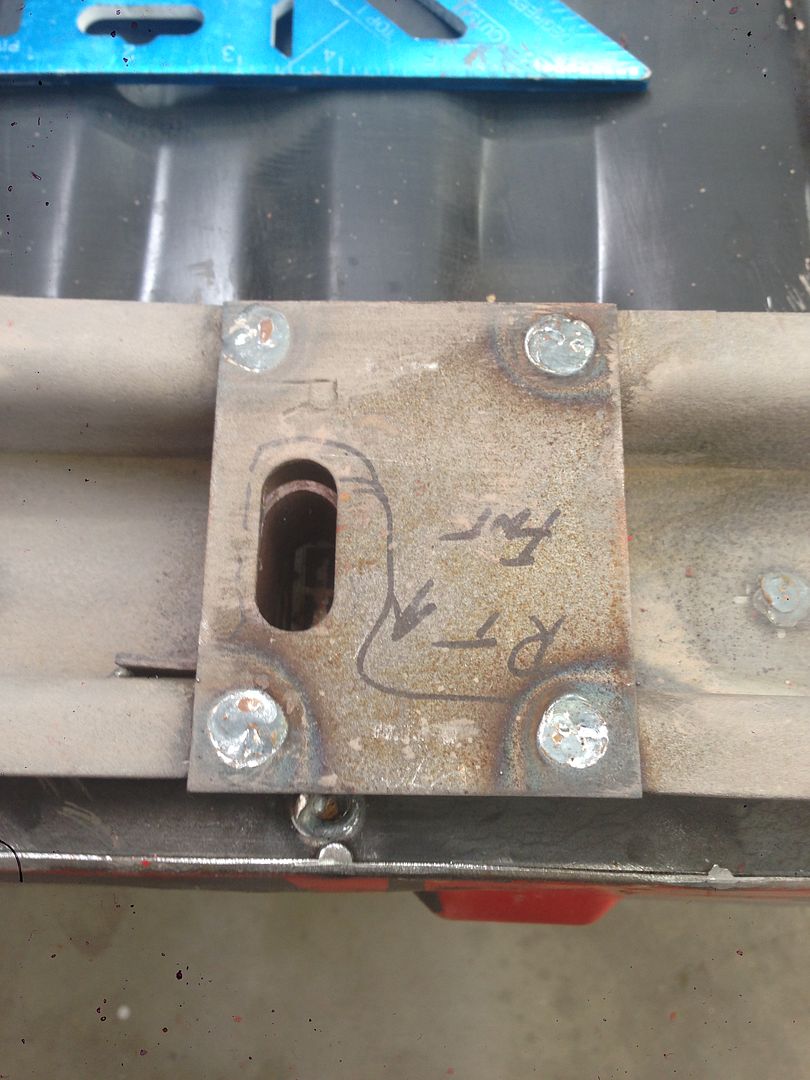
I pre-fit the box only to realize one of the crossmembers was slightly in the way causing box to not go in place . . . At this point I realized age was kicking in something fierce and crawling under the truck taking a measurement crawling back out to make a cut then by the time I got to chop saw I forgot the measurement, only to crawl back under and realizing I left the tape measure on the bench! I crawl out the tape measure is not on bench. Phone rings and I forget what I was doing. Repeat this a million times a day and I got tired of crawling under truck and back out again. By then the brain and body is fried. Stop and repeat for days with nothing done!

SO, its time to re-think this method. In my past two shops I had hoists in them for doing this type work. This shop the ceiling was too low so the hoist was put outside.

It seems its either too hot, too cold, raining and how do I get the truck outside to hoist when it does not run. Then push it back in if I have to leave etc.

Time for a hoist to fit inside even if I have to sit on a chair and weld~fit.

Find a hoist I am interested in a local vendor comes over and said this one will work but  its not very heavy duty so lets step it up a notch. Decide on a 9000lb 4 post guy says sure that will fit no problem. We look up length and width. Cool looks like it fits. Look up the numbers for how high it will go, take a few measurements of my '66 trucks to see if in the air with cab about on ceiling I can sit on a chair underneath to work on it. Looks ok!

I order hoist. It shows up and we start to remove it from packaging. All looks good . . UNTIL I stand up one of the posts, look at the door and think it looks too tall.

I know the door is right at 96" and the hoist is 96.5" and that does not include the upper plate and the nut and adjuster cable that sticks up. It also does not include the extra height need for the casters!

Told the guy take it back the only reason I bought it was to be able to push it in and out of shop.

Sorry, No returns!

What do I do chop up the door frame which I had recently done with a engineered beam etc. Fresh stucco on the shop

I put the posts in the chop saw, cut off 5" and now how about the cables that need to be 5" shorter.

Call the hoist guy who delivered it and was going to do assembly he says sure we can get another set of cables for 600.00 to your door!

No way no how will I give 600.00 for cables when it was supposed to fit in the first place.

At this time I was a bit miffed . .

Started to call cable rigging places to see if they would be able to help.

Found a cable place down town phoenix. They said sure come on down will do it while you wait.

Of course a worker takes first cable and without thinking does not allow for the swedge lock on end of cable. Its now 1.5" too short!

Shop foreman gets involved grabs a new length of cable from roll and a new end and tells the guy to fix it!

At this time I am thinking of the 600.00 from another place for set of cables.

I go into office and ask what is final amount and its 3.11 each plus tax. Total to fix the 600.00 cable issue is 13.48 !!

Take cables home and cut up everything else that needs shortening and it all fits perfect, the hoist will now fit in shop!

There, Drama for the week!  All that and I have not gotten to the headers and exhaust again.

Of course getting the hoist in the first place had me selling off stuff (like the intake adapter, LOL) My '66 Fire Truck and a bit more. (also enough $$ so I could order wheels for the 427 Truck)

Box floor job nearly done. Of course just as I had laid out plastic to catch some of the fresh glass beads I was using for blasting edges etc a hoist hose blew and sprayed oil everywhere. Long hose another 200.00 down the tubes.


TimeWarpF100

  • Hero Member
  • *****
  • Posts: 683
    • View Profile
Re: My FE Powered 1966 F100 "Project"
« Reply #53 on: December 05, 2014, 11:25:52 AM »
Yeah, Its the black crossmember I left in for support as the floor is 1/2 the thickness of original. It touches slightly keeping the box too close to the cab.


For cooling I am using a desert cooler radiator from a mid to late 460 powered F150. I had to fab up some brackets to get it in proper position.

I was able to get in touch with a cooling system engineer (because of what it was going in- thanks SEMA) with help in proper location of fan to shroud and distance from radiator. I gave the engineer the dimensions of what I had and he came up with proper part numbers of what would work. It all fits in there nicely. Lets hope it gives proper cooling! He gave me a few pointers on best distances from rad etc. A quick and easy learning curve. When the distance of fan from radiator is wrong it messes everything up.
(using a thermal type fan clutch)


TimeWarpF100

  • Hero Member
  • *****
  • Posts: 683
    • View Profile
Re: My FE Powered 1966 F100 "Project"
« Reply #54 on: December 05, 2014, 11:28:55 AM »
I started this project back in 2008, at this point hoping to make more progress soon.


TimeWarpF100

  • Hero Member
  • *****
  • Posts: 683
    • View Profile
Re: My FE Powered 1966 F100 "Project"
« Reply #55 on: December 05, 2014, 11:33:19 AM »
This is the wheel I would like to use.


New 4 post.


Taking a break from the 427 truck for a bit and taking some time to get cab mounted on chassis for the EcoBoost Project


« Last Edit: December 05, 2014, 11:37:37 AM by TimeWarpF100 »

turbohunter

  • Hero Member
  • *****
  • Posts: 2509
    • View Profile
Re: My FE Powered 1966 F100 "Project"
« Reply #56 on: December 05, 2014, 12:49:33 PM »
Man do your experiences sound like mine.
To many (is there really such a thing?..... Jay ;D) projects and not enough room.
Your crawling in and out from under the truck story is all to familiar.
Really neat projects though. Enjoy reading and thinking about them.
Those cut down posts would do Ok in my garage. Food for thought.
I'm not getting any younger either.
Marc
'61 F100 292Y
'66 Mustang Injected 428
'66 Q code Country Squire wagon


TimeWarpF100

  • Hero Member
  • *****
  • Posts: 683
    • View Profile
Re: My FE Powered 1966 F100 "Project"
« Reply #57 on: January 08, 2015, 11:29:20 AM »
Man do your experiences sound like mine.
To many (is there really such a thing?..... Jay ;D) projects and not enough room.
Your crawling in and out from under the truck story is all to familiar.
Really neat projects though. Enjoy reading and thinking about them.
Those cut down posts would do Ok in my garage. Food for thought.
I'm not getting any younger either.

Made the front Page of BangShift

http://bangshift.com/general-news/car-features/ford-car-features/bangshift-project-files-one-two-ford-truck-projects-427-one-ecoboost-swap/

http://www.bangshift.com/forum/forum/bangshift/project-cars-update/964209-1966-f-100-ecoboost-1966-f-100-427-side-oiler


A bit more detailed link

http://www.garagejournal.com/forum/showthread.php?t=147380
« Last Edit: January 08, 2015, 11:31:06 AM by TimeWarpF100 »

lovehamr

  • Full Member
  • ***
  • Posts: 209
    • View Profile
Re: My FE Powered 1966 F100 "Project"
« Reply #58 on: January 08, 2015, 04:24:19 PM »
One of the comments from Bangshift: "Wow this dude makes me feel lazy!"

A yup! ;)

rockittsled

  • Full Member
  • ***
  • Posts: 100
  • 1976 F-250 390 4v C6
    • View Profile
Re: My FE Powered 1966 F100 "Project"
« Reply #59 on: January 09, 2015, 11:19:48 AM »
One of the comments from Bangshift: "Wow this dude makes me feel lazy!"

A yup! ;)
Found the Bangshift article yesterday before I went to bed. I agree! ;D