This week I cleaned up a lot of small projects on the car, and by late in the day Sunday the car was looking more complete than ever. My driveshaft had arrived from Mark Williams this week, but before I put it in and started on the rear end work, I wanted to finish up in the interior. Wednesday night I got a few hours in the shop and was able to get the plates welded to the floor for the seat mounts, and also spent a few minutes getting the shifter mounted to the floor. On Friday night I installed the Lokar gas pedal, and then unbolted the Wilwood brake pedal assembly and the steering column from the cross bar and pulled the bar out of the car, so that I could finish welding and reinforcing the brake pedal mount.
On Saturday morning I had a few more hours out in the shop, and worked on the the welding and reinforcements for the cross bar. After finishing with that I made up a cardboard template for the hole I needed to cut in the firewall so that the master cylinders could bolt to the Wilwood brake pedal assembly. Then I repositioned the cross bar between the two front roll cage uprights, bolted the brake pedal mount to the hole in the firewall to make sure it was aligned correctly, and welded the dash bar into position.
Next I bolted the master cylinders on the brake pedal assembly, and tried to fit the assembly into position under the dash. Unfortunately the master cylinders wouldn't quite fit through the hole in the firewall, so I had to do some additional trimming to the firewall. This was a contortionists nightmare; I couldn't easily get at the hole from the engine side or under the dash side to trim it, but finally using a small cutoff wheel on a die grinder I was able to trim the opening where it was needed. Finally I got the pedal assembly and the master cylinders mounted, and took off the tape from the master cylinders where the reservoirs were mounted , and installed the reservoirs. The photo below shows the master cylinders; there is a pretty nice clear area between the master cylinders and the back of the engine:
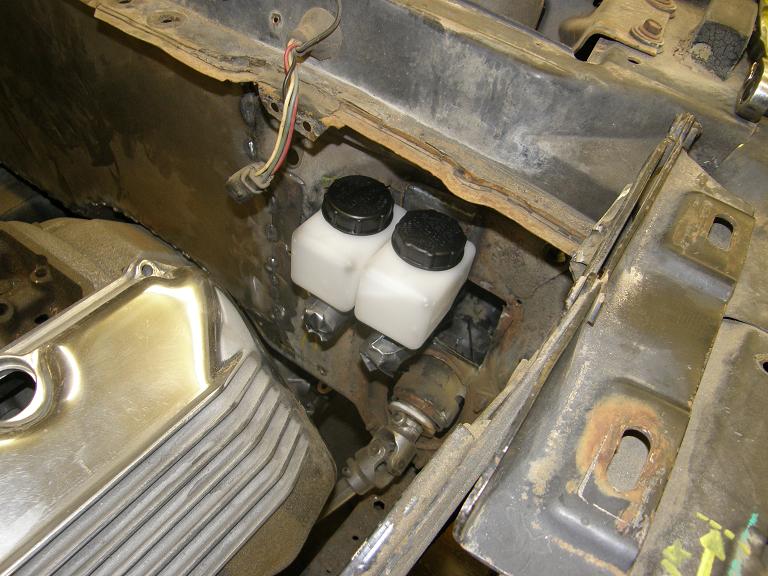
My alternative to this setup would have been to retain the stock pedal and use some kind of a double pivot linkage arrangement to relocate the master cylinder up and out to clear the engine. I thought that this would be a lot of work, hence my selection of the Wilwood pedal and master cylinder assembly, but as it turned out getting the Wilwood pedal installed was a lot of work too. Hindsight being 20/20, I think I would have given more thought to the double pivot linkage scheme before settling on the Wilwood pedal, but one thing for sure is that if I had gone that route, I might still have limited access to the back left side of the engine with the valve cover off, and of course with the Wilwood master cylinders being completely behind the engine, that is not an issue with this setup.
The last thing I did on Saturday before heading out to watch my daughter's basketball tournament was to put the seat tracks on the passenger side seat, and bolt the seats and the shifter into the car. With both pedals, both seats, the steering wheel and the shifter installed, it was starting to look like a real car! Of course, it all has to come apart again for cleaning and painting before final assembly, but having the interior essentially all put together except for the dash (which I plan to custom fabricate later) gave a good sense of progress.
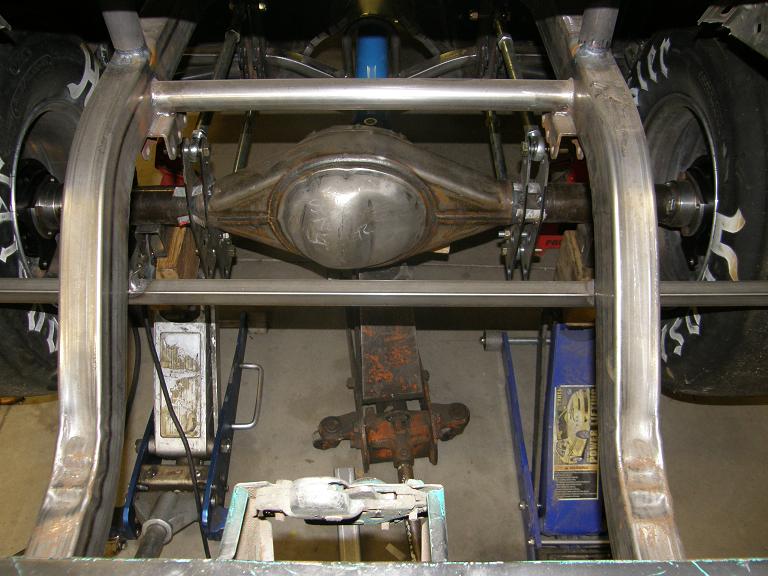
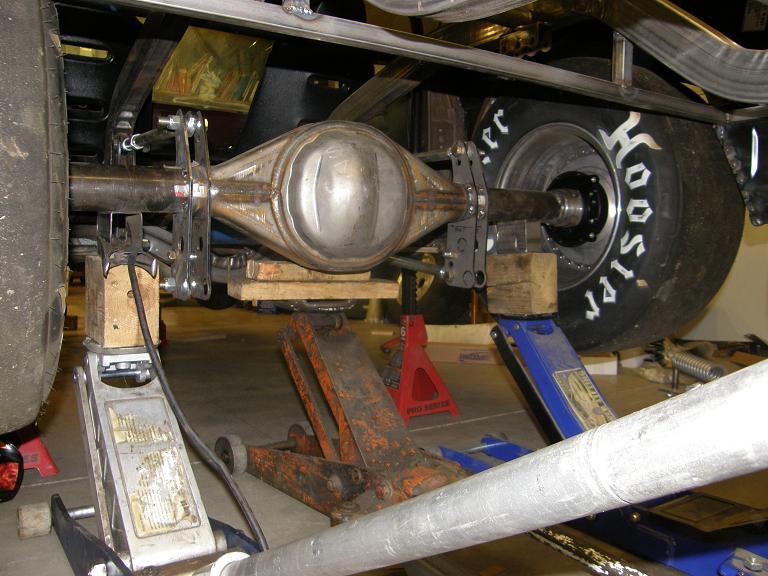
I had another basketball game to attend on Sunday afternoon, so I set my alarm for 7:30 and was out in the shop with a hot cup of coffee by 8:00. I was looking forward to getting to work on the rear end. After cleaning up under the car so I had a clear area to work, I positioned three floor jacks under the rear end to allow precise positioning, including in the rotational axis, and jacked up the rear end so that the tires were where I wanted them in the wheelwells. Next I unboxed the Mark Williams driveshaft and installed it; it fit perfectly. Finally I checked the angles of the yoke coming out of the Gear Vendors unit and the rear end yoke, and pumped up the center floor jack until the angles were the same. Back out from under the car, I pushed the rear end back and forth a couple times until the tires were spaced the same distance from the wheelwells, and now I finally had the rear end aligned properly under the car. I made sure that the ladder bar brackets were square on the axle housing, and tacked them into place in several spots. Here's a couple of photos of the car at this point:
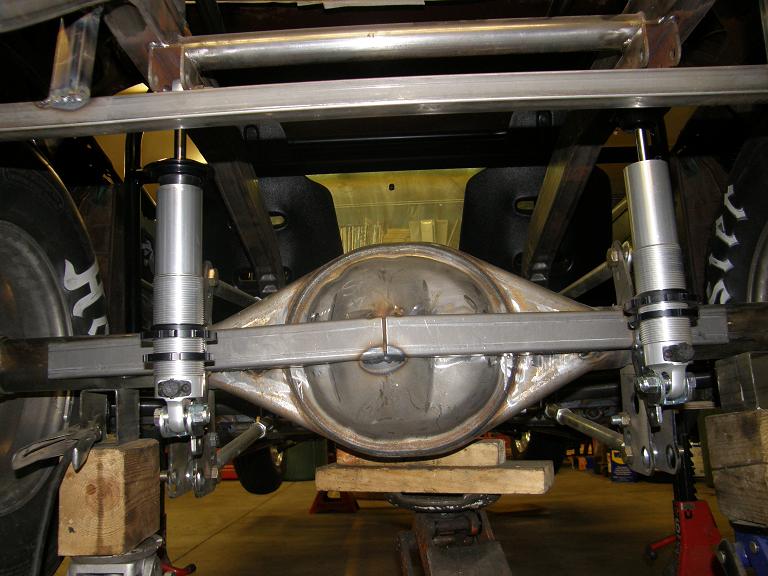
Next I decided to tackle the rear coil over shock installation. I've had the shocks for this car since I purchased the S&W back half kit in 2005, so it took me a while to find all the brackets that came with them, and figure out how they were supposed to weld to the rear end. After I got this figured out it became clear that I needed to get the back brace tacked in place on the axle housing before I could weld on the lower shock mounts. I trimmed the four link brackets in back of the axle housing to allow the back brace to be installed, then tacked it into place. Then I modified the lower shock mount brackets to fit in place over the back brace, and assembled the shocks and brackets, hanging them in place from the top shock mounts that had been welded into the back half kit at S&W. Making sure they were aligned vertically, I tacked the lower shock mounts in position. Photo below:
After the shocks were installed I started looking at installing the rear end locating device. The S&W kit had come with a panhard rod, but I had purchased a Watts linkage kit from Speedway to try to get better location than the panhard rod could provide. The Watts linkage had come with bars that were about 20" long. With a panhard rod, the longer the rod, the better the suspension geometry. I knew that the same would be the case with a Watts linkage setup, but really didn't know how narrow I could make the mounting points. The width of my back half frame rails was only 24", so I was going to have to cut the bars down in length to about 12" in order to fit the frame rails. I decided to do a quick CAD drawing to confirm that shortening up the bars would still allow me the suspension travel I needed. I figured I needed 3" of up travel and 5" of down travel from the static position of the rear suspension to make sure there was no binding during normal suspension operation. The drawing below is the CAD drawing I made up to check this:
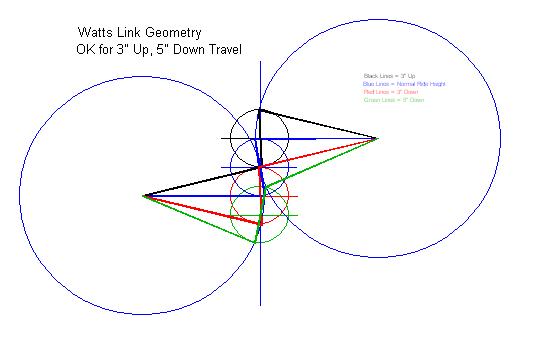
The drawing showed that in the range of suspension travel of interest, there was no issue with binding, and the Watts link should locate the rear end side to side effectively. I cut the bars down to the length I needed, which turned out to be 10 1/2", and then rethreaded the cut ends for the rod ends that needed to screw in there.
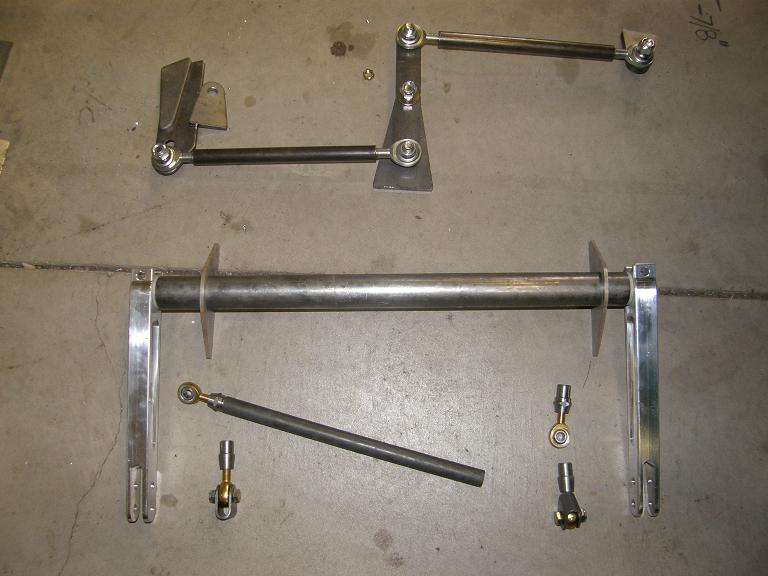
I was about ready to head off to the basketball game, but before I did, I laid out the Watts linkage and the other rear suspension piece that needed to be installed, the rear sway bar, shown in the photo below:
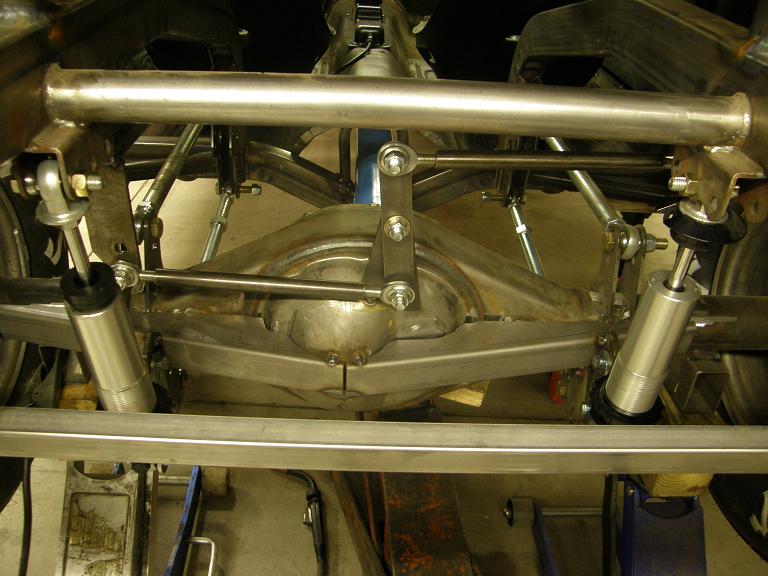
Unfortunately (or fortunately, depending on your perspective), my daughter's basketball game was a bust; the other team failed to show. So, we were back at home by 3:15, giving me a couple more hours to work on the car before I had to call it a day. After a bunch of measuring, cutting, fitting, and trial welding and re-welding, I finally got the Watts linkage installed with the bars parallel; photo below:
The rear sway bar doesn't look like its going to be a big deal to get installed, so I think I can probably get that done during the week this week. Then the rear suspension has to be disassembled and all the suspension brackets have to be finish welded to the axle housing and the frame. I also need to get the aluminum wheel tubs installed once the axle housing and tires and wheels are out of the way. Next weekend I won't have a lot of time to work on the car, but hopefully I can at least get those things taken care of. After that I can start the headers and the aluminum oil pan that will be required for the car, and finally get all the body panels on the car, essentially completing the chassis work. It looks like I should be able to get this done by the end of March (crossing my fingers ;-))


