This week was another fairly productive week on the new car, although I didn't get done as much as I wanted to. I had been planning to get the driveshaft angles set and get the rear end components mounted and tacked into place this weekend, but on Monday when I ordered the driveshaft I decided that I'd rather have the driveshaft on hand and installed before I finalized the rear end configuration. So, instead I decided to move ahead with finishing up the chassis work at the front of the car, and then look at getting some tubing installed to tie the subframes together.
It turned out that the work on the front of the car took longer than I thought. One of the things I wanted to do at the front was to drop a tube down from the front roll cage extension tube to the factory frame rail, in order to support the frame where the front suspension load would be. As I was looking at this on Friday night, it became clear that the header pipes had to come straight through this area, and if I didn't put the tube in the correct spot it would interfere with the headers. So, before I could even start thinking about positioning the tube I had to know where the header pipes would be.
As a result, I spent Friday night and early Saturday morning fabbing up the first several inches of primary pipes and the header flange for each side. I was hoping to have at least six inches of straight pipe coming out of the head ports before turning the pipes towards the back of the car, but it appeared that this might be optimistic, based on the location of the exhaust ports and the stock frame rail. No way to tell for sure without actually mocking it up, though. On the heads I'm using the ports exit the casting at a 15 degree angle, so the pipes have to be welded onto the header flanges at this angle to keep the exhaust coming out of the port in a straight line. I dug out some 2 1/8" exhaust pipe for this task, because I was planning on using 2 1/8" to 2 1/4" to 2 3/8" stepped headers, just like what I had previously used for my Galaxie. This would allow me to re-use the collectors from those headers; since this car is getting the 585" SOHC from the Galaxie, I'm going to put my 510" engine back in the Gal, and I have a different set of headers for that engine.
On the topic of the Galaxie, I got an interesting call from my friend Joel this week (aka Captain Stabbin', also aka the Trunk Monkey). Joel suggested that I get the Galaxie ready for Drag Week in 2011 also. He offered to donate an 800 HP capable manual transmission and clutch setup so that the Galaxie would be a stick car, and he could drive the Galaxie this year, while I drove the Shelby clone. That's a pretty interesting idea that I'm still considering; it would be fun to have two cammer cars at Drag Week! Of course, I have a perfectly good C-4 and driveline for the Galaxie, and the car was already set up for that, so I wondered why Joel wanted to swap in the manual. He responded that he really didn't want to drive a car with "that oily, greasy, smelly fluid coupling behind the engine" LOL! But I'm not sure I'd want to run somebody else's transmission in the car, to say nothing of having two cars in the same class, and the extra expense of fielding two cars at Drag Week. I'm still thinking about this; no decision is required right away, and we will see how things play out this year. But it sure would be fun to have both cars at the event.
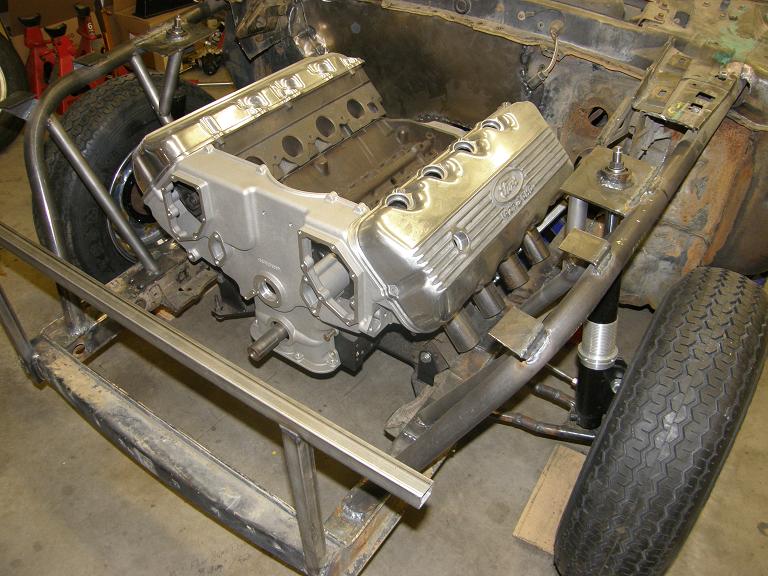
Back at the header flanges, I cut some 6" sections of the 2 1/8" tubing, cut off at a 15 degree angle, and welded the tubes into my header flanges. After getting done with this on Saturday morning, I installed one of the flanges on the driver's side to see how it would fit. Unfortunately, as I had expected, the six inch head pipes were not going to fit; at the back the flange wouldn't even bolt into place on the engine. Here's a photo:

It looked like if I cut the pipes down to 5" the flange might at least bolt onto the engine, and give me an idea of where the pipes came past the frame rail. Also from this mock up it appeared that the spot weld flange at the edge of the frame rail was going to be in the way of the primary pipes. As result I decided to cut this flange off the frame rail, and weld up the seam. After getting this done I cut an inch off all the driver's side primary pipes and was able to get the header flange mounted on the engine.

Sorry for the poor photo quality. With the pipes on the engine, I was able to determine where I had to put frame tube so that it would not interfere with the header pipes. I also took a mandrel bent section of 2 1/8" exhaust pipe and using this as a gauge, determined where I would have to cut the primary pipes off in order to get them past the frame rails. It looked like the straight section of pipe would be anywhere from 3 1/2" to 4" depending on the pipe's location. Not as long as I was hoping, but at least livable, and certainly a lot longer than the pipes would have been had I opted to go with a Boss 429 style engine compartment.
Shortly after this a couple friends of mine stopped over to ask some SOHC questions; one of them is in the business, and has a customer who would like to put an SOHC in a Cobra replica, so he wanted to take some measurements off one of the engines I have on an engine stand to see what kind of fitment issues he would be dealing with. While talking we were looking at the front end of my Shelby clone, and they suggested that I use some of the 1 1/4" chrome moly tubing I had on hand to triangulate the front roll cage extension. They suggested going from the junction welded at the front of the stock frame rail, up to the upper strut mount, and then back down to the stock frame rail at the firewall. I could still run my bar from the middle of the front roll cage extension down to the stock frame rail to support the suspension mounting point and engine mount area, but the other bars would triangulate the whole setup.
I really liked this idea. After my friends left I started working on this, but quickly came to the realization that this triangulation bar would cause a couple problems. One would be that it would limit my ability to remove the engine's valve covers, especially if I used studs to mount them. The second, and more serious issue was that by putting in a bar that ran down to the stock frame rail at the firewall, I would seriously limit the room for the headers to go through this area. The room on the driver's side was already limited by the steering linkage, and I figured I could only fit a couple of the header tubes through there as it was. Installing the bar meant that at least three of the tubes, and maybe all four, would have to wrap underneath the stock frame rail. This would lead to ground clearance issues that I didn't want to contend with, so after kicking it around a little I went back to my original plan, which was the bar down to the stock frame rail, a short support bar up to the upper strut mount, and a triangulation bar at the front of the roll cage extension tube, similar to what I'd seen on certain aftermarket roll cage kits.
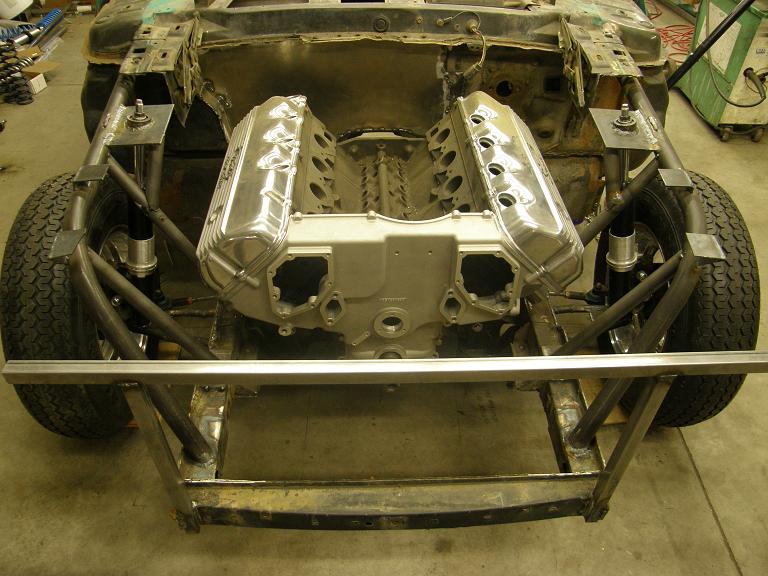
By the end of the night Saturday I had the bars cut and tacked in on the driver's side. Sunday I spent most of the day on the equivalent passenger side tasks. Here's a couple of photos of the front of the car with these modifications:
I also got my new front wheels this week, and had the front tires mounted; Sunday afternoon I swapped them onto the car. Here's a photo:
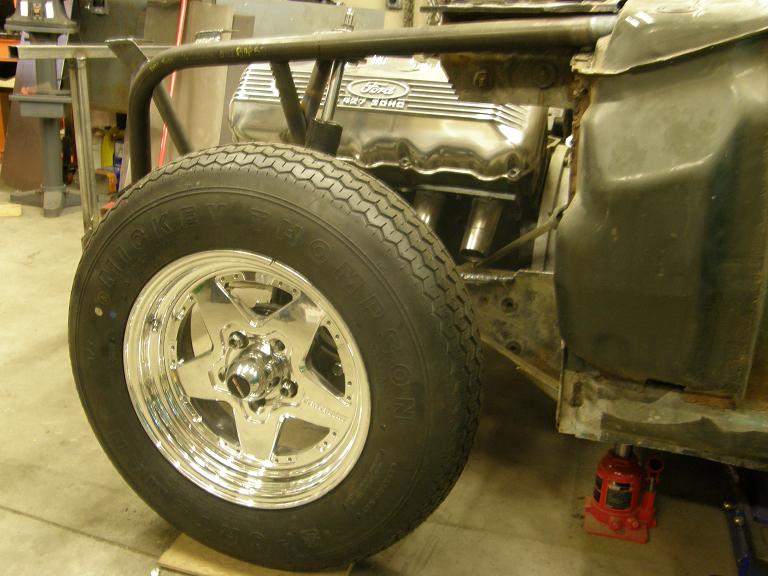
I think those wheels look pretty good. I was really waffling between these Centerlines and Weld Wheels, and I liked the Weld's because they look good too and are probably a little lighter. However, the Welds were double the price of the Centerlines, and they are also not available in a 5 inch or 6 inch width. I didn't want to go with a really narrow rim in the front, because I don't like the way the cars handle with the 3 1/2" wide wheels, plus I've had some bad experiences with road hazards and the narrow wheels (pothole + 3 1/2" wheel = blown tire and bent rim). I've also seen this at Drag Week, in 2005 when one of the guys in my class hit a pothole and blew a tire. So I settled on the Centerlines because they were available in a 5" rim width.
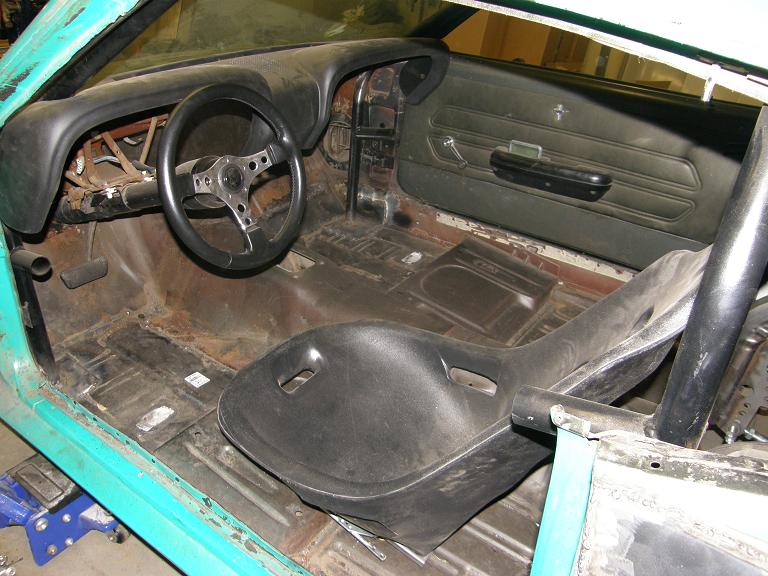
Next I spent some time trial-installing the front seat in the interior, because I wanted to determine how I was going to mount it. I was thinking about installing the subframe connection bars so that they came through the floor behind the front seats, but I didn't want to do this without knowing first where the seats would be installed, in case there was some interference there. After I got the driver's side seat installed, I finally got a chance to sit in my new car. The seating position was good, and mounting the seat farther back from stock gave me plenty of leg room, which is sometimes a problem in early Mustangs. Here's a picture of the admittedly incomplete interior:
Finally, the last hour out in the shop today I spent the time laying under the car, and figuring out where I was going to run the tubes to connect the subframes, and also how I was going to make up the transmission mount. Based on the seat position I figured I'd be better off running the tubes completely under the car until I got right up to the rear subframe, and then just notch the floor a little and bend the pipe to come through and weld to the back half crossmember. I also figured out that I could notch the factory unit body crossmember that the transmission mount attaches to so that the header collector could come through up near the floor of the car, for maximum ground clearance, and then reinforce the notch to maintain the required strength for the mount.
At the beginning of the week I had been hoping that I would be able to get the subframe connections and transmission mount completed this weekend, in addition to the front end work, but obviously this will have to wait for next weekend. It is pretty obvious at this point that there is no way I'll be done with the chassis work by the end of this month as I was originally hoping, and with certain family commitments in March, it is probably realistic to assume that the chassis work won't be completed until the end of March. Hopefully this will still leave me enough time to get the car painted by mid-May, and on the road by the beginning of July. We will see...


