After the thrash of the last couple of weeks to get the body and paint work finished, I took a little breather this week on Monday night. I had prior commitments with my son's Scout troop on Monday, and after I finished with that I spent the evening on the couch

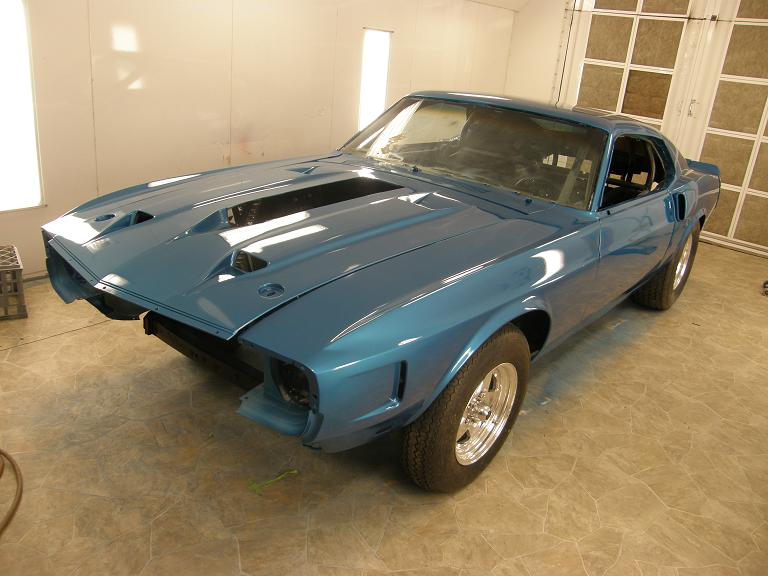
By Tuesday though I was back working on the car; Tuesday evening after work I spent a couple hours in the booth pulling off all the masking tape and getting the wheels back on, and the car back on the ground. Here's a shot of the car still in the booth, ready to roll back down to the main shop area for further assembly:
Wednesday night I got my kids to help me roll the car back down into the shop, and I spent the evening adjusting the body panels so the fit was a little better. I had also heard from my friend Steve P (F570rd) who has some experience with electric motors, and he had suggested that maybe the problem was the start and/or run capacitors for the electric motor on my air compressor, rather than the motor itself. Right after work on Wednesday I had gone up to the compressor and opened the box on the side, with the intention of taking whatever capacitors were in the box out, so that I could order some replacements from McMcaster Carr. I was surprised when the terminals on the first capacitor I tried to remove pulled off easily when I tried to remove the wires; could this be the problem? I identified the capacitors (2 start and 2 run capacitors) and ordered some replacements from McMaster Carr's web site. Total expenditure: $26. I hoped that would fix the problem.
I had taken Friday off from work, and of course with the holiday on the 4th this gave me a four day weekend, so I was looking forward to getting a lot accomplished. I'd been figuring on focusing on the engine, trying to get the engine ready to go and the intake finished up so I that could get it on the dyno on the 4th, but with that freshly painted car staring at me from 20 feet away I just couldn't resist starting to work on getting it put together. Thursday night I worked more on the trunk lid and quarter panel end cap alignment, getting it about where it needed to be, and then installed the taillight panel, rear bumper, and associated trim pieces. It looked cool! Friday morning I was out to the shop early, again spending a little time on the assembly of the car that would be permitted and still allow me to buff the car later. Finally I got going on the engine, by removing the old oil pan that fit the Galaxie and flipping it upside down to check the rod bearings. Here's a shot of the engine on the stand:
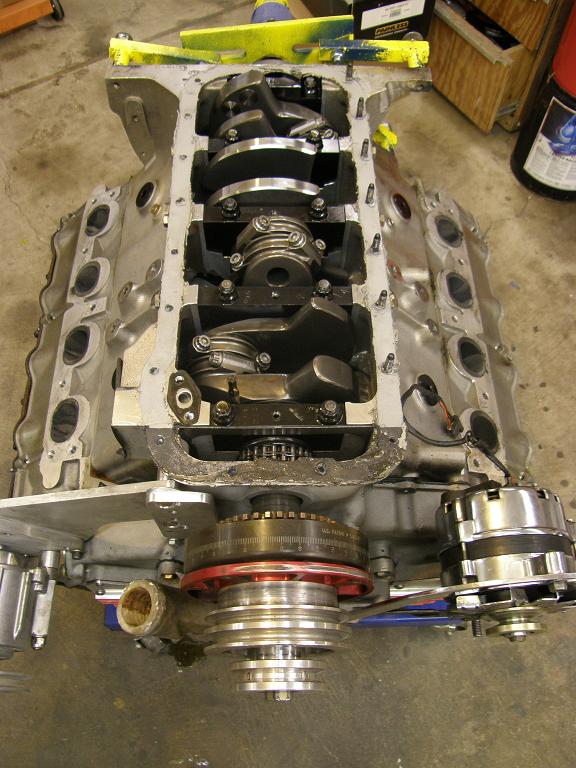
I wanted to check the rod bearings for a variety of reasons, not the least of which was the dyno sessions on this engine from last summer. I had been experimenting with methanol, and as anyone who knows methanol will tell you, after a short while the hygroscopic nature of the fuel will end up making your oil look like a chocolate milkshake. I changed the engine oil a few times on the dyno, but had probably 50 pulls on the engine during the development work on methanol I did last summer, and that scummy oil had me concerned. Of course, the engine has got well over 100 dyno pulls on it since I put it together in 2009, plus lots of 7500 RPM drag strip passes, and over 2000 street miles, so a check of the rod bearings was definitely in order.
I was very pleased to see how good the bearings looked when I took them out. I had used coated bearings in this engine, and nearly all of the coating was still intact on the bearing shells, so this was very good news. The torques on the rods and mains also looked very good. I didn't bother to check the main bearings, because the rod bearings were in such good shape. I replaced them all with a duplicate set and started looking at the installation of the new oil pan.
There were several items that had to be addressed with the pan. First, I had to make sure that the windage tray I used on this engine would fit down into the pan itself. This was kind of a question mark because the windage tray (a Moroso louvered unit) had been modified to work with the 4.6" stroke of this engine. I ended up having to trim the windage tray a little bit to fit around one of the crossmembers in the pan, and also had to take a die grinder to the edge of the pan rails, to bevel them so that the tray would fit all the way down into the pan. Next I test fit the pan on the engine, and found some interference between the inside of the pan rail and where the oil pump bolted onto the block, so I clearanced that area as well. Since the old pan was a rear sump unit, I had to go to a different oil pump pickup with this pan, so I found a Milodon unit that was close to what I needed, and bent the tube a little with some heat to make it fit where I wanted it to in the pan. Finally, I cut some 3/8" thick aluminum plate, so that I could put some holes in it, thread them, and plug them, after going through them to put in the 7 pan bolts on the right side of the engine that have to go in through the oil pan sump.
Just as I got going on this, the glass guy showed up. As it happened, last Monday while driving on a gravel road the car in front of me had kicked up a big rock and put a crack in the windshield of my truck. I figured as long as I had to replace the truck's windshield I might as well have the Mustang's windshield done at the same time. In order to replace the windshield the cowl panel had to come off the car, and I didn't want the glass guy screwing around with my freshly painted vehicle, so I removed the cowl panel for him while he began cutting out the old windshield. Based on the condition of the butyl sealer he thought that it was probably the original windshield in the car. In deference to my paranoia about the paint he let me help him take out the old glass, and also test fit the new windshield in place, and finally set the new windshield in its final position after he put the urethane glass sealer in place on the windshield frame. The car looked a lot better with the replacement windshield.
Just as the glass guy was leaving the UPS truck rolled into the driveway, with my McMaster Carr order. I grabbed the four capacitors and went upstairs to the air compressor, still taken apart from Wednesday night. I decided to start by just replacing the start capacitor with the suspect terminals; this took about two minutes. Back downstairs, I flipped the switch and the compressor fired right up! A $6.50 repair with that one capacitor, and now I had extras on hand. I figured I'd buy Steve P a beer next time he was over to my place; he sure called the problem correctly.
I fabricated the plates I needed for the plugs in the bottom of the pan, and then welded them on the bottom of the pan before calling it a night. Saturday morning and early afternoon I had a couple of family activities to attend, but afterwards I got back to the shop to install the oil pan. This ended up taking quite a bit longer than I expected, because I'd forgotten I'd wanted to install a sight gauge on the front of the pan prior to putting it on the engine, and also because I had to fabricate some bolts with a long reach to go into the 7 holes in the oil pan. Finally, after this was completed, I was able to get the pan installed. Not even this went according to plan though, because two of the oil pan bolt holes in the Shelby block turned out to be stripped. So, after getting all the other bolts installed and tightened, I installed two helicoils in the block, and put in the last two bolts. Last thing I did on Saturday night was to flip the block right side up on the stand and collect the parts required for the next task, which was to replace the valve springs.
I use the Comp Cams 943 springs on this engine; Bill Conley has tested these springs with the cams I use on his SOHC spintron fixture, and they are good to 8000 RPM, but like the rest of the engine these springs have seen a lot of use. I'd rather not risk a $30K engine with a set of $300 valve springs, so I wanted to replace them for the upcoming dyno tests and street/drag use. I have an on-engine valve spring compressor that I made up for use on the SOHC, but it is a somewhat tedious process, requiring unbolting and rebolting the rocker shafts each time you R&R a spring. In addition, I was carefully checking the installed spring heights, valve seals, and spring pressures as I went along installing the springs. I had about one and a half sets of these springs available, and I went through them to get the 16 best springs. I was surprised to find about four springs out of the group that were way down on pressure as compared to the others; most of the springs measured 225-240 pounds at an installed height of 1.900", but there were four springs that ranged from 190 to 205 pounds! A good example of why it pays to check all this stuff...
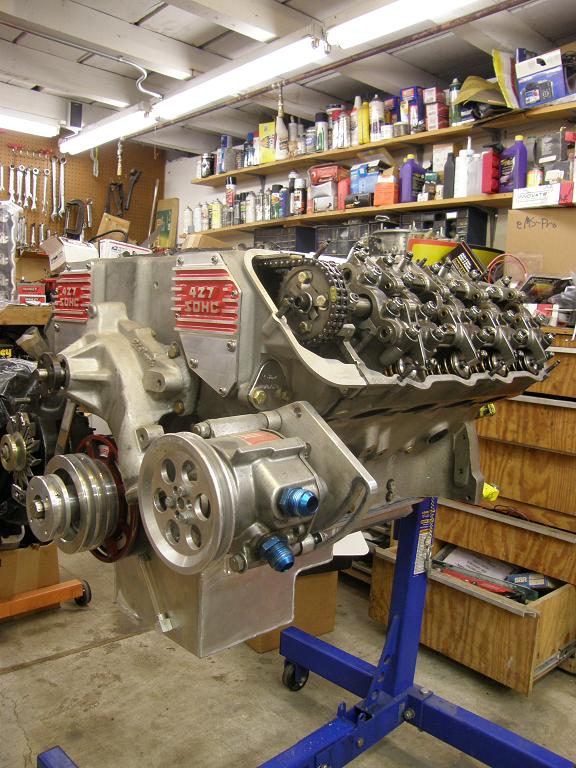
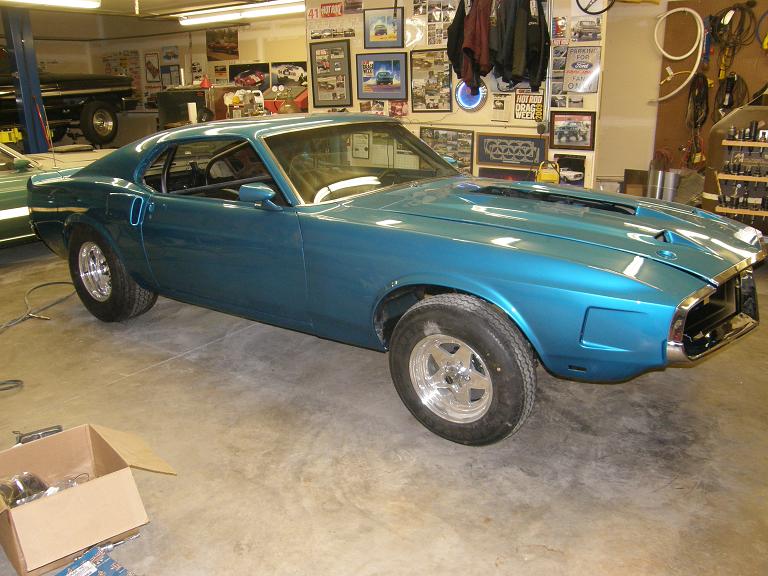
It pretty much took me all day to get the new springs installed, and then the valvetrain back together on the engine, but now its ready to go. I also spent some time tonight painting the headlight area of the car satin black, and installing some more of the front end pieces. Here's a picture of the assembled engine, and also the car back down in the shop:
With my day off tomorrow I'm finally going to go after finishing the intake manifold; hopefully I will get it bolted on by the end of the day, so that during the week I can get the engine mounted on the dyno, and run it next weekend. I'll post another update next Sunday.


