It was a totally hectic week this week, but I managed to get quite a bit of work done on the car, and I think I'm still good to go for laying on the paint next weekend.
The week started with a welcome email from David Freiburger at Hot Rod. Power Tour ended last weekend, so on Tuesday I sent David an email asking if he had considered whether my car could run in the Modified class at Drag Week this year. He emailed me right back and said some new information would come out later that day, and that I'd be good to go. Boy, I was sure happy to hear that! I went to bed on Tuesday without seeing anything new on the Hot Rod web site, but Wednesday morning there was a new set of Drag Week rules posted. The new rules eliminated the prohibition against strut front suspensions, while keeping the ban on tube frame cars. So, my car is now legal for Modified, but I think that the rules still address the big complaint from the Modified class last year, where there was a Modified power adder car that came with a bolt on tube-frame front end and a racing type strut suspension. Lots of long time Drag Week competitors complained about that car, but it did sneak in under the rules, as they were written last year. This year the tube frame rule would mean this car would have to run Unlimited.
Wednesday night I'd arranged to have Steve come over and give me a hand with the bodywork on the lower quarter panels of the car. This was the area where I had cut the stock quarter panel and stretched the wheelwell, to fit a bigger diameter tire. I didn't have this area quite right, and Steve seemed like he was itching to take a crack at this, so Wednesday night I turned him loose on that area for a couple hours while I crawled under the car with the wax and grease remover, wire brush, Scotchbrite, etc., to try to get ready for painting the chassis of the car. I was not looking forward to scraping all the undercoating that was obviously covering the floor of the car, but when I finally got under there and started working, I realized that what I had thought was undercoating was actually dirt. It appeared to be red clay of some sort, sprayed all over underneath the car, and it had the same texture and appearance as undercoating. But, of course, it came off a lot more easily, which was something of a relief.
Back in the engine compartment there was some undercoating present, and I was able to get this off with a variety of scrapers and a cup wire brush on the the grinder. For three hours I worked on getting the chassis clean, and by the end of the night I was covered with all kinds of crap, and was only about half done. But Steve had made good progress on the quarters and had them looking pretty good. On Thursday night the time I had out in the shop was spent finishing up the body work in this area; I did some finish sanding and laid on a couple coats of K-36 on Thursday night, but Friday night I had some family plans so I couldn't get done with the work on Friday. I had hoped to be finished with that Friday night, because that would leave me the weekend to get a bunch of other things accomplished. Oh well...
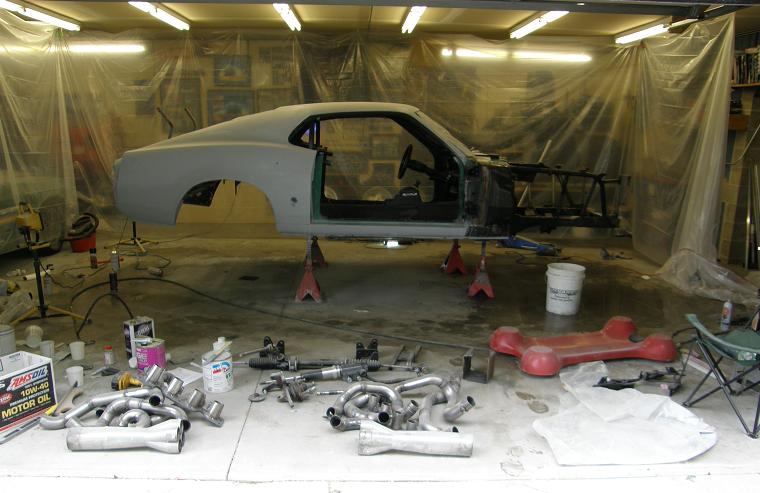
Saturday morning I got going early on finishing up the bodywork on the quarters, and had them all finished with one more coat of K-36 applied by noon. At this point, a view of the car from outside the open garage door looked like this:
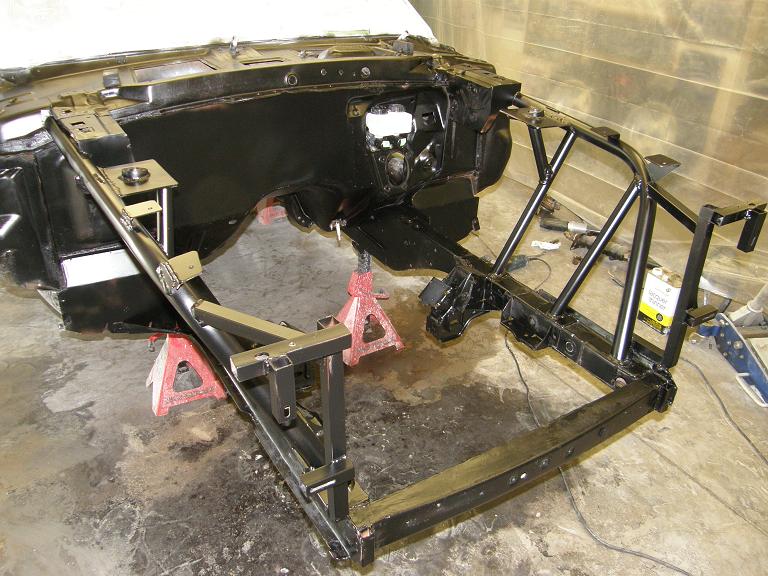
I spent all Saturday afternoon doing more washing, scrubbing, and degreasing of the car's undercarriage. Finally, around dinner time on Saturday, I was ready to start painting. I started with the areas that had some surface rust, and used Rustoleum red oxide primer to coat all these areas. I needed about a can and a half of the Rustoleum to do the job. After that was done, I waited about half an hour and then broke out the satin finish black Rustoleum, and starting at the back of the car, started spraying. Four cans later I was done with the rear frame and floor area, and also the underside of the floor of the passenger compartment, and had a good start at the engine compartment. Unfortunately, I was out of Rustoleum. I made a dash down to the local Menards to buy another three cans of the paint, and snuck in just before they closed for the evening. I was covered with overspray from laying under the car and painting the floor, and I can just imagine what the cashier thought when I came up to the counter with more paint LOL! Back at home I kept going, painting the entire engine compartment, and then turning to the interior and painting the floor of the passenger compartment. I didn't get done until almost 11:00 PM on Saturday, and I went through the entire additional three cans of Rustoleum! I hit the sack on Saturday night after a shower, with evidence of back Rustoleum still on my arms and in my hair.
Sunday morning I was back out to the shop, anxious to see how the paint looked once it was dry. I was pretty happy with the results; here's a couple of photos:
Having the car's chassis painted seemed to be a big step forward on this project, and I was anxious to get going on assembling the suspension. I'd been hoping to get both the front and rear suspensions installed this weekend, but because I'd had to spend Saturday morning on bodywork that now appeared doubtful. I got going on getting a couple of loose ends on the suspension stuff tied up before I started assembly. Most of this work involved reinforcing the front lower control arms; when I'd lengthened them, I hadn't finished the job by adding reinforcements, and since I was close to getting the front suspension installed I needed to do that now. Also, I had neglected to add a drain to the rear axle housing, so I cut a square piece of 1/4" plate steel, drilled and tapped it for a 1/4" pipe thread, and then welded it to the bottom of the axle housing.
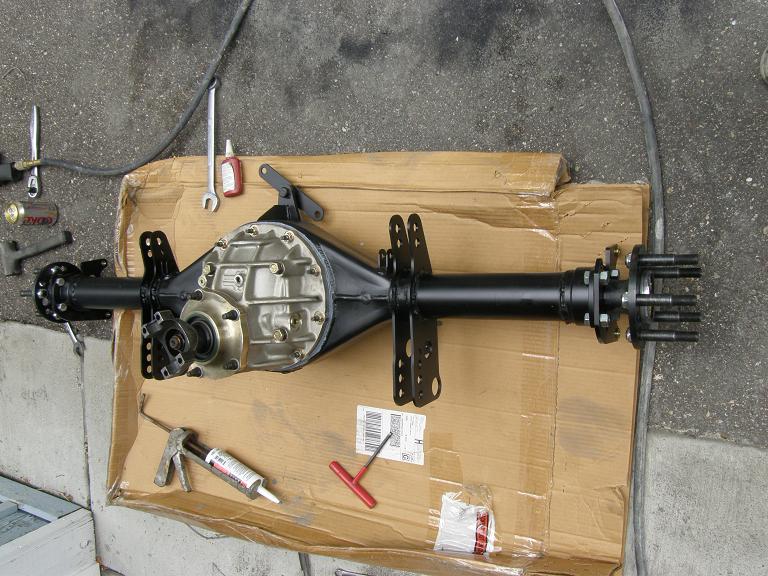
By noon I was ready to start the assembly, but first I had to scuff and clean the rear axle housing and paint it. This, as usual, took more time than I expected. After the paint was dry I assembled the Mark Williams center section into the housing, and added the axles, but when it came to bolting on the Wilwood axle retainer plates that doubled as caliper mounts, I realized that I did not have the correct size bolts on hand. So, off the local NAPA store for some 1/2" -20 bolts, 1" long, and matching nuts. Back at home I was able to attach the axle retaining plates, then installed the drive studs and lock nuts on the axle flanges. At this point the axle housing was looking like this:
I checked my watch and saw that it was already after 3:00 PM, and I still hadn't gotten going on the suspension assembly! Why does this stuff always take longer than it seems it should? I put the rear axle assembly on a floor jack, and got it positioned under the car so I could start putting the rear end stuff together. First I assembled the four link bars, after making sure that they were all the same length. Next I dug the Strange coil overs out of the parts stash, assembled them with the springs that they had been provided with, and bolted them into position. Next up was the Watts link, and as I got out the pieces I realized that nothing had been painted yet, so I had to clean, scuff and paint the two Watts link bars. While the paint was drying I dug out the rear sway bar parts, and realized that I had not yet welded up the end links for the sway bar. Assembling the rear suspension was turning out to be more work than just bolting everything together.
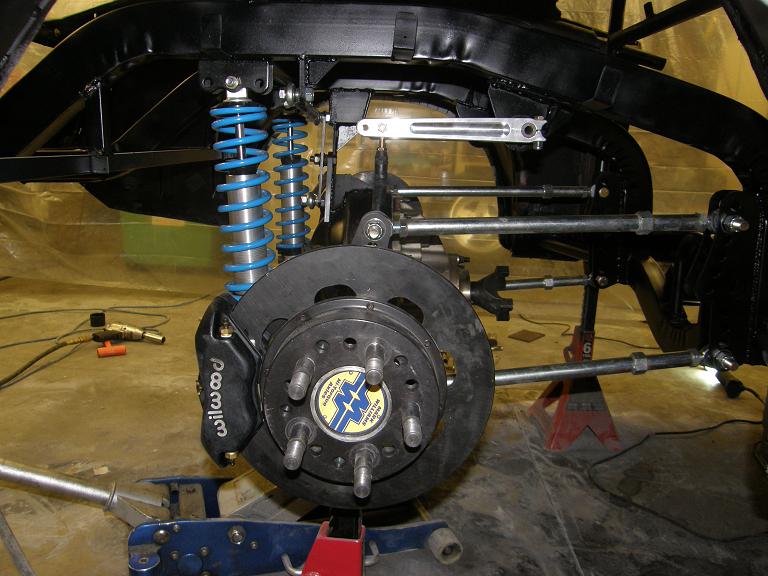
I continued along through the afternoon and early evening getting the rest of the rear suspension put together. The end links for the sway bar turned out to be rather challenging, because I couldn't use a piece of straight tube for the end links; the needed a very slight dog leg in them to clear the bolts for the upper four link bar on the axle housing. By 9:00 tonight I was on the last part, adding the rear disc brakes. I had a question about which way to mount the brake rotors to the hats; one side of the rotor was recessed a little where it bolted on, and I wasn't sure if this recessed area went towards the hat or away from it. I tried to get on Wilwood's web site and download a copy of the instructions (my original copy was long gone), but Wilwood's site was down. So, I took a guess, and assembled the first rotor the way I thought it was supposed to go. I installed the rotor, and tried to fit the caliper in place, and realized I had guessed wrong

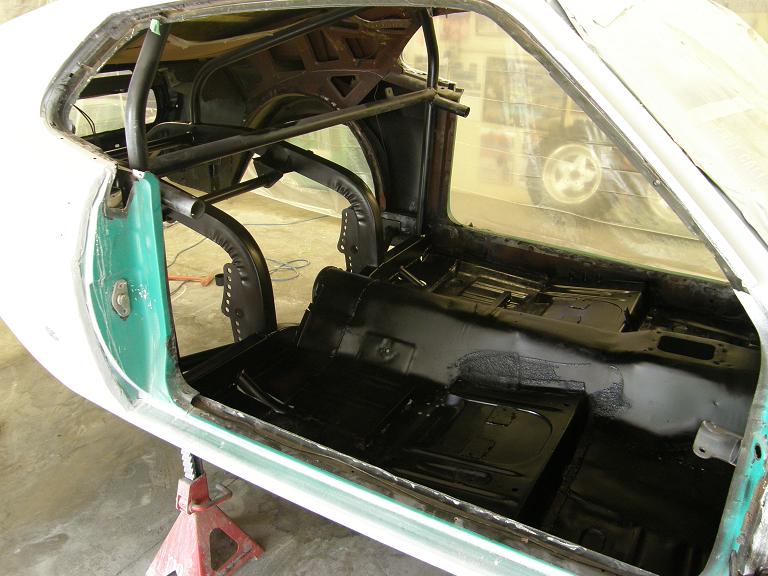
Back apart it came, and I flipped the rotor over and reassembled. This time the caliper fit, and I quickly assembled the other side. Here's a shot looking through the wheelwell at the rear suspension components:
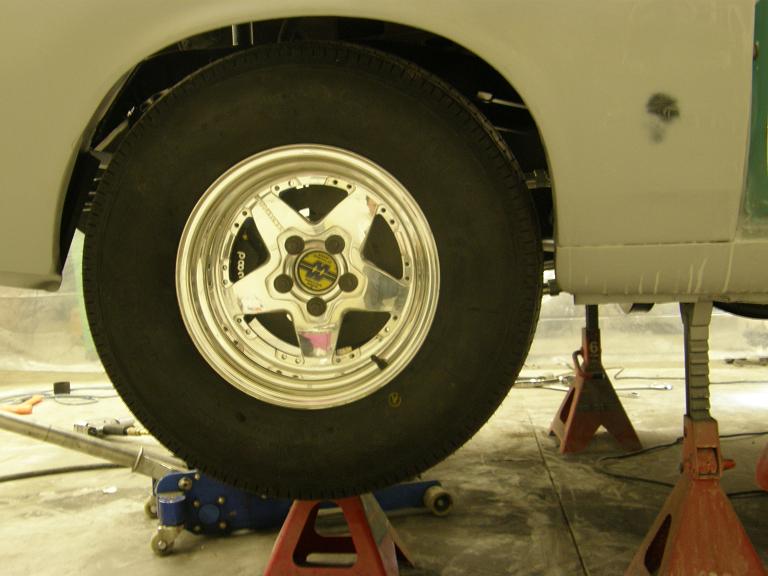
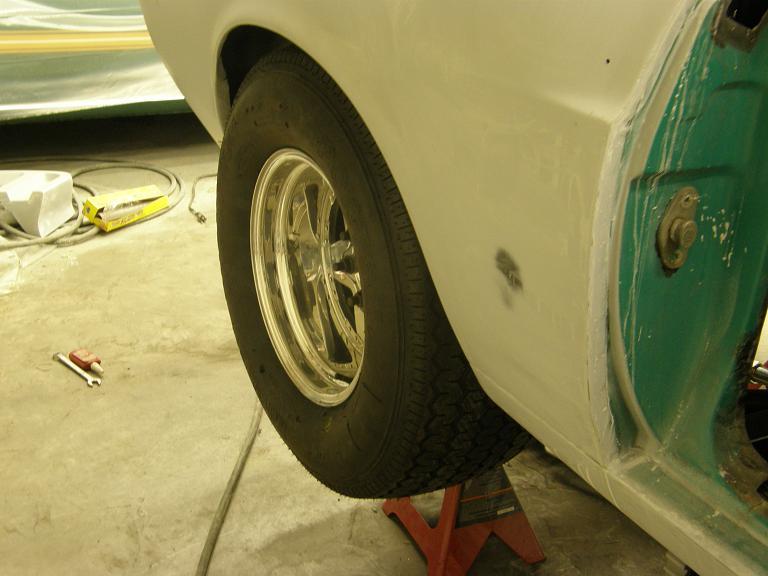
I was just about ready to throw on the rear tires. I was looking forward to this with some amount of trepidation, because the tires I had originally ordered for the car turned out to be discontinued by Goodyear. So, I'd had to go to a Mickey Thompson Sportsman tire instead, which was just slightly larger than the original Goodyear's I'd wanted. I was concerned that they may not fit. In any case, with the slicks I'd planned to use on the car, the rear wheelwell lips had to be rolled inside for tire clearance. I'd already slotted the lips, and now that the rear suspension was in place I was able to use a roller tool that bolts to the axle flange, and uses a nylon roller to push the wheelwell lips back and up inside the fender. I've used this tool pretty successfully in the past, so I wasn't expecting any problems. However, as I was rolling the wheelwell lip on the passenger side at the back of the wheelwell, I must have applied to much pressure to the roller. I heard a crack, and sure enough, the body filler near the area of the fender where Steve had been doing the bodywork had cracked. Dammit! Just what I needed, more bodywork...
I went on a little more carefully from there, and finished getting the fender lips rolled up inside the fenders. Then I bolted on the tires, and saw to my relief that the tires seemed to have plenty of clearance. After jacking the car up by the center of the axle housing I found that I needed to drop the coil over backets a couple holes in order to get the ride height correct, but I can always do that later. Here's a couple shots of the passenger side tire on the car; if you look close you can see the cracked body filler at the back side of the wheelwell:
I'm pretty beat after this weekend's work, but I sure made a lot of progress. I think I'm still on track to get the car painted next weekend, although it will be a busy week for me to get everything done. Fortunately I don't have a lot of family commitments this week, so I should be able to work on the car most evenings. With luck, one week from tonight I will be posting pictures of the car wearing its new paint! I am really looking forward to that...


