I finally had the kind of weekend this weekend that I'd been wanting to have on my sheet metal intake during the whole month of April. All the materials and pieces were available, and I was able to spend the weekend machining the parts and welding them together.
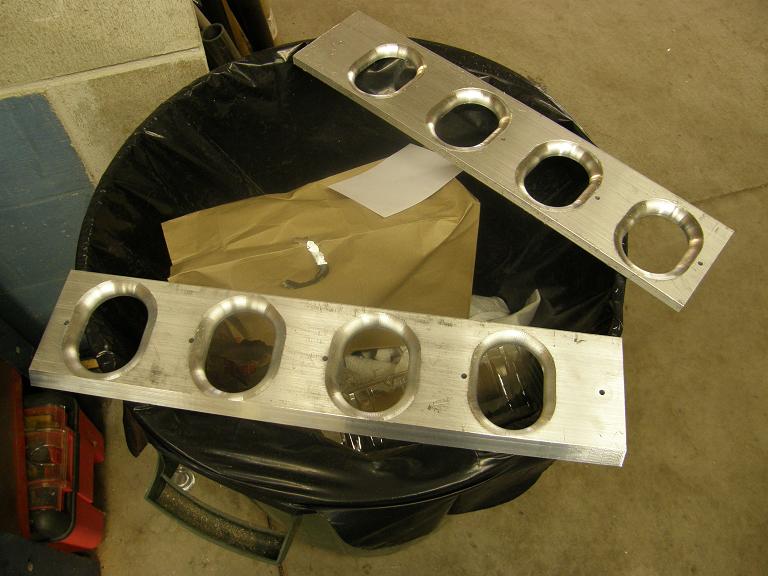
Friday night I wrote the CNC programs and machined the runner entry plates. These plates will fit over the runner entrances in the plenum, and provide a smooth transition for the air into the runner. Plus I can modify them if I want to increase the length of the runner during dyno testing of the engine. A photo of the plates is shown below:
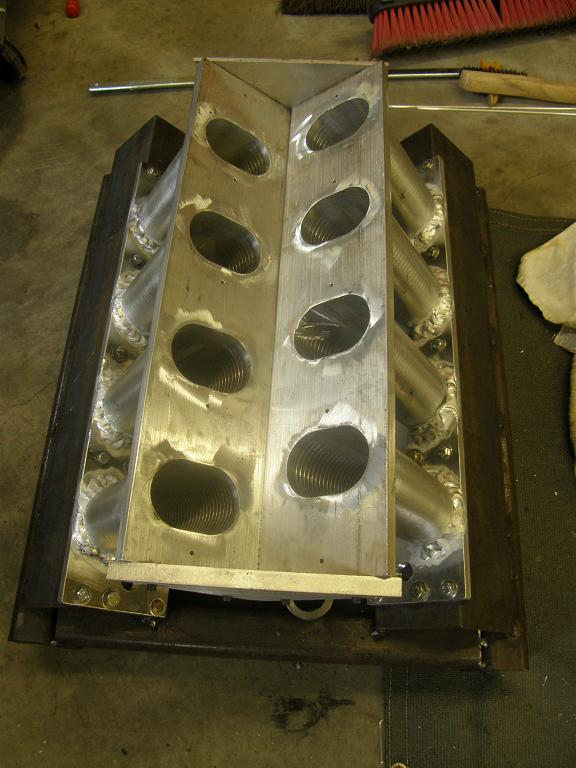
Saturday morning I got back to work welding the runners to the plenum plates. I'd completed about half this work last weekend, but hadn't had any time this week to keep going on them. In order to prevent warpage I clamped the flat plates to a 2X3 square steel tube, then preheated them and finished welding on the runners. I took care to rescrub all the weld areas with the stainless steel brush and clean it off with acetone, and also to scuff all the welding rods with Scotchbrite, and have a bunch of tungstens for the torch ready to go so I'd be ready to change them quickly after I inevitably dipped them into the puddle LOL! After I had the runners completely welded to the plenum plates, I reassembled the entire bottom part of the manifold on the jig, and put the whole works into the pre-heat oven. After it was hot I pulled it out onto the floor again (unable to lift it onto the bench), and welded the outside half of all the runners to the bottom plates. The welding went reasonably well, and although the welds were far from beautiful, I was pretty confident that they were strong and sealed. Here's a photo of the intake at this stage:
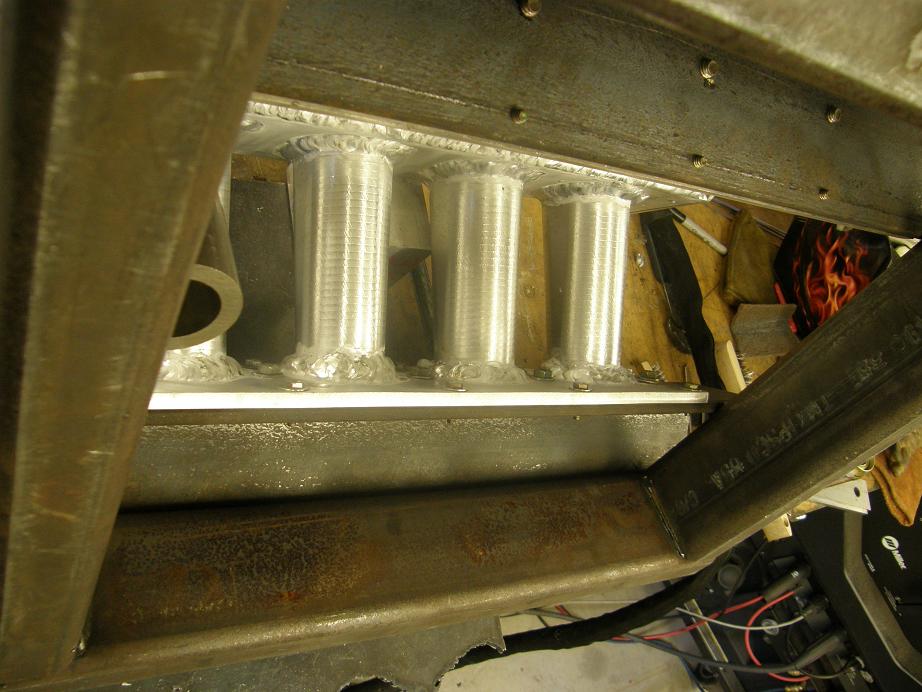
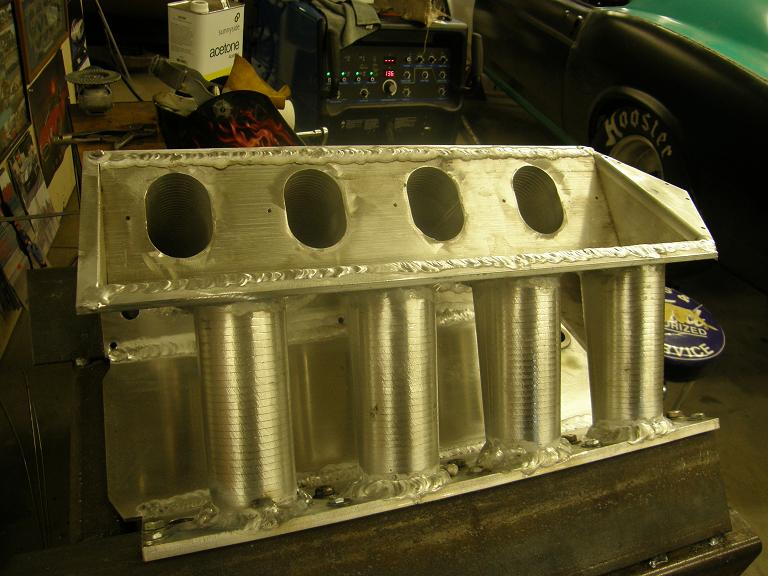
By the time this welding was done, the jig itself had cooled down enough so that I could move it, so I picked it up and put it onto the bench to make access easier, and save my knees. I set it on the bench with the jig on its side, so that I could get access from underneath the jig. I'd never been able to do this when I used a junk engine as a jig, and as soon as I got in there to weld, I knew I'd made the right choice to build the jig. The inside half of the runners was easily accessible from under the jig, and access to the welding area was no problem. I was able to get all the remaining welding done on the runners and bottom plate in about an hour. Here's a photo showing the access to the bottom side of the runners through the jig:
Finally on Saturday after the welding on the runners was completed, and I had welded up the seam between the plenum plates from underneath the jig, I put the valley cover plate of the intake in place and welded it in position. I'd seen a lot of warpage here when I'd made my previous SOHC sheet metal intake, so I took pains to tack the valley cover plate in place in several locations on each side before I welded the complete seam. It didn't seem to matter, though; the relatively thin plate bowed up in the middle during the welding process, and it also pulled the bottom of the bottom plates away from the jig. When I built the jig I had added some bolts towards the bottom of the bottom plates, to help hold them to the jig in this area more securely, but after getting most of the welding done on the valley plate, I had to remove these bolts in order to weld the valley plate where it was right underneath the bolts. That was all it took; the bottom plates pulled away from the jig during this final part of the welding operation on the valley plate. Fortunately, the gap between the jig and the bottom of the plate was only about .010", and I had designed the jig so that .060" would have to be machined off the bottom plates before the manifold would fit on the engine; I figured any warpage I encountered would be cleaned up with a .060" cut, and this would certainly take care of the warpage I encountered welding the valley plate.
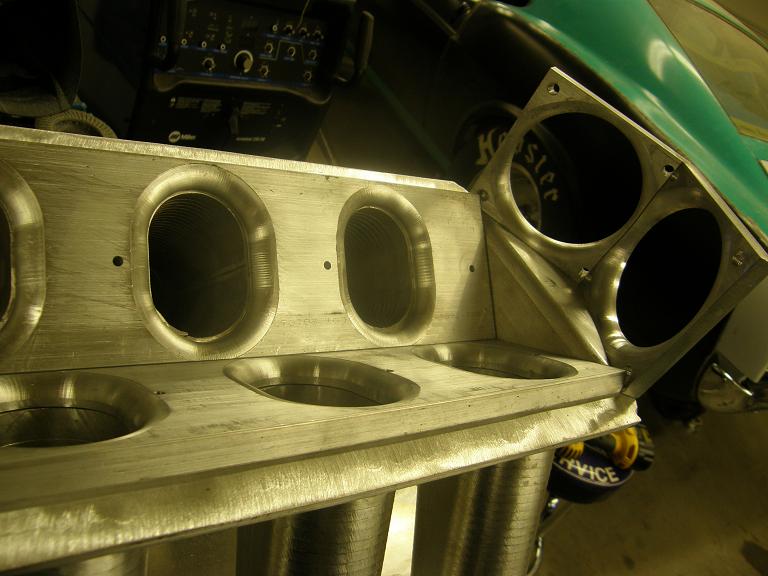
At the end of the night on Saturday I took a break from the welding and worked on a CNC program to build the plates I needed to mount the two 90mm throttle bodies on the front of the intake. Sunday morning I was out in the shop by 9:30, cranked up the CNC machine and started cutting the throttle body mounting plates. While the CNC was whirring away I started cutout out the remaining pieces I'd need for the bottom half of the intake on my bandsaw. I needed to cut a triangular piece that would weld at right angles to the front triangular piece that formed the front of the plenum of the intake. This corner where these two pieces came together needed to be radiused, so after I got the triangular shaped piece cut out I welded it to the front plenum piece. About this time the CNC machine was finished, so I put it in manual mode, chucked up the now welded front plenum piece, and rounded the corner with a corner rounding end mill. With all the pieces in hand, I took the opportunity to bolt the front plenum piece in place with the throttle body mounting plates, and also with the radiused runner entry plates installed, to see how it all looked; photo below:
Looked to be a nice, smooth transition for the air into the runners. I cleaned up all the welding surfaces and with a variety of vise grips and welding clamps got everything fixtured together. Took about 45 minutes for me to get the pieces welded in place; here's a photo of the completed bottom half of the intake:
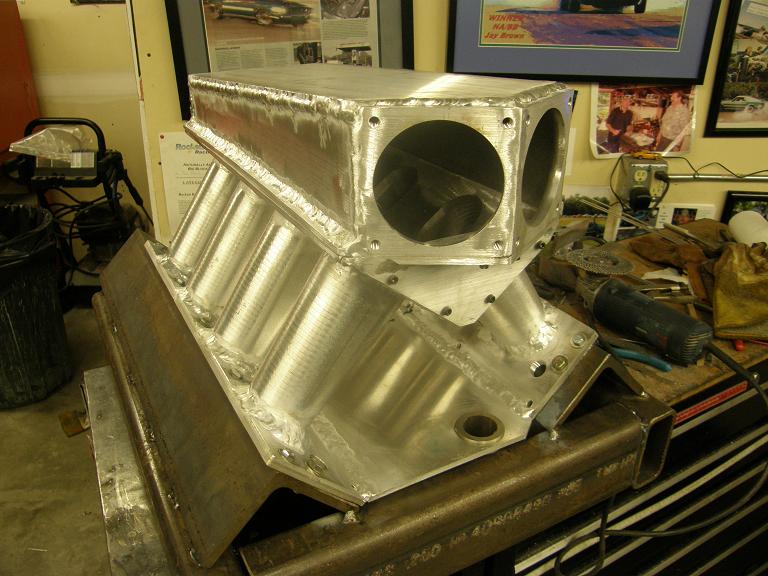
By this time it was mid-afternoon, so I went in for a late lunch to let the manifold cool. When I came back out I ground down the welds on the top surface of the intake, so that I could lay matching plates in place for the top half of the manifold. This was much less complicated than all the work that had gone before, and by 6:00 PM or so I had everything ready for welding. It took a while to get all this done, and I stopped for a dinner break in the middle, but by 9:00 tonight I had it finished up. Here's a couple pictures of the more or less completed intake, one without the throttle bodies and one with:

Of course, there will be a lot more work that needs to be done on this intake before it is ready to run. I have to cut .060" off each bottom plate, mill the mounting surfaces flat where the top half of the intake bolts to the bottom half, cut the runners for the injector bungs, weld on brackets for the fuel rails, etc. I also want to cut a design of some sort into the top plate of the manifold; I used a 3/8" thick plate here so I could mill in some fins and maybe some lettering. But all of this stuff can be done in pieces; the really important thing is that the basic manifold is now together. This was a gating task for me, because the hood of the car has to be cut to allow the intake to come through. I need to be starting the bodywork on the car next weekend, and part of that is going to be to fabricate some kind of a custom hood bulge/scoop to cover the intake manifold. Now that the manifold is done, I can put it on the engine that is installed in the car and see where the hood has to be cut, and how much of a bulge will be required to cover the intake.
Looking at my schedule, driving the car has been pushed out to the start of August. I might be able to pull it in some, but the intake has taken more time than I expected, and there's always some other unknown problem waiting to throw off my schedule down the road. One thing for sure is that I can't afford to lose any time on the paint and bodywork; if that doesn't go smoothly, my whole trip to Drag Week with this car could go up in smoke. I'm hoping to get all the major mud work on the car finished next weekend; Jerry and Steve may be able to come over and give me a hand, and those guys are really fast at bodywork (whereas I'm more of a snail when it comes to that stuff). If we can get that done, then I'd have a couple of weekend for the priming/block sanding phase, and could get the paint on the car around the first week in June. Things should start going faster after that. I'll post another update next weekend.


