One of the things I wanted to do to my race car this year is try to lighten it up a little bit. I've been trying to come up with various small projects to take about 100 pounds total out of the car. One of the first thoughts was to swap out the bumpers for fiberglass copies. The front bumper on my car is not available commercially in fiberglass, so I decided to build one in fiberglass. This is a lot of work for a fairly minimal weight savings, probably only 20 pounds between the bumper and brackets, but that weight is hanging way out in the front of the car, and my car is relatively nose heavy, so I thought it would be a worthwhile project. Back in my model airplane days I did a lot of work with fiberglass on very large models using multi-piece molds, so this wasn't a particularly difficult project in comparison.
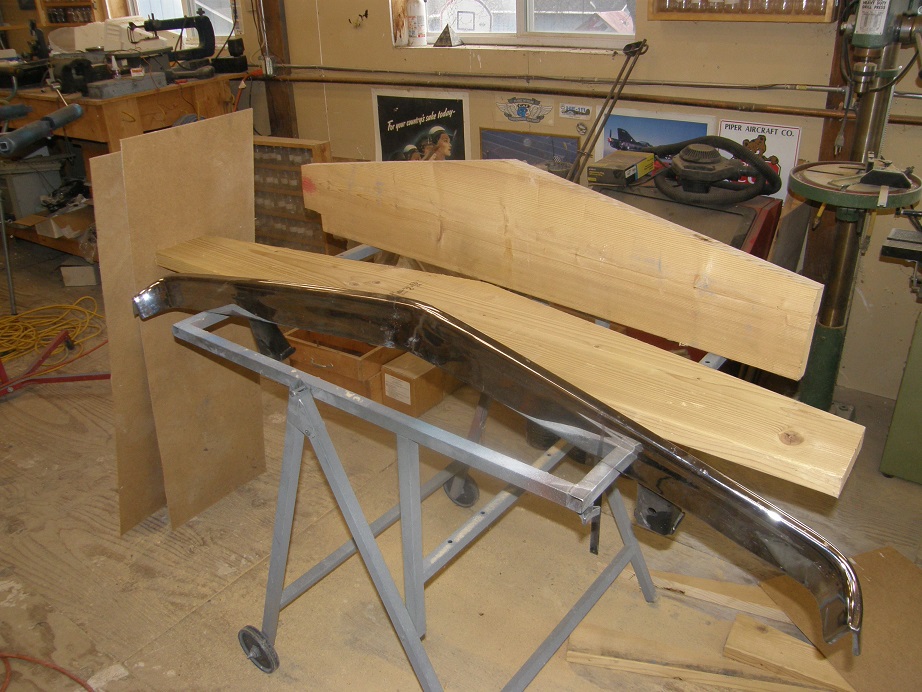
The first thing you have to do is mount the piece you want to duplicate on a parting board. This is just a flat surface that the part mounts on and seals to, so that the fiberglassing chemicals don't leak all over the place when you lay up the part. The picture below shows the original bumper, some 2X12s I cut up for support, and a couple of pieces of masonite to form the flat surface:
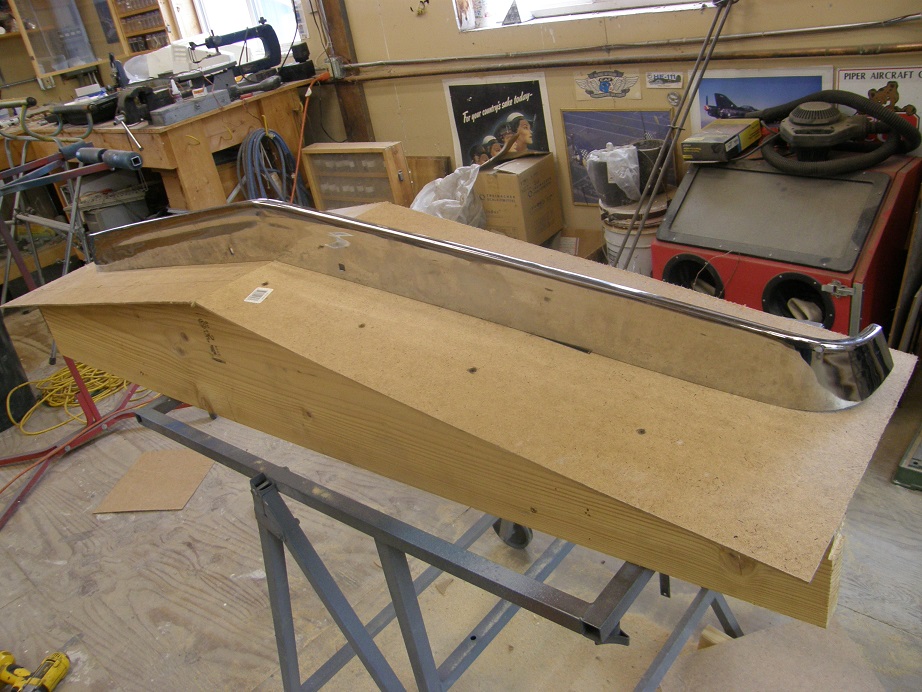
Here's the parting board put together. The holes in the board are for the brackets that are welded to the bumper.

The bumper is placed on the parting board and bolted in place to some of the wood framework underneath, with the factory brackets:
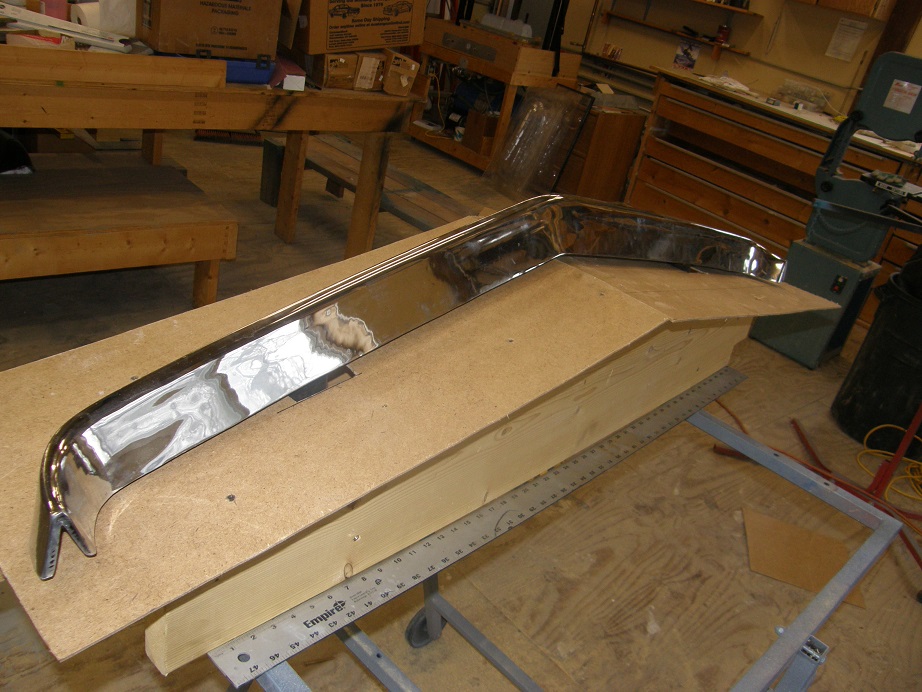
In this case one side of the bumper fit up nicely with the parting board, but the other side had a pretty big gap, as shown in the photo below:
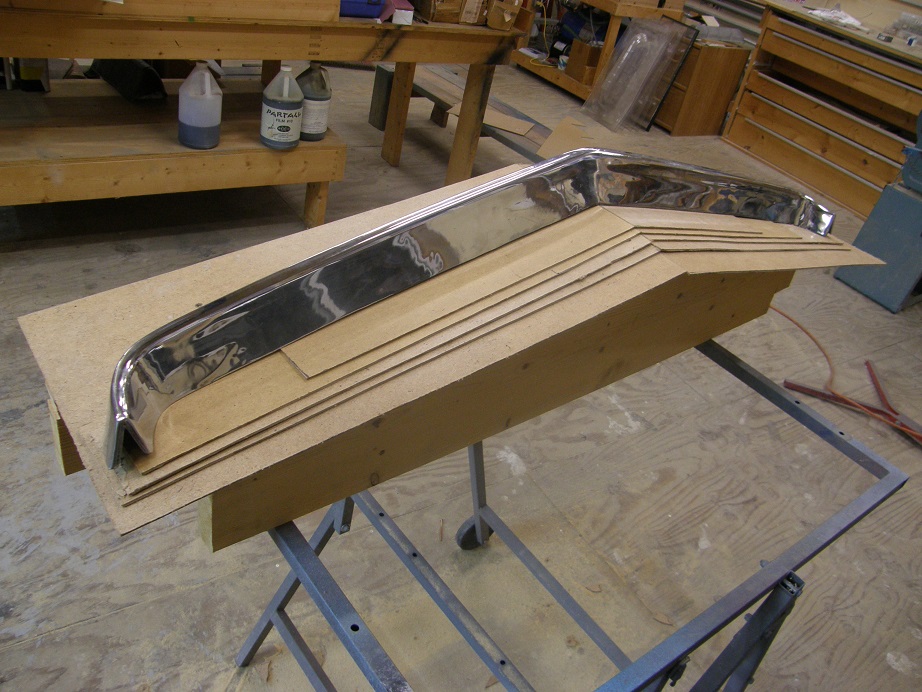
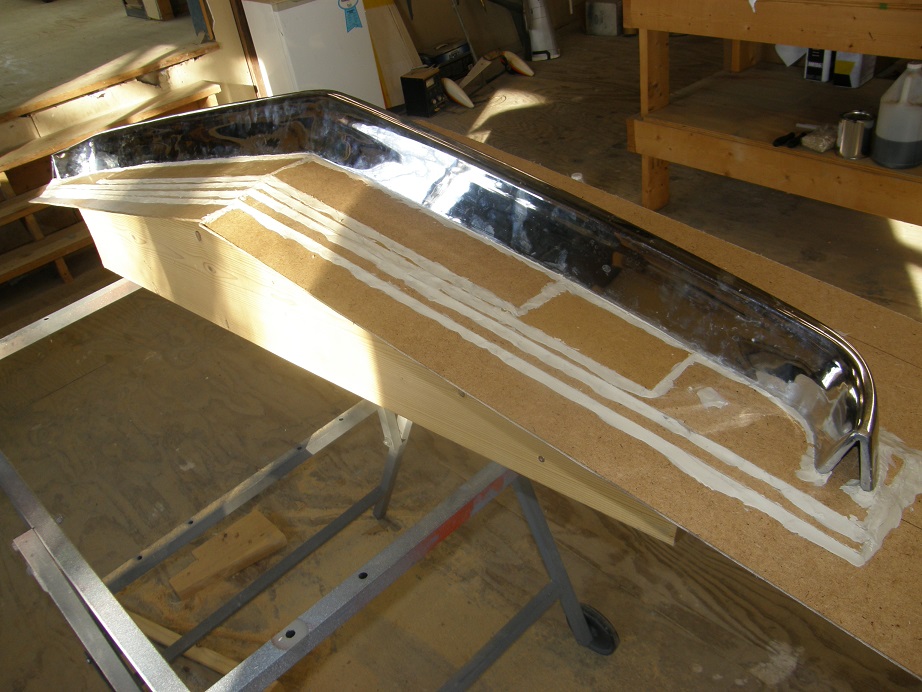
The way to handle this is to build up some masonite on the parting board wherever there are gaps, to minimize any gaps between the bumper and the parting board, as shown in the photo below:
Finally, to get ready to make the mold, you use clay to fill in any remaining gaps between bumper and the parting board, and also between the pieces of masonite:
Now that the part you want to duplicate is in the parting board, you have to apply mold release. This is a two step process. First, using a wax called Partall #2, you wax the part and the parting board. You apply the wax just like you are waxing a car; apply, let dry for a few minutes, and then buff. Three coats are required, with about one hour drying time between each coat. After the last coat is dry, you spray on a chemical called PVA (Poly Vinyl Alcohol). This is a water soluble chemical that forms a skin on top of the wax. You don't put on too much, just mist it on in a couple of light coats, and let it dry.
After the PVA is dry, maybe an hour later, you can start the layup. First part of the layup is spraying on the gelcoat. This is a fairly thick polyester product that puts a hard skin on the surface of the mold. I use tooling gelcoat, which is designed to handle the rigors of pulling many parts from the mold, even though I planned to just make one or two bumpers. I have a special gun for spraying gelcoat, because it is so thick, but a cheap pressure pot style gun will also work; I used one of those for several years. The gelcoat has to go on to a thickness of around 20 mils; I have a cheap thickness gauge that you can put into the wet gelcoat that measures its thickness. If you go too thin, it doesn't want to cure, and if you go too thick, it will tend to wrinkle, so you have to be careful at this point. The gelcoat is a polyester product and is catalyzed with a chemical called MEKP, which is the same thing used to catalyze polyester resin. After you catalyzed the gelcoat you have to spray it within 15 or 20 minutes, otherwise it will start to set up in the mixing cup. The photo below shows the bumper and parting board sprayed with the gelcoat:

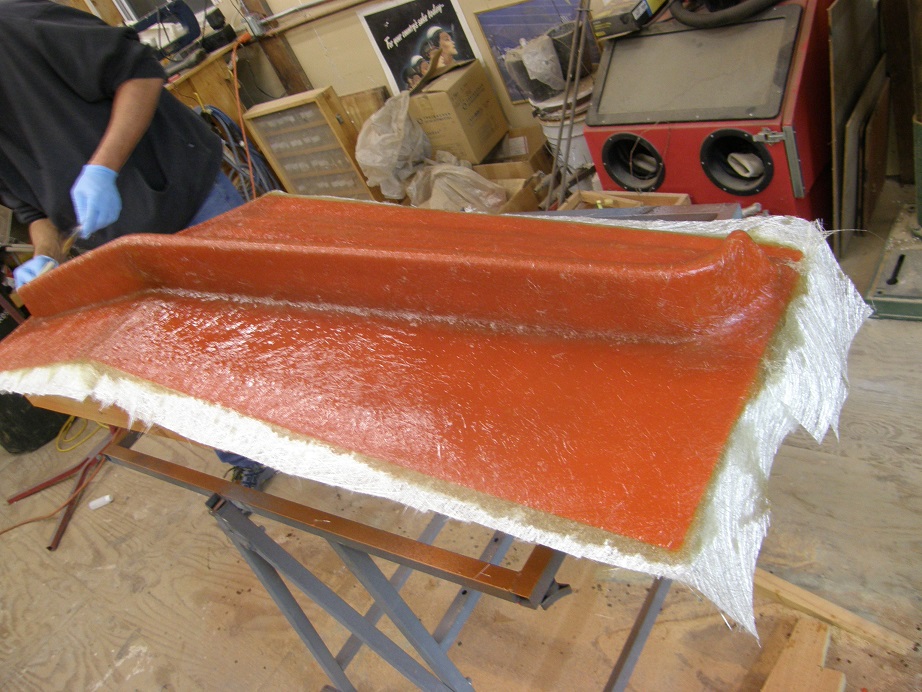
Usually within an hour or so the gelcoat will start to set up after spraying. When you can touch the gelcoat with your finger and no gelcoat transfers to your finger, you are ready to start laying up the fiberglass. For molds I use fiberglass matte, and cut it into pieces that can be laid up against the part. Fiberglass matte is basically random fiberglass fibers, rather than cloth, held together with a binder that dissolves in polyester resin. You mix up a pint or so of polyester resin and MEKP, and using a disposable paintbrush start laying the matte on the part and soaking it with resin. As the binder breaks down the fiberglass fibers start to stick to the part and parting board. You cover the whole works with one layer, and then do it again. I put a total of four layers on this mold, to make it fairly rigid. Here's a picture of the layup at this point:
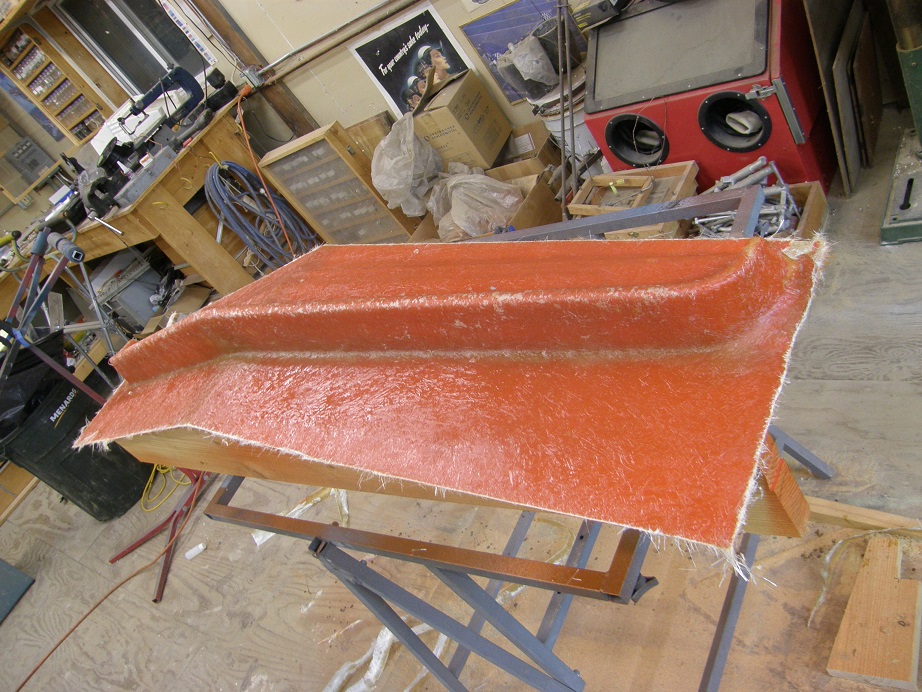
Next is a part where timing is somewhat critical; this is trimming the excess matte from the mold. When the polyester resin starts to set up, it can be easily cut with a utility knife. However, if you wait too long, no way a knife will cut it, and you will have to use a cutoff wheel to trim the mold outline, which is a pain and will put fiberglass dust all over the shop. I tend to check the layup every five minutes or so, and just hang around until it will cut easily without tearing. Here's a picture of the trimmed mold layup:
After letting the mold dry for 24 hours, you can pull it off the part. This is the hardest and most nerve wracking part of the whole process. The mold will separate from the parting board pretty easily because it is flat, but pulling it off the bumper is a challenge. I have a bunch of plastic wedges I use to put pressure on the mold, and after half an hour of screwing around it finally released with a loud crack. I'm always worried about breaking the gelcoat during this step, but usually it comes out OK. However, if your layup does not have sufficient draft, you may have to break the mold to get it off the part. Fortunately, this bumper had plent of draft, so the mold came off looking just fine:

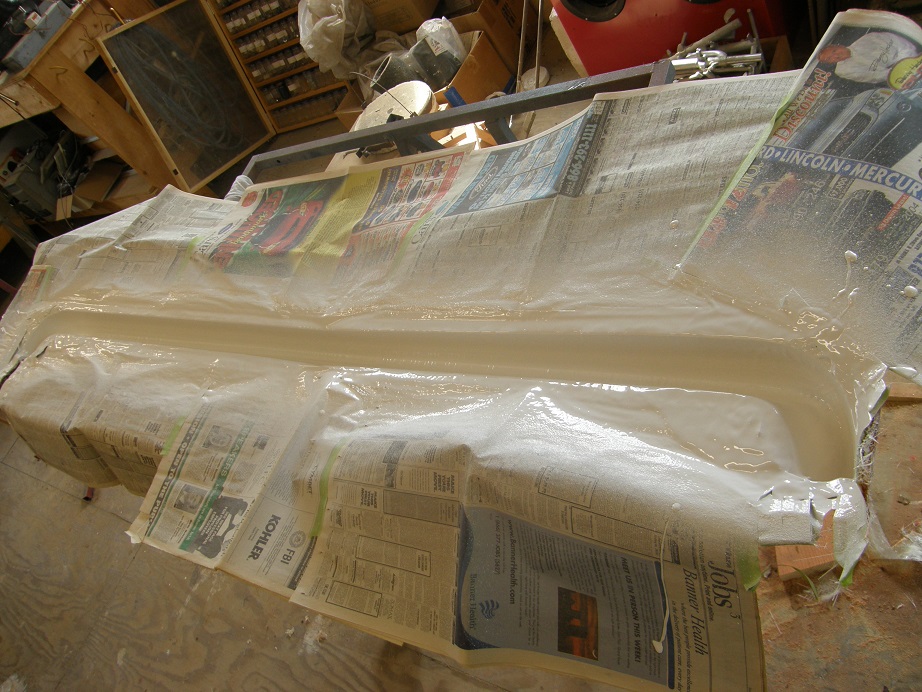
I like to let a mold like this fully cure for a few weeks before trying to pull a part from it, so that's what I did with this one. After that time had elapsed, I used soap and water to thoroughly clean the mold and prepare it for making a part. Then, the whole process basically is repeated. The mold is waxed three times, then sprayed with PVA. After the PVA is dry, the gelcoat can be sprayed into the mold. I used regular part gelcoat for the part, which is white. I also masked off the parts of the mold that weren't going to be the bumper. Here's a pic of the mold with the gelcoat sprayed:
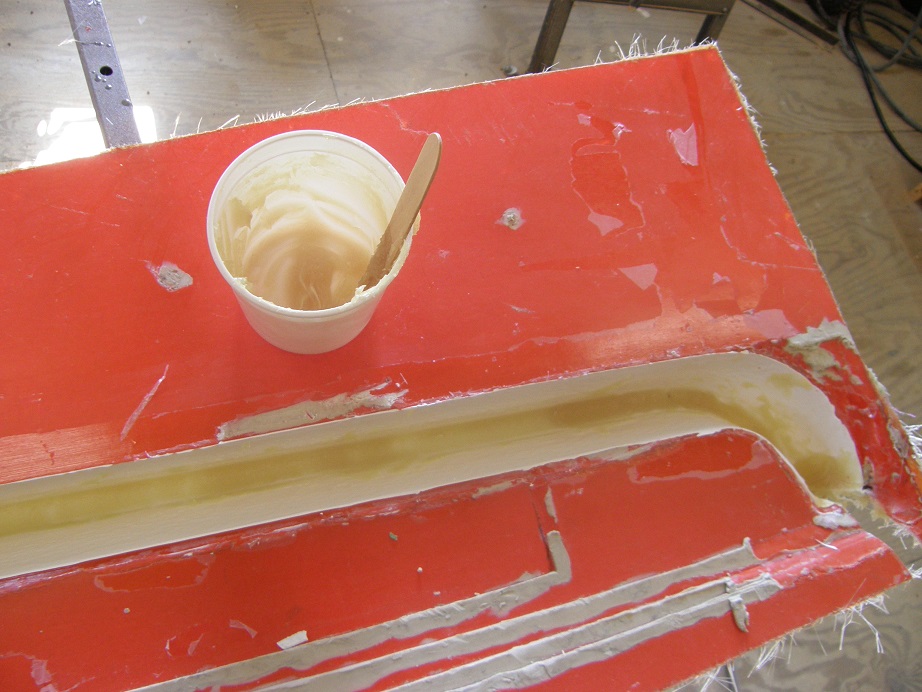
In order to keep the bumper strong yet lightweight, you use fiberglass cloth to lay up the part, not fiberglass matte. Pound for pound cloth is a lot stronger. However, cloth is woven together and not attached with a chemical binder, so it doesn't conform into tight corners as well as matte does. So, in order to take the sharpness out of the corners, you use a dry powder called Cabosil, and mix it with some polyester resin to form a paste. I use a tongue depressor to fillet all the sharp corners in the mold with this Cabosil paste, to make it easier to lay up the cloth into the mold. You don't want gelcoat in the mold that is not backed up with some solid material, so the Cabosil addresses this issue. Here's a picture of the mold after the masking paper has been removed and some of the Cabosil paste has been put into the corners of the mold:
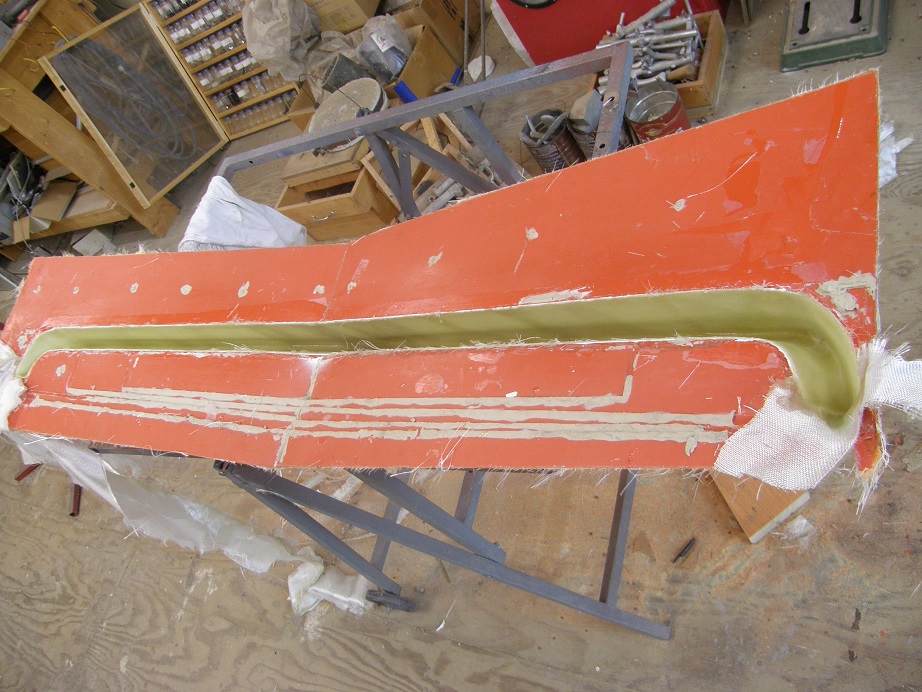
Next you mix up some more polyester resin and MEKP, and after cutting the fiberglass cloth into strips, start laying it up into the mold. I started with two layers of four ounce cloth, and then finished with two more layers of six ounce cloth. Its a good idea for strength to put the cloth layers in at different angles, rather than all lined up together, so I laid the first section of cloth in at 45 degrees from the length of the bumper, and the next section along the length, then repeated this with the six ounce cloth. Here's the layup at this point:

Once again I checked the layup every few minutes to see when it became easy to cut with a knife. Took about an hour this time before it was ready, then I trimmed the excess fiberglass cloth at the edges of the mold. I left some cloth at the ends, so I had something to pull on to help get the bumper out of the mold:
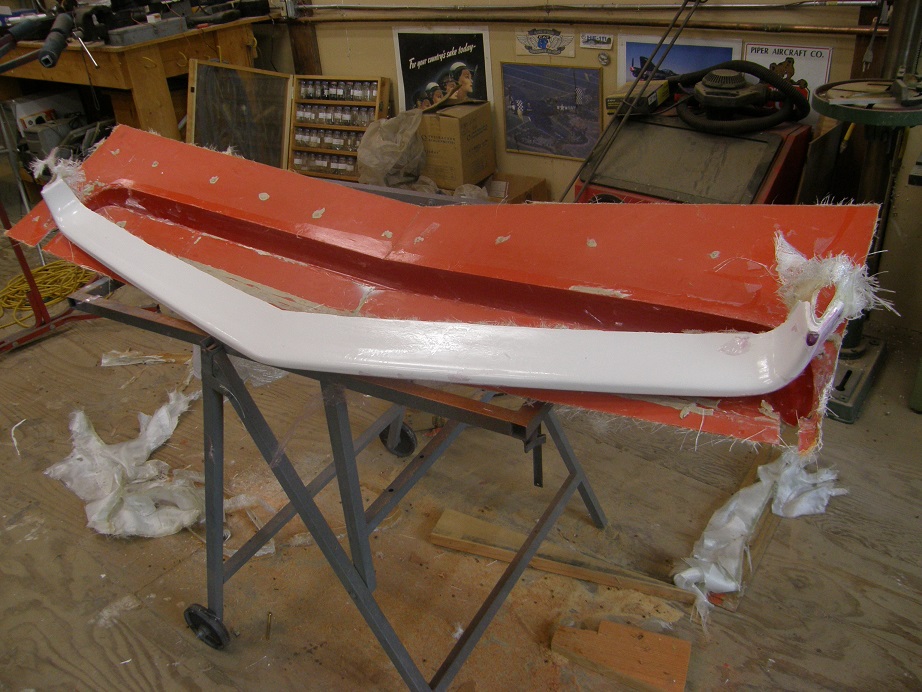
After 24 hours I got to work removing the bumper from the mold. I used my plastic wedges to work between the mold and the part, to help break it loose, and finally after 20 minutes or so I got one of the ends pulled up, and then the rest of the bumper came out without any trouble. Here's a picture; the purple residue you see on some parts of the bumper is PVA that is still attached:
From here I have to sand the bumper's edges nice and smooth, clean it up and spray it with some primer, and then figure out how I'm going to mount it to the fiberglass bumper brackets that I got from Crites. When I've got it successfully mounted on the car, I'm going to pull it off and try one of those spray-chrome products to see if I can make it look as much like chrome as possible. I also purchased a rear fiberglass bumper from a fiberglass place, so I will try to chrome that one at the same time. I will report back on my results with the chrome stuff when I have them - Jay


