Thought I'd take a lunch break and post some more pictures and a progress update. After getting the engine installed and one the mounts last night, this morning I worked on getting the transmission mount installed, and the transmission positioned where I wanted it in the car.
I started by jacking up the back of the transmission to see how well the shifter on the trans would align with the hole in the floor. To my surprise and delight, it was nearly a perfect fit:
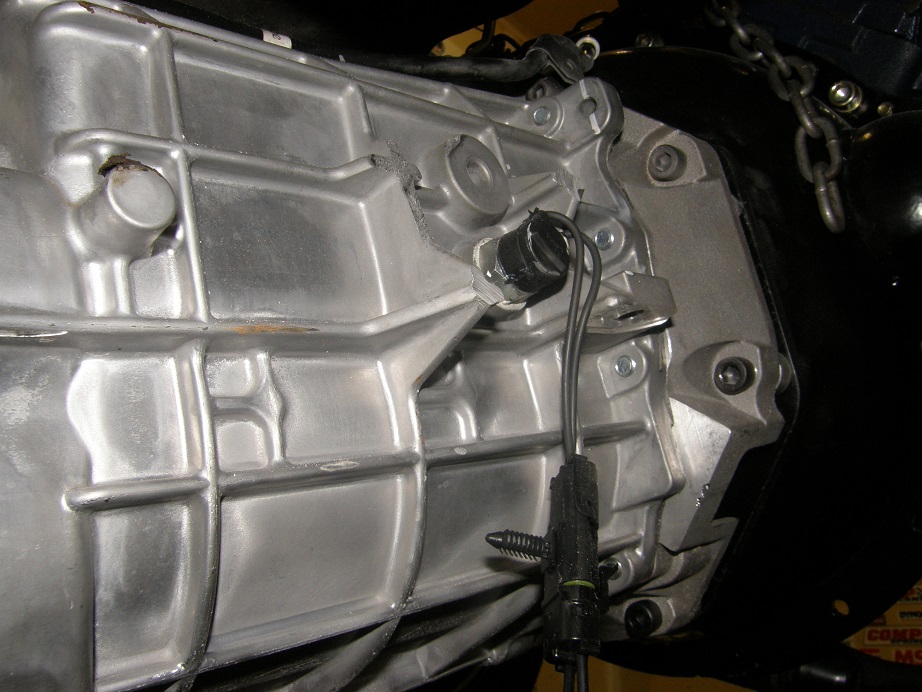
I could see there would be some minor trimming required around the opening, to clear the bolts on the left and right side of the shifter housing, but other than that there were really no issues. Next I measured from the center of the transmission shaft to either side of the frame and the pinch weld of the rocker panels, and unfortunately found that the transmission was off center towards the drivers side by 1/2". I thought I would try to just push it over into position, but there was interference with the tunnel in several spots. The biggest interference spot was with these triangular ears that protrude from the passenger side of the transmission:

It didn't look like these things really did anything. The top rear one was the biggest offender, so I decided to cut that one off with the sawzall, and grind a little on the lower rear one and top front one to add some clearance in that area. Here's a picture of the modification:
After the modification I put the trans back up in the tunnel, but found more interference, this time with the factory crossmember support welded to the floor. Some of that had been cut away already on Saturday, per Cory's post, but in order to get the trans centered in the tunnel I needed to cut away quite a bit more of it on the passenger side. Down came the trans again, and with no good access for a cutting wheel I ended up using my plasma cutter to take out some more of the material. Then I went in with a die grinder to clean it up. Now with the trans jacked up I was able to get it centered in the tunnel, with at least 1/4" of clearance all around.
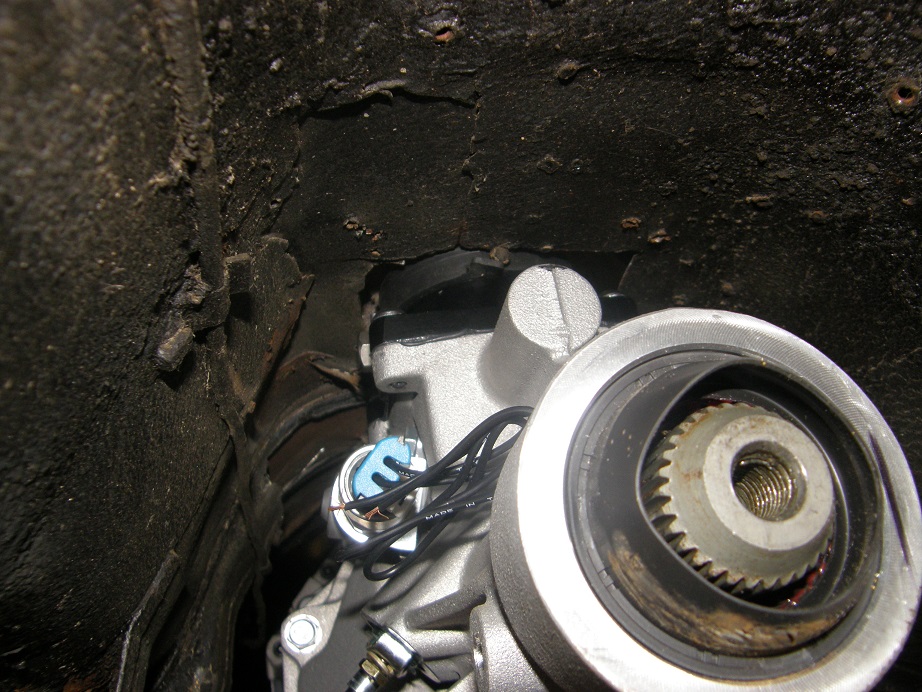
Next I tried to bolt on the transmission mount and figure out how that whole thing worked. I ran into another intereference problem here, with the stud that comes down from the frame bracket that holds the emergency brake cable bellcrank. In the photo below I've dropped the trans down a little; that stud sticking down has got to go:
This is kind of a problem because I was hoping to use the factory emergency brake cable to activate the emergency brakes built into the rear disc brake kit. There is no way that bellcrank will fit in there, even with the stud still in place, because the transmission mount is in the way. I think I'll end up dropping the whole emergency brake cable setup down a little, and fabricating a new stud that welds to the transmission mount, in order to make the emergency brake functional. Just a little more fabricating

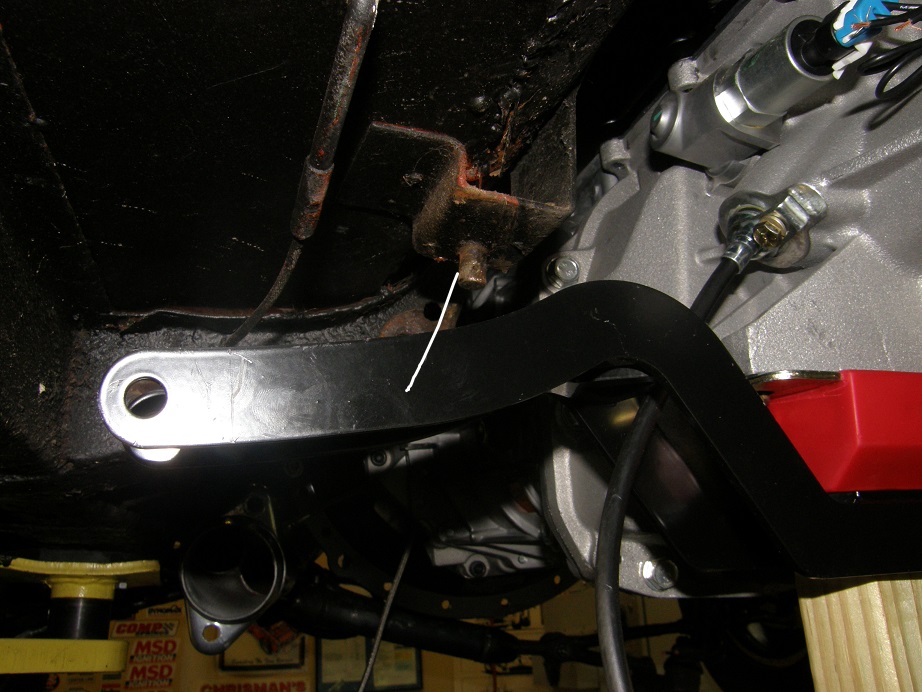
Finally after cutting the stud I got the transmission and mount up into the car where I wanted it to be, centered in the tunnel and as high as possible. I measured the angle of the back of the trans and it was exactly the same as the angle of the 8" rearend yoke that is still in the car, so that was OK. I wish the trans angle had been a little higher, but I can compensate for that when I install the 9" axle housing this afternoon. With the trans mount in position it was obvious now how it had to be attached to the car, and it was bolted through the floorboards! What a Mickey Mouse deal that is! For now I decided to just install it, but it will need some serious bracing in order for me to be comfortable driving the car, especially since the floorpans in this car were replaced at some point, and I don't know what kind of the job the installer did. I'd hate to rely on a poorly welded in floorpan, or any floorpan for that matter, to support the back of the trans.
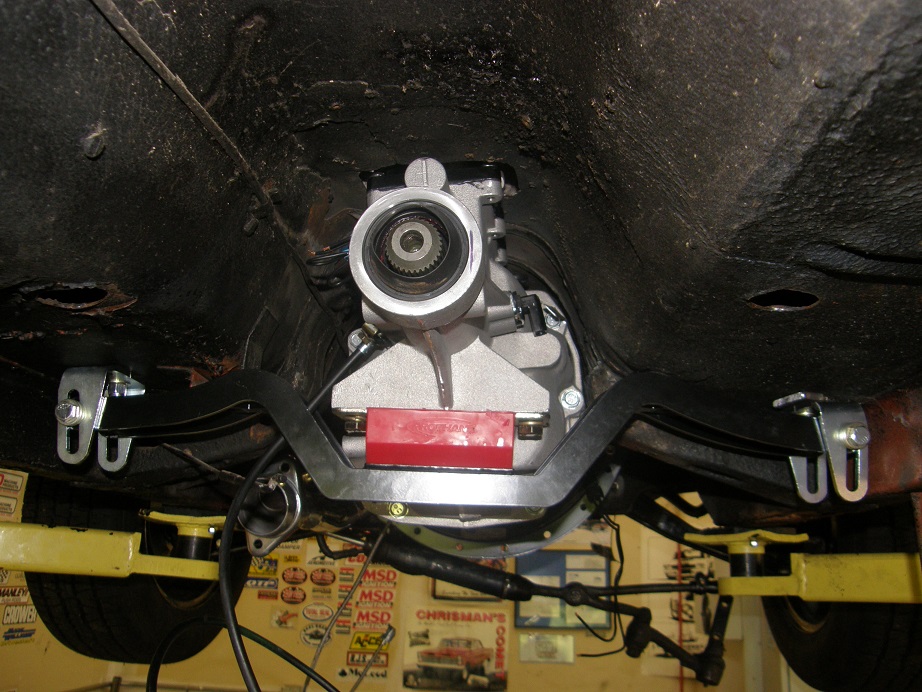
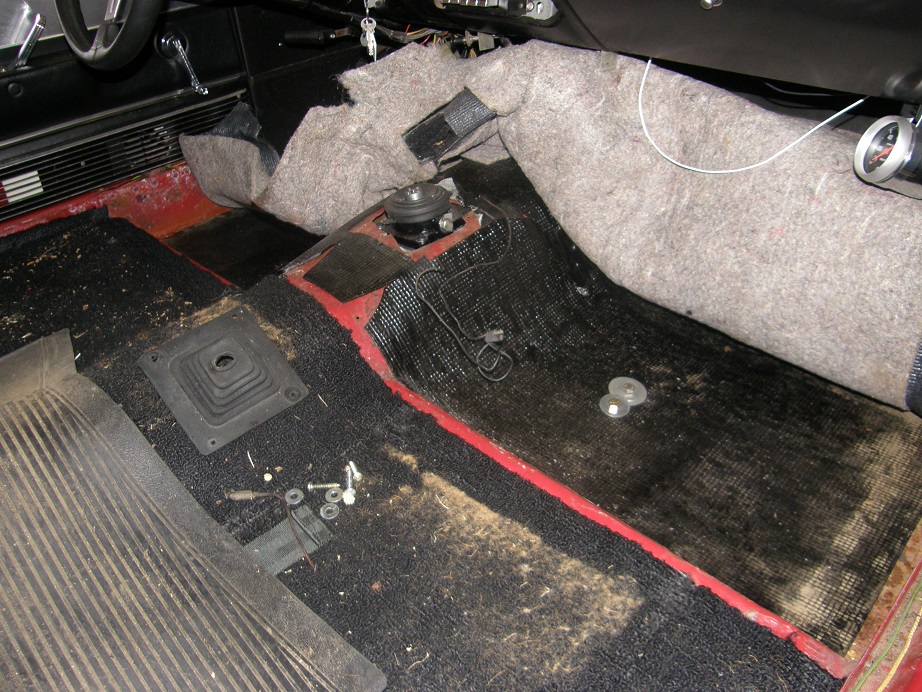
Here's a picture of the transmission mount installed from underneath, and then one of the interior of the car with the transmission up into position. Based on how well it fit through the stock opening, I think it will fit my console just fine:
Thinking ahead, my idea of splitting the spacer I need in two and installing it from under the car is obviously not practical given the transmission position in the tunnel; access to the top bolts is very limited. So, I'm going to have to pull the engine and trans back out to install the spacers. No big deal, though, its only about an hour to get it out and another hour to get it back in, so I think installing the spacers and replacing the engine and trans is an evening project. Also, yesterday before I bolted the transmission on the engine, I measured the pilot shaft diameter, and it was 0.678". This was pretty close to the numbers Jared had mentioned in his post earlier. Why would my stock pilot bushing be so loose on the pilot shaft? I went digging around for another one, and sure enough it fit very well. Jared, I think you called it with the worn pilot bushing; I think the first one I tried had been used on the dyno quite a few times, and was probably just worn enough to make it feel loose. So, when I get the engine and trans back out to add the spacers, I think I will probably pull the clutch off and replace that Chinese pilot bearing with a stock Ford bushing. So, maybe its a two evening project

This afternoon I'll be installing the rear axle housing, getting it angled properly and tacked in position on the spring perches, and then temporarily installing the 9" center section, so I can get a measurement for the driveshaft. Then the axle housing has to come out, be cleaned and painted, and then assembled with the axles and center section and re-installed in the car. Also, over the weekend my Y-block pal shamed me into a decision on the springs and Cal-Tracs ("What the hell is wrong with you? Slapper bars???"), so I guess I'll be ordering that setup tomorrow. There goes another $1000

But, then the car will have all new suspension, front and rear, all new disc brakes, and a new engine, trans, and rear end. It will probably take me another few weeks of screwing around with the details to get it finished, but by the end of the day today most of the hard work will be done. I'll try to post a quick update later this evening.


