Author Topic: My experiment "The Tractor Motor"  (Read 31439 times)

0 Members and 1 Guest are viewing this topic.

Mario428

  • Guest
My experiment "The Tractor Motor"
« on: March 21, 2011, 06:40:50 PM »
As most are aware my racing season was cut short last year by a couple of split cylinders. Way too thin though every test I could do told me I was alright but evidently they were wrong when it came to a .040 over 428 size bore.
With a burning desire to go racing but a poor budget for a new block I decided what the heck and went the 8 sleeve route. A couple of people have tried this but no long term results yet, mine may be the first. Wes seems to have lost interest in his creation.

I cut the old sleeves out and patiently chipped away the Hardblok, the tenacity of the Hardblok has me more optimistic about this working than I had been. That stuff is stuck hard to everything in there!!!!!!
Once the hardblok was out of the way I set the block up on my CNC mill and machined the top and bottom of the holes in the block. I elected to go with a step at the top, did not want to be pushing the block apart by having the step at the bottom and the step at bottom also takes away cyl wall length. This way the head and gasket help hold the desk flat and pinch the flange of the sleeve in place.

The machined block


Between my machine shop and I we found an Allis Chambers sleeve that gave me the right amount of length and meat with a 4.125 bore. Turned the outside of the sleeves to suit the diameters in the block. Diameter at bottom is .020 smaller than the top so sleeve goes 3/4's of the way in before it must be pressed.

Sleeve going in


The liquid is loctite sleeve retainer, the best choice according to everyone I asked.

Sleeves in 1 side


Hardblok is in both sides now and block will be al machine shop by end of the week.

To those in the know around here the motor will be known as "The TRactor Motor" now because of the origin of the sleeves.
Just putting this out to a select few and however it works out by seasons end I will tell the world, good or bad.

jayb

  • Administrator
  • Hero Member
  • *****
  • Posts: 7579
    • View Profile
    • FE Power
Re: My experiment "The Tractor Motor"
« Reply #1 on: March 21, 2011, 11:53:07 PM »
I'll be curious to see how this works out, and wish you the best of luck with it.  One of the issues to watch for is a crack developing between one bore and the next at the thinnest point between them; cutting the material out for the sleeve can weaken this area to the point where it can't stand the stresses there anymore, and this crack can develop after some heat cycles.  I've seen this happen when two consecutive cylinders are sleeved for a repair, and then the heads have to come off and the crack has to be pinned to repair it.  I even had one guy tell me that he pins the middle of the deck between the sleeves even if there is no crack present.  Seems to me Wes had this problem too, although I can't remember for sure.

I have also been told that you can get away with sleeving two consecutive cylinders if you use the thinner .090" wall sleeves, and don't make them a real tight press fit in the block.  Using that logic, you should be able to sleeve all 8 holes using this technique.

In any case, I've never done something like what you are doing here, so what do I know.  If this works out, it will be a great way to create a 427!  Good luck with the project; I am looking forward to your updates - Jay
Jay Brown
- 1969 Mach 1, Drag Week 2005 Winner NA/BB, 511" FE (10.60s @ 129); Drag Week 2007 Runner-Up PA/BB, 490" Supercharged FE (9.35 @ 151)
- 1964 Ford Galaxie, Drag Week 2009 Winner Modified NA (9.50s @ 143), 585" SOHC
- 1969 Shelby Clone, Drag Week 2015 Winner Modified NA (Average 8.98 @ 149), 585" SOHC


WConley

  • Hero Member
  • *****
  • Posts: 1223
  • No longer walking funny!
    • View Profile
Re: My experiment "The Tractor Motor"
« Reply #2 on: March 28, 2011, 11:11:43 AM »
Carl Holbrook used to do the 8-sleeve route on many of his Cobra Jet race blocks - brand new from the factory!  He claimed that the centrifugally cast sleeves held their shape better and gave him less blowby under the stress of racing.

Like Jay mentioned, he used the thinner .090" sleeves in this case.  I think I recall Carl saying that he bored and sleeved every other hole first, then came back and did the rest.  As far as where to put the step in the block, I have always been taught that it's best to support the sleeve from the bottom.  The fire ring from the head gasket pushes down hard on the sleeve, and it is well supported by the main bulkhead structure down low.  The head bolts tie in to structure down by the bulkheads too, completing the loop.  Up top you only have the head deck, which is now disconnected from the bores.  Hopefully it will work well for you though!  We're all learning here.   ;)
A careful study of failure will yield the ingredients for success.

AlanCasida

  • Hero Member
  • *****
  • Posts: 1127
    • View Profile
Re: My experiment "The Tractor Motor"
« Reply #3 on: March 28, 2011, 08:53:54 PM »
Gessford Machine Shop in Nebraska sleeved a 428 to a 427 bore several years ago. I don't know how it turned out though. Here is a link with photos:
http://www.gessford.com/projects/images/428-427HardBlok.htm

Mario428

  • Guest
Re: My experiment "The Tractor Motor"
« Reply #4 on: March 29, 2011, 04:25:49 PM »
I am somewhat concerned about the strength of the deck surface between the cyl's but the thickness of the sleeve itself may be enough to keep from flexing the deck too much.
I spent some time looking as close as I could at the Kirkham block, if you all remember the sleeves were held at the top and freestanding. They seemed to be depending on the rigidity of the cylinder too. Again experimental kinda like  mine is.
There is one thing I did do though, the bore at the bottom is .025 smaller than at the top and the rough machined area inbetween has a very rough finish. I am counting on the hardblok to grip the cylinders at the steps and on the rough finish. The hardblok was amazingly hard to remove from the water jackets, came out in chips not large sections like I expected. Allyn Armstrong who's shop is doing the machining was a lot more optimistic about it working when I explained I was going to do a very tall fill on the block. He was surprised to find out that I thought the .125 wall I will have left seemed like lots to me. He is a chevy guy and used to very thick cyl walls. LOL
George at Gessford sent me the link to those pics of the block they did many years ago but like everyone else never did hear the long term progress of the block, even if it ever got used.
I will have about a grand into it by the time I am done, got a pretty good deal on the sleeves so not out a lot of money if it does not work out. Has been an interesting exercise and there is another 105 block sitting waiting if I get the urge to experiment again. GRIN

billballinger

  • Jr. Member
  • **
  • Posts: 33
    • View Profile
Re: My experiment "The Tractor Motor"
« Reply #5 on: March 30, 2011, 05:49:32 AM »
It might seem counter-intuitive, but my thinking is that heat expansion of the deck and the sleeve would make having the looser end on top.  You might get a little cold weeping at extreme ambient cold, but a plug-in block heater could fix that.  When an engine fails it seems that it is rarely up top, but on the bottom.  I think having the sleeve tight in the bottom would work better.  Diesels I have sleeved were machined that way, but they were two stroke Detroits where the top is always hot, and by their nature of use the sleeves were very tight on both ends, the top being only slightly looser.   

babybolt

  • Hero Member
  • *****
  • Posts: 516
    • View Profile
Re: My experiment "The Tractor Motor"
« Reply #6 on: April 06, 2011, 03:57:27 PM »
Here's a Boss 302 block I have that was leaking at the head gasket.  It has eight sleeves in the block.  I am not sure who did the machining, but they left some rough edges at the bottom of the sleeves in the crankcase.  In the first two pictures you can see the two cracks that have formed at the thinnest section between adjoining cylinders at two different locations.   No welder in Detroit will touch this, even Razor.  The only hope looks to be pinning and maybe some trick epoxy and then waterglass.

https://picasaweb.google.com/429Nascar/Boss302block?feat=directlin

Darton makes sleeves with a ring at the top with flat reliefs that mate together to eliminate this thin section, though they would be special order most likely.  Their pdf catalog on the web has a lot of interesting technical info worth viewing by itself.


jayb

  • Administrator
  • Hero Member
  • *****
  • Posts: 7579
    • View Profile
    • FE Power
Re: My experiment "The Tractor Motor"
« Reply #7 on: April 06, 2011, 08:13:50 PM »
Doug's photos show exactly the same thing I observed on a 428 block with two consecutive sleeves.  This was not my block, but one I saw at a machine shop back in the 80s.  But the machinist told me at the time that pinning would solve the problem.  Maybe the other guy who told me to pin the area in advance had the right idea.  It will be interesting to see how Mario's approach works out.  In any case, if pinning the crack will sove the problem that would be a fairly inexpensive fix, although it would be inconvenient to have to pull the motor apart to do it...
Jay Brown
- 1969 Mach 1, Drag Week 2005 Winner NA/BB, 511" FE (10.60s @ 129); Drag Week 2007 Runner-Up PA/BB, 490" Supercharged FE (9.35 @ 151)
- 1964 Ford Galaxie, Drag Week 2009 Winner Modified NA (9.50s @ 143), 585" SOHC
- 1969 Shelby Clone, Drag Week 2015 Winner Modified NA (Average 8.98 @ 149), 585" SOHC


Kerry j

  • Full Member
  • ***
  • Posts: 106
    • View Profile
Re: My experiment "The Tractor Motor"
« Reply #8 on: April 07, 2011, 10:27:19 AM »
Quote
Doug's photos show exactly the same thing I observed on a 428 block with two consecutive sleeves.  This was not my block, but one I saw at a machine shop back in the 80s.  But the machinist told me at the time that pinning would solve the problem.  Maybe the other guy who told me to pin the area in advance had the right idea.  It will be interesting to see how Mario's approach works out.  In any case, if pinning the crack will sove the problem that would be a fairly inexpensive fix, although it would be inconvenient to have to pull the motor apart to do it...[/quote]


Hmm, now you guys have me wondering about the 427 sideoiler block I have that has 8 sleeves. I haven't noticed any cracking, but I also haven't been looking there for cracks. I'll do that today and see if it has any.

How is this "pinning" done and would it be wise to get it pinned before I assemble the engine even if there are no cracks?

jayb

  • Administrator
  • Hero Member
  • *****
  • Posts: 7579
    • View Profile
    • FE Power
Re: My experiment "The Tractor Motor"
« Reply #9 on: April 07, 2011, 10:41:19 AM »
To "pin" a crack you start at one end, drill a hole, tap it, and then screw in a threaded rod (this serves as the pin) with some Loctite or other sealer, then cut the rod off flush with the surface.  You need to start so that the hole that you drill is past the end of the crack.  Then you do the same thing further down the crack, so that the next hole you drill overlaps the pin you just put in.  Basically you repeat this process all the way down the crack so that you have an overlapping series of threaded pins that replace the metal in the crack area.  To finish you machine the surface flat.

There are special kits you can buy with the pins already made up, so you don't have to use threaded rod.  Some of them use different mechanisms, like stops of some sort, to allow you to bottom the pin in a specially drilled and tapped hole.  I've used this product with success:  http://www.locknstitch.com/Metal_Stitching.htm

I don't know if it would be advisable to pin the area before it cracked or not.  I had one guy tell me he did this, but I have no idea if that's the right thing to do.  I think if it was me I'd try it without doing that, with the understanding that I may have to pull the engine out to fix the cracks if they developed.
Jay Brown
- 1969 Mach 1, Drag Week 2005 Winner NA/BB, 511" FE (10.60s @ 129); Drag Week 2007 Runner-Up PA/BB, 490" Supercharged FE (9.35 @ 151)
- 1964 Ford Galaxie, Drag Week 2009 Winner Modified NA (9.50s @ 143), 585" SOHC
- 1969 Shelby Clone, Drag Week 2015 Winner Modified NA (Average 8.98 @ 149), 585" SOHC


Kerry j

  • Full Member
  • ***
  • Posts: 106
    • View Profile
Re: My experiment "The Tractor Motor"
« Reply #10 on: April 07, 2011, 10:54:15 AM »
IC. And we're talking about a pretty small crack here, just between the two cylinder bores. I'm going to look the areas over with a magnifying glass and see if there's any evidence of a crack or stress there. If not, I think I'll leave it alone. The block was run for a few thousand miles before I got it, so it does have some history.

I was thinking about hardblock to the freeze plugs, but I don't see where it would do any good for this problem.

Qikbbstang

  • Hero Member
  • *****
  • Posts: 908
    • View Profile
Re: My experiment "The Tractor Motor"
« Reply #11 on: April 13, 2011, 10:37:19 PM »
Decades ago I visited Torque Man Enterprises in Glennville Ga. They were leaders in monster 385 series FORDs esp for truck pulls. One of their "tricks" was brazing or welding on what looked like 1 to 1-1/4" Deck Plates to the top of the cylinders, then boring and slieving machining the works so that it had enormous Cubic Inches. I happened to call after a week-end just as a blown Puller Motor was brought in. They were studying it in shock. It had blown the 4-bolt lower end so hard out the bottom of the block that the mains with caps and block sections with studs were all still intact around the crank. It ripped the entire bottom off the motor the carnage was out of this world.. Just keep in mind that the crank needs to be supported.

cammerfe

  • Hero Member
  • *****
  • Posts: 1676
    • View Profile
Re: My experiment "The Tractor Motor"
« Reply #12 on: April 16, 2011, 09:43:45 PM »
A couple of comments come to mind. First, Carl Holbrook was known to furnace braze eight sleeves into a block and then completely go over all the machined areas, treating it as if it were a raw casting. And at one time he used chrome moly tubing as sleeve material. I was a metallurgical process engineer at T&C Livonia at the time and we had a number of discussions about the ideas he dreamed-up. (Bill Coon was actually doing the brazing)

I was amazed at the lay-out of the block in the Jag engine I'm using for Maxton racing. Although when Jag first spec'ed this V-8 design, they intended to use nikasil bores, there was an extended run of gasoline in Europe with high-enough Sulfur content that the combustion process created enough sulfuric acid to attack the bore surfaces. This became a warrantee nightmare, and, although the sulfur content contretemps was solved in fairly short order after identification, the factory has used cast-in liners ever since.

These cast-in liners fit into an aluminium block laid-out in such a way that there is a significant water jacket surrounding each cylinder---but the water jacket only extends down the cylinder for about an inch and a half. Most of the ferrous liner is not cooled by water.

Since I first saw this way of doing things, on an engine that earned a 'Ten Best' on the first year of its introduction, I have believed that the use of properly-installed Hardblok is very justified for high performance applications. About the only drawback is the extra weight. JMO

KS   

Mario428

  • Guest
Re: My experiment "The Tractor Motor"
« Reply #13 on: April 22, 2011, 06:31:47 PM »
PIcked my block up at the machine shop last weekend, after some issues last year I get another place to clean it and put cam bearings in.
I stuck the sleeves into the crankcase abot 3/16 to 1/4 inch assuming since people were putting big stroke cranks in there was lost of room. NOT!!!!!!!!!
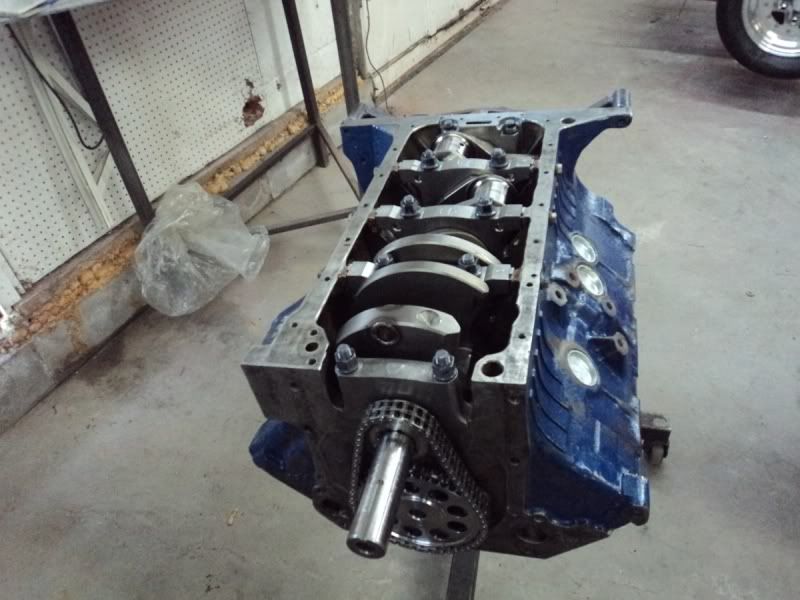
A ton of grinding and everything now rotates like it should. PIcked up the clean block last night and started assembly today.
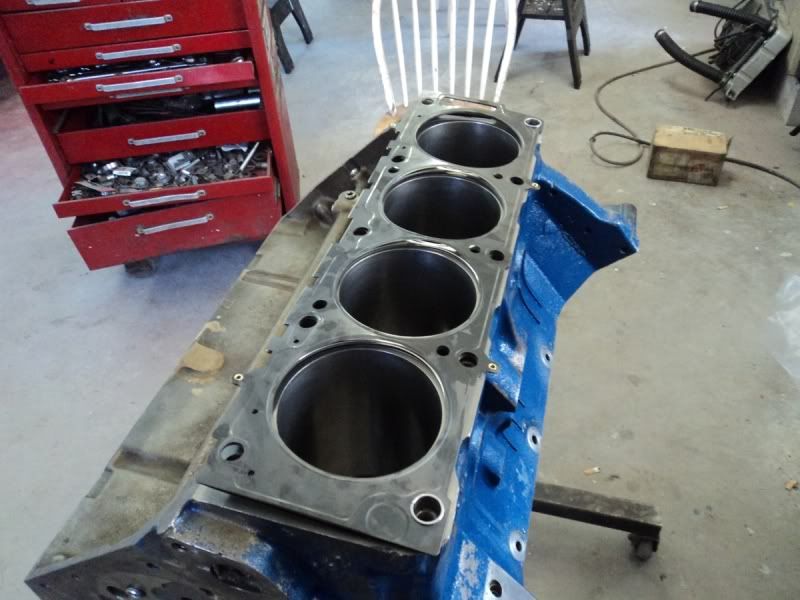
Pic of the deck


With all the machining and whatever over the last couple of years I ended up .013 out of the hole so I cut .020 of the pistons today to fix that problem. 4.175 seems to be somewhat of an oddball bore so I have to file a lot off a set of rings to make them fit. Did get the crank and cam in today


Off to work on my friends Camaro I did the housing for tomorrow, back at the motor on Sunday.

On another note I ordered a cometic gasket kit for my motor, I wanted the 4.3 bore gasket so the gasket would sit on the top of the sleeve but the ridge is awful close to the edge of the sleeve so we will ahve to see how it works out. But interesting gaskets, it was what they call a Street-Pro top end set, can be bought for about the price of 2 of their regular head gaskets and the gaskets look the same to me.
But this is the first time I have seen MLS gaskets and they were quite a surprise.
Top view of head gasket


All metal is interesting but the end view of the 3 pcs flopping around threw me for a loop


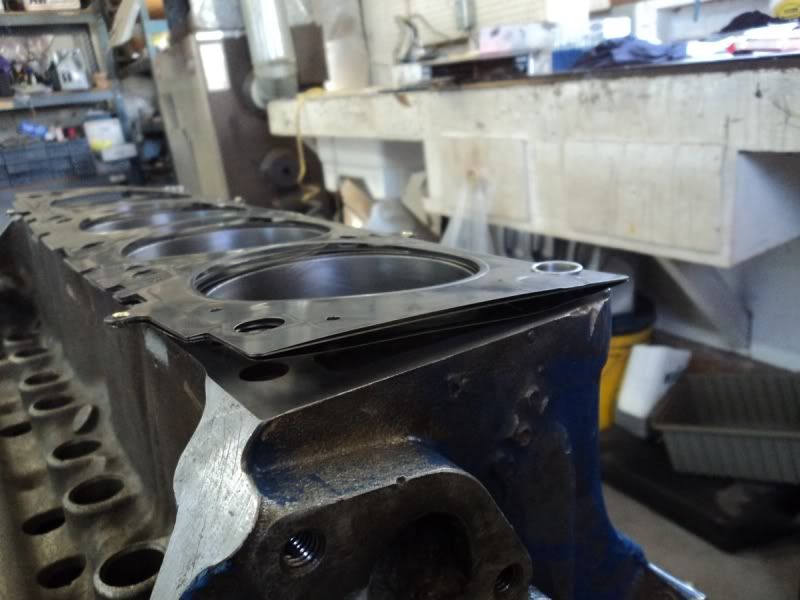
Everyone swears by them so I will coat with copper spray and see how they work.

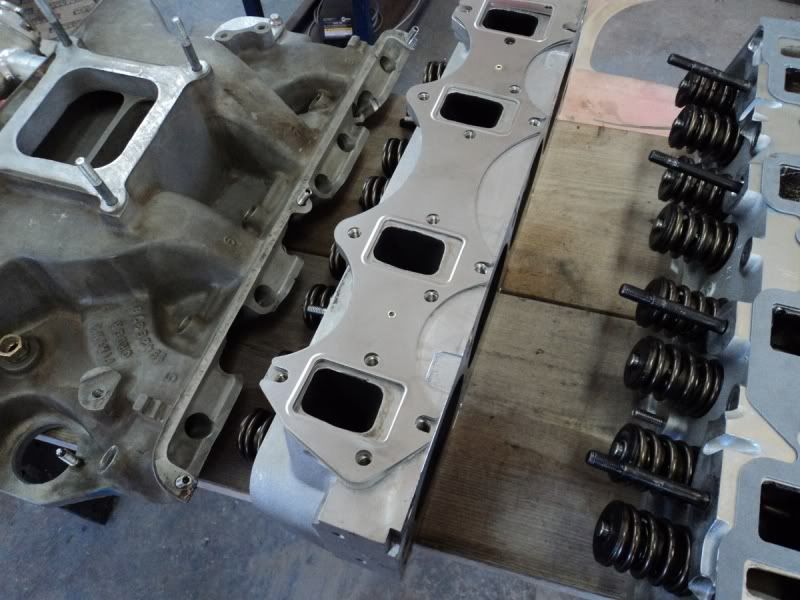
All the gaskets are somewhat interesting, intake is quite hard but appears to be very high quality


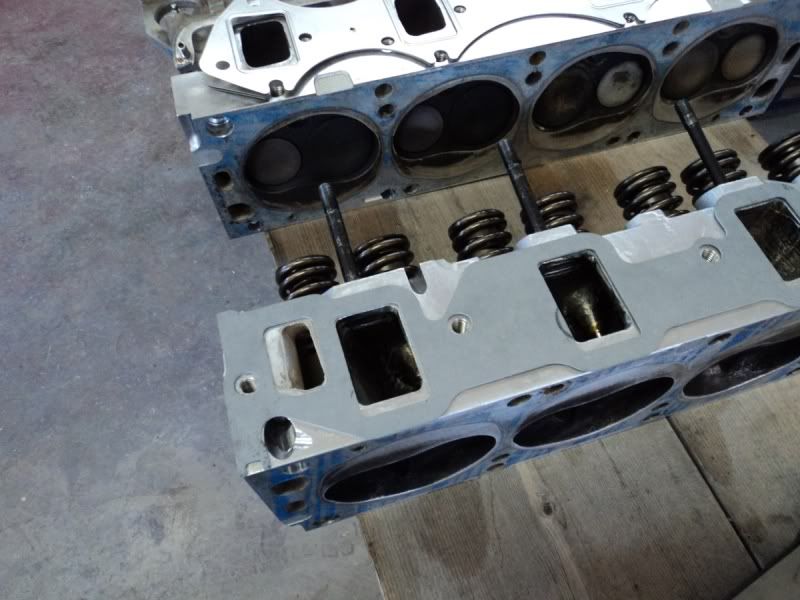
Exhaust is a surprise because it is MLS also, my parts guy said he just sold me the last set of headder gaskets ever. LOL


VC gasket is also quite hard, should work well with my cast or soon to come sheet metal VC's but might be an issue with stock type tin covers, no pics just a black VC gasket.
Will see how the week goes, may play hooky for a day or so and see if I can get the "Tractor" motor fired next weekend.


falcon428

  • Full Member
  • ***
  • Posts: 101
    • View Profile
Re: My experiment "The Tractor Motor"
« Reply #14 on: April 22, 2011, 07:22:52 PM »
Mario,

Wish you best w/ sleeves.  I have a 428 w/ a couple sleeves, always wondered about sleeving all holes before.  interested in how it works for you, will follow thread for updates down the road.
My real concern with the AC sleeves is will you be able to get the RPM over 2100?? ;D  those ole tractors werent good for much more than that.  :)
'65 Mercury Comet w/ Pond Alum. 427, C6
'61 Ford Starliner w/ 352, C6
'68 Falcon w/ ProCharged FE, Lenco 5sp
'67 Country Sedan SW
'62 Falcon awaiting turbocoupe motor & tranny
'40 Ford Tudor Sedan all original