I had intended to install the Explorer disks out back. So the new 31 spline axle shafts from Jegs got new bearings. (I wasted money on the axle installation kit “bearings, seals, and wheel studs” from Jegs. Poor shopping on my part. The bearings were fine, the seal was wrong, and the wheel studs were too short.) Since there were no bearing on the shafts, the guy at the 4X4 shop only charged $20 for the bearing install. The axles went in with the U shaped bearing retaining brackets from Jegs. This was right before the car went back to the body shop for some touch up work. I was in a hurry.
The main reason I wanted the Explorer brakes was for the drum feature of the emergency brake. After purchasing the stuff from pick a part and getting it home, I was not thrilled with how the bearing would be retained. Or some of the methods I had seen used after I did more research. They should work great on a big bearing housing, but I have the small bearing!!! For me, gap between the axle housing flange and the Exploder backing plate that results from the bearing sticking out of the housing should be measured precisely for a machined spacer. I saw a post where someone used your typical 3/8” flat washer as the spacer!!! I couldn’t go that route as a permanent fix, but it did well enough to get the car winched on and off the roll back for a trip to the body shop.
Next step was the buy the GT rear brackets from MS and do a mock assemble. Everything looked like it would work without the axle shaft installed. With a new set of axle bearings from the parts house, about $45, & $80 bucks to get the old bearings off and new ones installed. I made certain to mark the axles and the retaining brackets as right and left and gave the guy a copy of the instructions. My poor choices had cost me enough money so far, I didn’t want to add a shop mistake to cost me more. Luckily, it all worked out well. The back brackets got installed without issue, then the rear end went back together. Now, I can’t remember if I put the additive, or gear oil for that matter, in the rear end for the traction lock unit?

And I need to install the pinion snubber. Too many mental notes, they all run together.
For the rear, I bought new stuff from Blue Oval industries. It was the Ford racing M-2300-G2 conversion kit for a 9”. It was $225 shipped to the house. New calipers, rotors, machined spacers for rotor, mounting hardware for big bearing housing, brake pads, and dust shields. It’s a lot of stuff and that box was heavy, I guess they are closing it out. I also bought new Ford flexible brake hoses for connecting to the hard lines from the place that TKO had mentioned. Next came the emergency brake cables. I looked at setting it up just as MS shows, but it looks like the end of the cable will pull at an awkward angle as the lever pulls forward. After some thought, I cut some card board templates for a bracket that could be welded to the spring plate. A 9/16 nut with a 9/16 drill bit ran through it is perfect for the cable ends to slide into. It keeps a nice arc as it goes through the motion. The pictures are with the suspension at full droop, the cables are tight to the spring and spring plate, but should be OK when the suspension is loaded. After I got them installed, I realized I will need to do something different for traction bars!!! Tonight as I’m typing this up, it dawns on me that I could have mounted it to the U-bolt in the same area as the bracket. Hind sight, right.
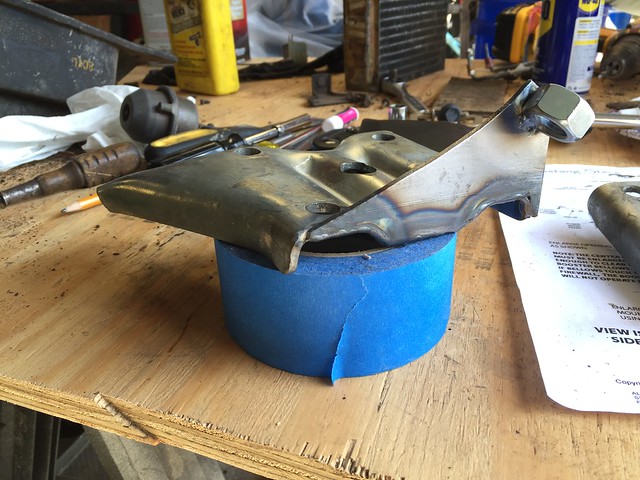 IMG_1682
Fresh from welding
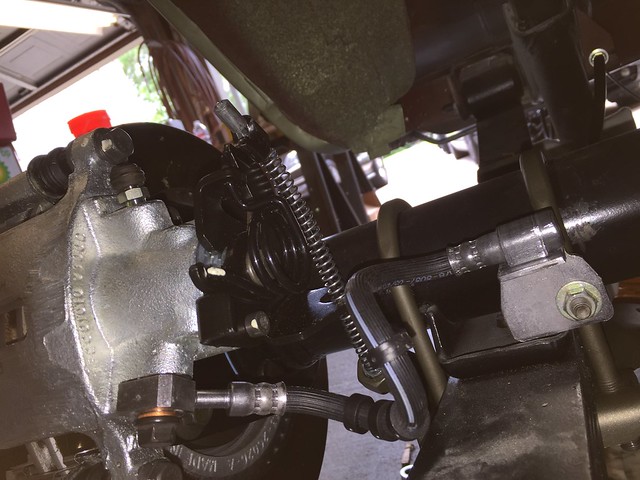 IMG_1690
 Had to cut down on the metal bracket Ford put on them and they worked out well. The hoses had clips for connecting the ABS cable, I guess, to them. That got cut off and rounded with a file.
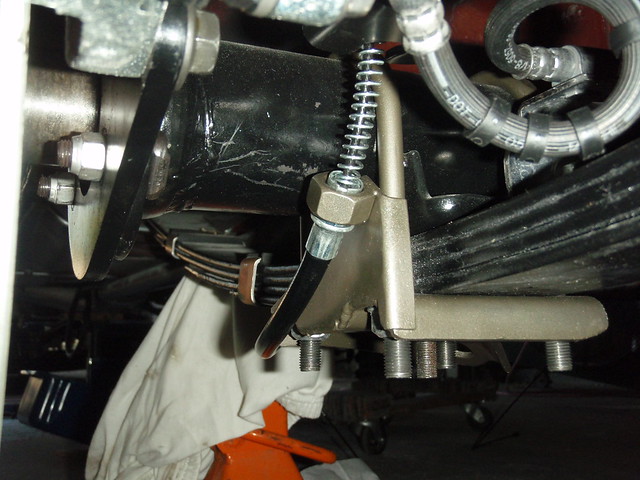 P7160034
  P7160041
 I got this picture and view a little later. That same type of tab welded to the nut to space it out from the center of the U-bolt would have probable worked. The length of the cable may come into play though.
Updated Photos 6/4/18


