GOT IT!!!!!!! OK so I was pretty confident that everything was aligned perfectly. the alignment tool for the Clutch discs even made a "pop" sound when you pulled it out (due to the suction being broken when it came out of the pilot bushing). However, my buddy over there at Modern Driveline said that there has to be almost NO resistance at all. The tool should literally push in and out like there is nothing touching it.
So Friday night, I crawled back under the car and tool off the starter, bell housing, Pressure plate and top disc. I left the back of the clutch as well as the bottom clutch disc on the flywheel. Then I put in the alignment took, and put the top disc back on and placed the pressure plate portion of the clutch back on (but did not tighten it down). Then I kept doing tiny adjustments to the alignment tool (while holding the pressure plate on with the other hand to apply pressure. When I got it so that there was almost no resistance what so ever on the tool, I put as much pressure as I could with one of my hands on the pressure plate, and started putting the nuts back on with the other hand. Once I got all the nuts on as tight as I could by hand, I gently tested the alignment took to make sure I was still at almost no resistance. Then I torqued them back down in the star pattern suggested in the directions to a final pressure of 35 Ft/Lbs. After final torque, I again tested the alignment tool.... and surely enough, we were still at NO resistance!
Then I had to torque the bellhousing back on (also at a final torque of 35 ft/lbs) as well as bolt the starter back up.
Then the moment of truth.... Got the transmission up into place with the custom spacer on the front.... made sure it looked like it was centered and that the alignment dowels on the spacer lined up with the holes in the bell housing..... and within 2 minutes of pushing..... I heard the metal clap of it all mating up.!!! I don't think I have ever been so happy! HAHAHA
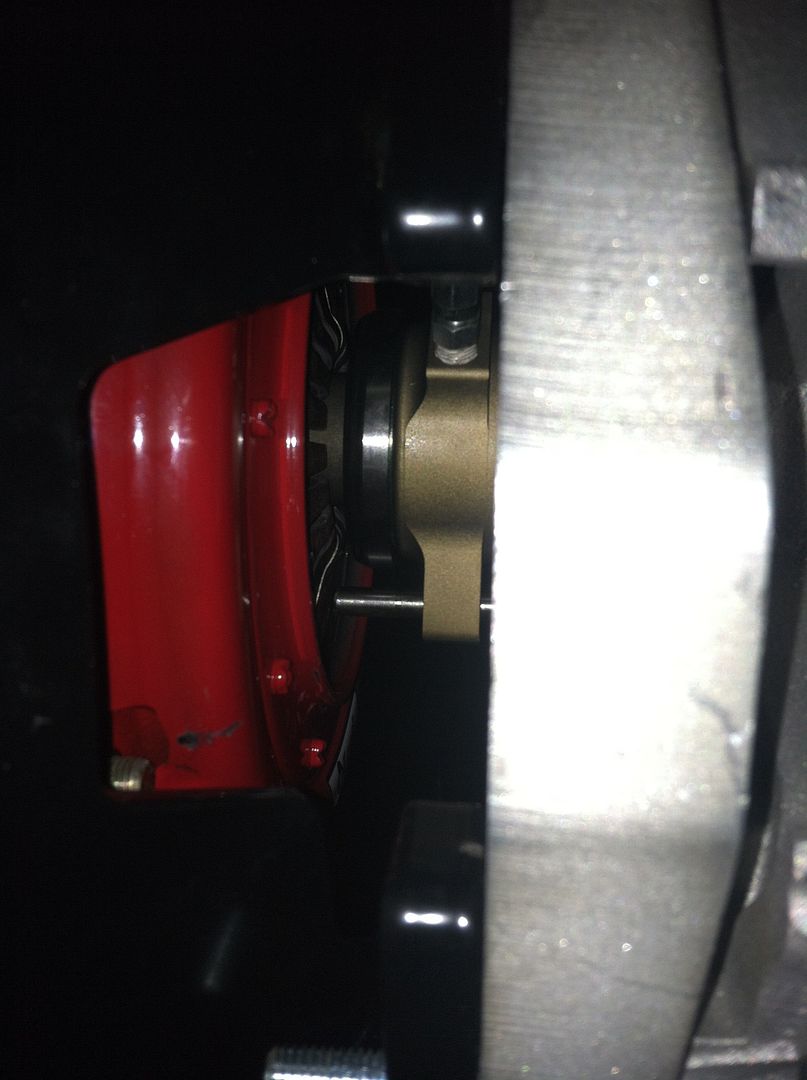
I figured while I was already down there and dirty... I might as well disconnect the stock hydraulic clutch line (which I had a plastic bag and rubber bands on the end so that it wasn't dripping hydraulic fluid on the floor)... and reattach the braided metal hydraulic line from the RAM throw out bearing. Then I filled the reservoir up with conventional heavy duty DOT3 hydraulic fluid and asked my wife to pump the clutch while I used the bleeder line below to bleed out the air. Within 3 pumps, I had all the air out, and asked the wife to push the petal all the way to the floor a few times so I could have a look inside the Bellhousing (where the clutch fork usually goes) to get a sense of the bearing travel. All looked perfect. When she let off the clutch, it released all the pressure off of the fingers, and when she pushed it to the floor, it looked like it pushed the fingers in all the way without bottoming out.!!!
Next on the list is getting the transmission reverse lock out module wired up, before I get her down off the jack stands, load her on a trailer, and get her over to get exhaust manifolds made up!
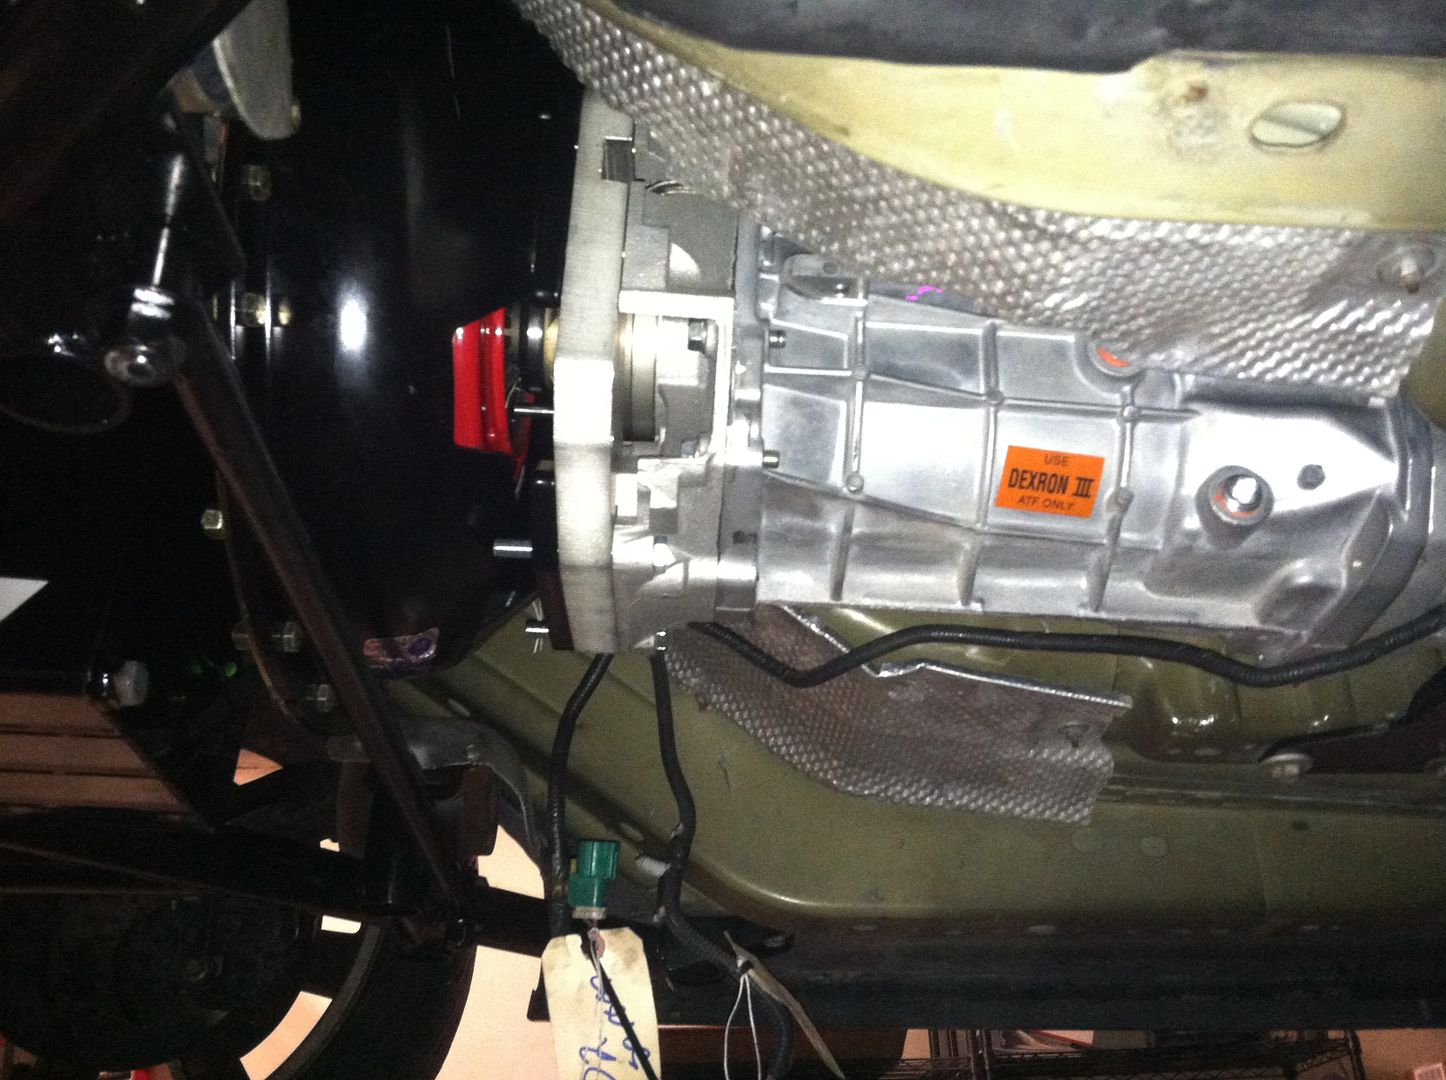
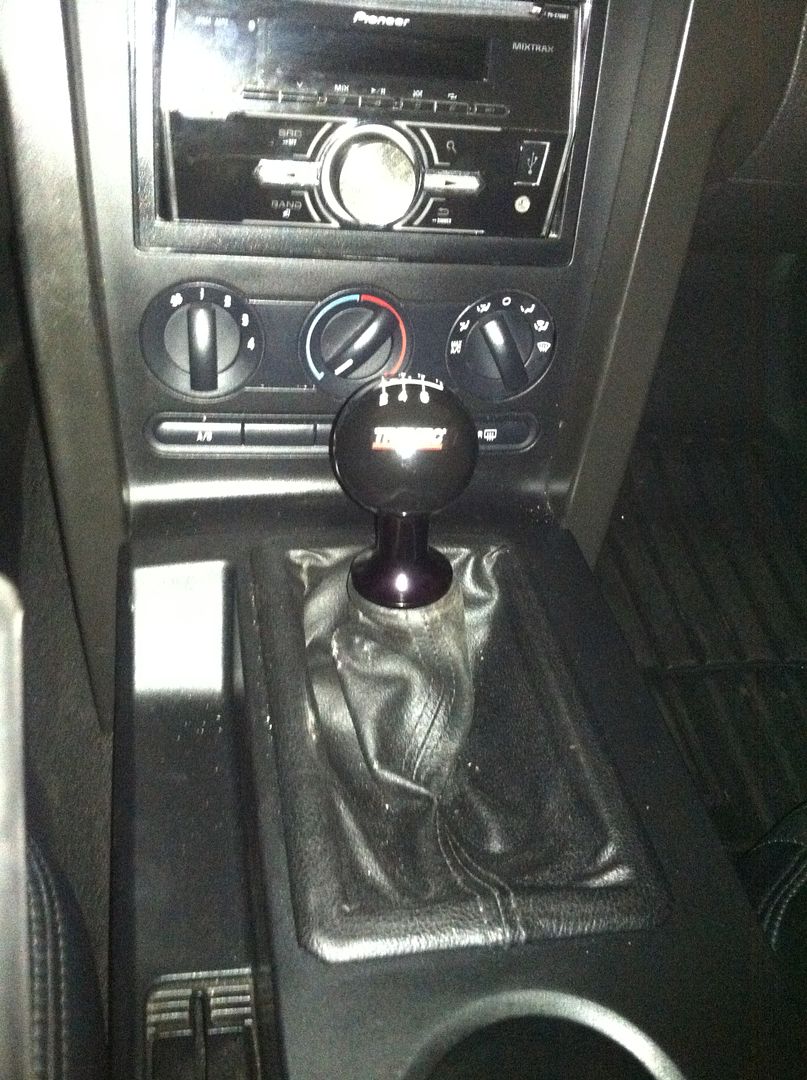
Pictured below is a picture of the T56XL Viper transmission with the custom spacer and bell housing (all mounted up), Then the clearest picture I could take inside the bell housing showing the RAM hydraulic clutch, and finally the tremec 6 speed ball and kit with the center console reinstalled...... Looks awesome.