Author Topic: Upgrades to my R-code Mach 1...  (Read 43230 times)

0 Members and 1 Guest are viewing this topic.

Heo

  • Hero Member
  • *****
  • Posts: 3287
    • View Profile
Re: Upgrades to my R-code Mach 1...
« Reply #75 on: March 29, 2019, 05:50:43 PM »

Doug, now i see you have a 8 point rollbar not a cage, you can probably tip the main hoop forward to weld the
topside of the rear bars before you attatch the side bars


The defenition of a Gentleman, is a man that can play the accordion.But dont do it

machoneman

  • Hero Member
  • *****
  • Posts: 3853
    • View Profile
Re: Upgrades to my R-code Mach 1...
« Reply #76 on: March 29, 2019, 06:10:10 PM »
Weight? Been told that most that can use the OEM hinges aren't much lighter than the steel hood.


Bob, I should have answered this better before. Without a doubt, the hood is at least half the weight of a stock hood. Probably more. I could easily pick it up and move it myself by just grabbing the sides. I would struggle with a stock hood.

While my intake will be heavier, and the roll bar will add significant weight, I'm hoping to offset most of that with aluminum heads, the fiberglass hood and ditching my heater box altogether. The battery is also going to the trunk.

Thanks Doug  as a lighter than stock hood (ugh, they ARE damned heavy!) is what I'm looking for.  Many of the the lift offs are light but often pretty crudely made. Glad to hear too you like the quality.

Btw, I did find an Eleanor-like body panel maker (forget the name, maybe Ring Brothers) who custom makes a true carbon-fiber '70 hood but it was like $1,300 plus shipping! 
« Last Edit: March 30, 2019, 11:46:26 AM by machoneman »
Bob Maag

GJCAT427

  • Hero Member
  • *****
  • Posts: 662
    • View Profile
Re: Upgrades to my R-code Mach 1...
« Reply #77 on: March 30, 2019, 04:53:10 AM »
Hey Doug. You do know a tig welder, Problem is your in west Ohio and I`m in western NY. Garry

cjshaker

  • Hero Member
  • *****
  • Posts: 4461
    • View Profile
Re: Upgrades to my R-code Mach 1...
« Reply #78 on: March 30, 2019, 08:22:45 AM »
Hey Doug. You do know a tig welder, Problem is your in west Ohio and I`m in western NY. Garry

Garry, weren't you talking about taking a long awaited vacation to that tropical paradise, Ohio, this year? The scenery is beautiful. It really has to be seen in person. ;)
Doug Smith


'69 R-code Mach 1, 427 MR, 2x4, Jerico, 4.30 Locker
'70 F-350 390
'55 Ford Customline 2dr
'37 Ford Coupe

Stangman

  • Hero Member
  • *****
  • Posts: 1698
    • View Profile
Re: Upgrades to my R-code Mach 1...
« Reply #79 on: March 30, 2019, 08:51:33 AM »
Not sure if I asked this already but what is the motor upgrade and will that also be in by the reunion.

AlanCasida

  • Hero Member
  • *****
  • Posts: 1099
    • View Profile
Re: Upgrades to my R-code Mach 1...
« Reply #80 on: March 30, 2019, 08:55:03 AM »
Looks you are fixin' to get busy! Good luck. I wish I had gone with just the bar rather than a cage. While the cage is safer on the track they can be more dangerous on the street when you are not wearing a helmet.

cjshaker

  • Hero Member
  • *****
  • Posts: 4461
    • View Profile
Re: Upgrades to my R-code Mach 1...
« Reply #81 on: March 30, 2019, 10:56:41 AM »
Not sure if I asked this already but what is the motor upgrade and will that also be in by the reunion.

Joe, it's going to be roughly 460 ci, based on my SOG block, but it won't be in by the Reunion.

Looks you are fixin' to get busy! Good luck. I wish I had gone with just the bar rather than a cage. While the cage is safer on the track they can be more dangerous on the street when you are not wearing a helmet.

Alan, most likely I'll upgrade to the front hoop and down bars in the near future. I'd prefer to have those custom bent though, because I don't like how many of the pre-bents hang down too low or don't tuck against the dash close enough. I know there are concerns about cages on the street, but a good seat, the 5 point harness and some padding should minimize that risk. You still have the factory short backed seats, and I can definitely see some concern there, but I guess even with good seats, the top hoop would cause concerns. There's always trade-offs for everything you do.
Doug Smith


'69 R-code Mach 1, 427 MR, 2x4, Jerico, 4.30 Locker
'70 F-350 390
'55 Ford Customline 2dr
'37 Ford Coupe

machoneman

  • Hero Member
  • *****
  • Posts: 3853
    • View Profile
Re: Upgrades to my R-code Mach 1...
« Reply #82 on: March 30, 2019, 11:51:48 AM »
More fun stuff for '69-'70 Mustangs. Nothing unchanged here, especially under the carbon fiber hood! Boss '9!

http://www.mustangandfords.com/featured-vehicles/mdmp-1203-1969-ford-mustang-the-carbon-fiber-colt/
Bob Maag

Stangman

  • Hero Member
  • *****
  • Posts: 1698
    • View Profile
Re: Upgrades to my R-code Mach 1...
« Reply #83 on: March 30, 2019, 05:27:55 PM »
Nice Doug keep up the good work

AlanCasida

  • Hero Member
  • *****
  • Posts: 1099
    • View Profile
Re: Upgrades to my R-code Mach 1...
« Reply #84 on: March 30, 2019, 06:55:19 PM »

Alan, most likely I'll upgrade to the front hoop and down bars in the near future. I'd prefer to have those custom bent though, because I don't like how many of the pre-bents hang down too low or don't tuck against the dash close enough. I know there are concerns about cages on the street, but a good seat, the 5 point harness and some padding should minimize that risk. You still have the factory short backed seats, and I can definitely see some concern there, but I guess even with good seats, the top hoop would cause concerns. There's always trade-offs for everything you do.
[/quote]

I know what you mean about the front down bars. I bought the pre-bent kit and installed it myself. When I put it in the doors were only shells with no mechanisms in them. When I finally put the door handles and window mechanisms in them I found I could not roll the windows up/down with the doors closed.  >:( I custom made some shorter window cranks but it is still a pain. 

AlanCasida

  • Hero Member
  • *****
  • Posts: 1099
    • View Profile
Re: Upgrades to my R-code Mach 1...
« Reply #85 on: March 30, 2019, 06:57:30 PM »

Alan, most likely I'll upgrade to the front hoop and down bars in the near future. I'd prefer to have those custom bent though, because I don't like how many of the pre-bents hang down too low or don't tuck against the dash close enough. I know there are concerns about cages on the street, but a good seat, the 5 point harness and some padding should minimize that risk. You still have the factory short backed seats, and I can definitely see some concern there, but I guess even with good seats, the top hoop would cause concerns. There's always trade-offs for everything you do.

I know what you mean about the front down bars. I bought the pre-bent kit and installed it myself. When I put it in the doors were only shells with no mechanisms in them. When I finally put the door handles and window mechanisms in them I found I could not roll the windows up/down with the doors closed.  >:(  . I custom made some shorter window cranks but it is still a pain.
« Last Edit: March 30, 2019, 07:23:19 PM by AlanCasida »

plovett

  • Guest
Re: Upgrades to my R-code Mach 1...
« Reply #86 on: April 05, 2019, 09:57:19 PM »
Might want to remove your front swaybar too, if you haven't already.  Helps weight transfer if you are trying to go fast in the 1/4 mile.

JMO,

paulie


edit:  oops.  After reading all the posts I see you are already doing that.  I haven't had a front sway bar for over a decade.  It helps some, IMO.

« Last Edit: April 05, 2019, 09:59:23 PM by plovett »

cjshaker

  • Hero Member
  • *****
  • Posts: 4461
    • View Profile
Re: Upgrades to my R-code Mach 1...
« Reply #87 on: April 19, 2019, 11:01:25 AM »
Paulie, I missed your post. Yes, I took the front sway bar out several years ago. The car isn't exactly designed for cornering anymore..lol
Doug Smith


'69 R-code Mach 1, 427 MR, 2x4, Jerico, 4.30 Locker
'70 F-350 390
'55 Ford Customline 2dr
'37 Ford Coupe

cjshaker

  • Hero Member
  • *****
  • Posts: 4461
    • View Profile
Re: Upgrades to my R-code Mach 1...
« Reply #88 on: April 19, 2019, 12:05:59 PM »
Well the transmission is in, but not without a few struggles. Been working late pretty much every night, but I think it'll all be ready for the Reunion.

I got the old toploader out and did some verifying of measurements to make sure my old driveshaft would work, although I had to change the yoke to a 32 spline, which is what the Jerico had. I also noticed at that time that the Jerico had a rollerized tailshaft, which I hadn't noticed before. It requires a hardened yoke to handle the needle bearings. Still, I was happy to find that it had that option. I also weighed both transmissions, with shifters, to find out how much less the Jerico set-up weighed. Weights came in at...
Toploader with shifter: 105 lbs
Jerico with shifter: 82 lbs
A savings of 23 lbs is big to me. My car was heavy at 3460 (without the 140 lbs of driver weight), so anyway I can save weight to offset the rollbar is going to be a big plus.

A comparison shot...


I also had to change the front bearing retainer to a standard throwout bearing style, whereas the Jerico had one designed for a hydraulic throwout set-up. It only took me over a week and a half to get the part from Jerico....who had it in stock, but that's another story.  ::)


I started out with concerns that the smallblock pilot snout that was on the Jerico would cause interference in the stock steel crank on installation. That would have stopped everything. I talked to Rory though, and he told me that his trans was a long snout also, but that it didn't cause any issues with his stock crank, then I verified from the forum member I bought it from (BH107), that the trans was indeed used behind an FE. Still having concerns, I did some measuring the best way I could with everything still in the car. I didn't want to remove the bell, clutch and flywheel assembly because time was limited, and working on my back on the floor is not my favorite thing to do. A lift would have made this entire job much easier!!

I measured by using a screwdriver to find the depth from the mounting flat of the bell, to the bottom of the crank hole for the snout. I was careful to only go in as far as the top of the bevel in the crank hole, since it's a drilled hole. Going to the bottom of the hole would have given me a false clearance measurement. Here's how I measured...
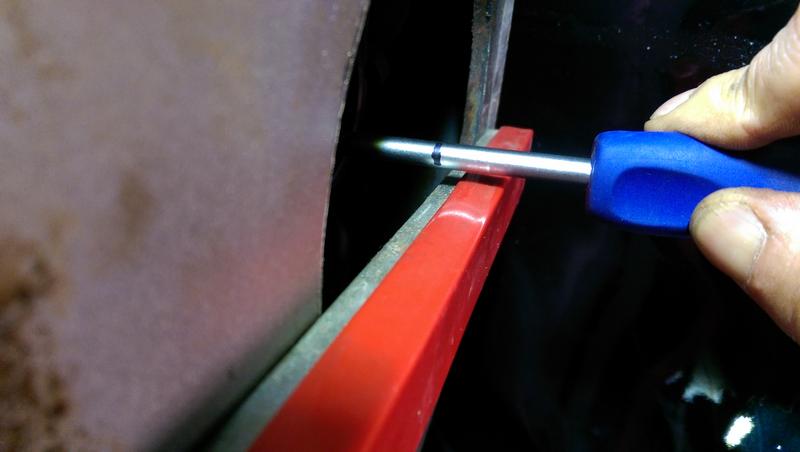


Then I measured to the outside of the pilot bearing, so I knew my input shaft splines would not interfere with that area.
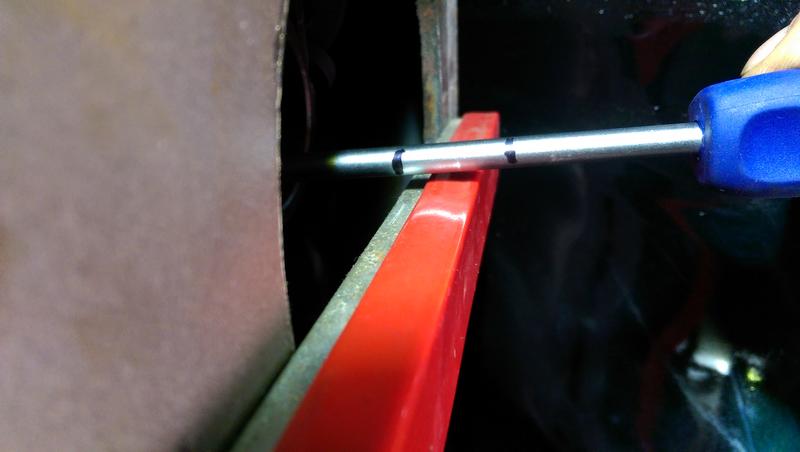


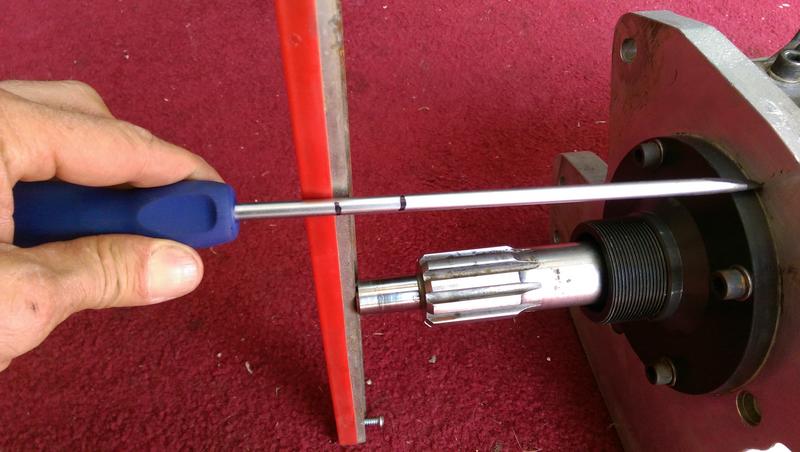
I knew these measurements were "rough" measurements, but it was the best I could come up with because my vernier caliper didn't go deep enough. I was hoping that they would be close enough to give me piece of mind. As it turned out, it appeared that I had plenty of room, so that concern went away. Here I'm comparing my depth marks to the input shaft on the Jerico. This shows the depth to the top of the bevel in the crank hole. Plenty of clearance! And the shaft splines showed even more clearance, so I figured I was good to go...


Next came the installation, and I knew I'd have issues with shifter rods and clearance against the tunnel and crossmember. I wasn't wrong. I didn't want to hack a big long area of my tunnel out, so I decided to see if I could gain the clearance needed by just notching my crossmember and and doing a little hammer work on the tunnel. After having the trans in and out about half a dozen times (thank God for that 23 lb weight savings!..lol), I marked where I thought the notch needed to be...
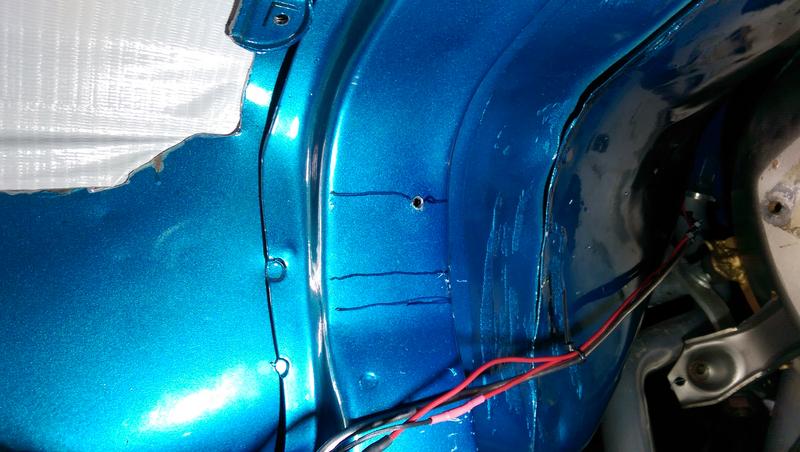


Then proceeded to cut the area out, make a template out of cardboard, then bend/make a piece to fit in the area and weld it back up.
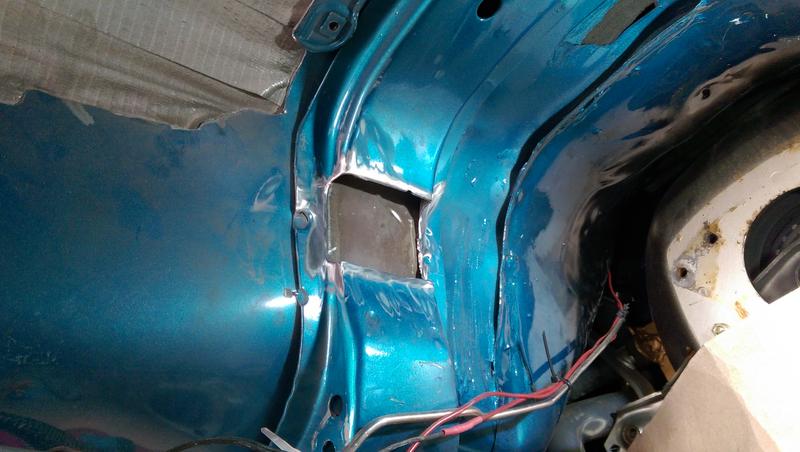
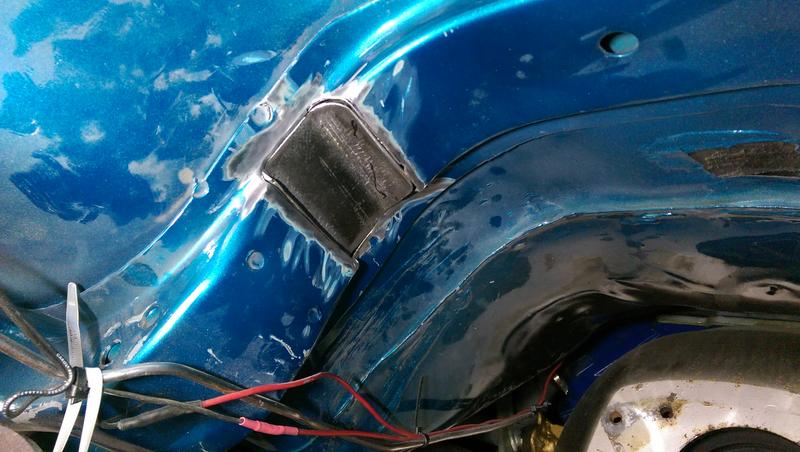
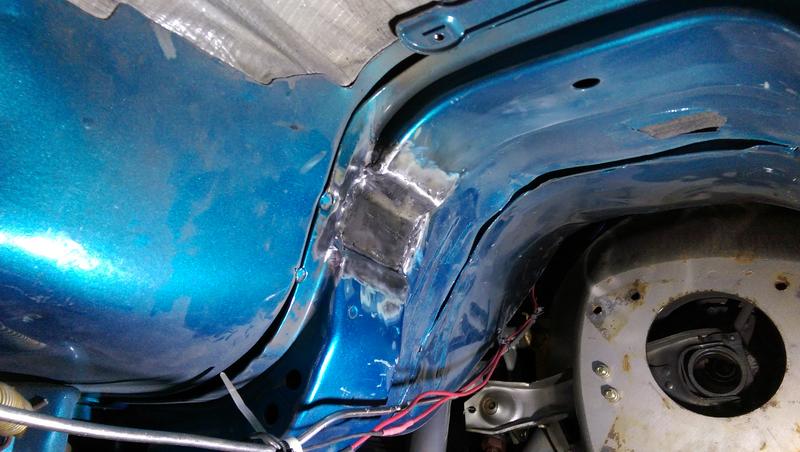


Remember, I was doing all this cutting, grinding and welding while laying on my back, directly underneath the work area which was about 2' above the floor. I think I'd rank this about 1 step above getting my fingernails pulled out with pliers!

I also discovered that I needed to clearance the trans face to clear the small bolts sticking out of the bellhousing that hold the pivot for my clutch arm. I'm not sure how others got away without doing this, but I couldn't rotate the trans into place to line up with the bell holes without doing this.
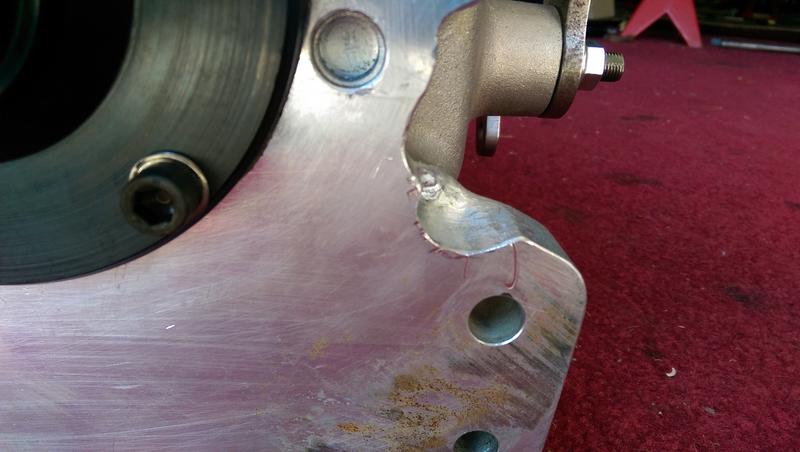


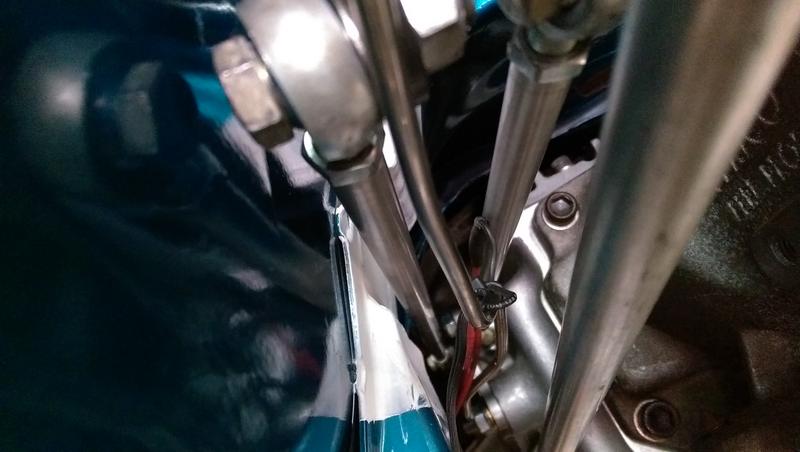
After about the 8th time installing the trans ( :P), I finally had it in place for the final time, and appeared to have the clearance I needed for the shifter rods. This shows the clearance I gained, and with the engine being tied down, I don't think movement will be an issue....I hope.


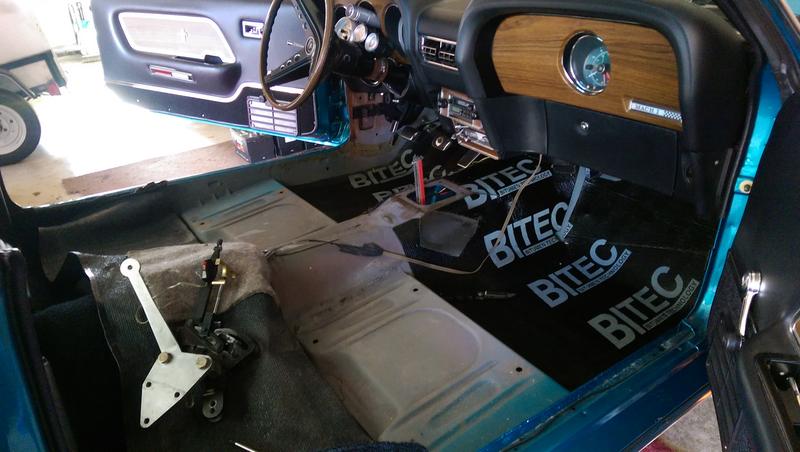
I started the whole job by removing the seats, front carpet, and laying back the back carpet so I could cut the hole for the shifter. While doing all the fitting, I marked and made initial cuts for the shifter, then fine tuned the hole for clearance and rounded everything up to get rid of sharp edges. Everything clears, and the shifter is in place and seems to work fine.
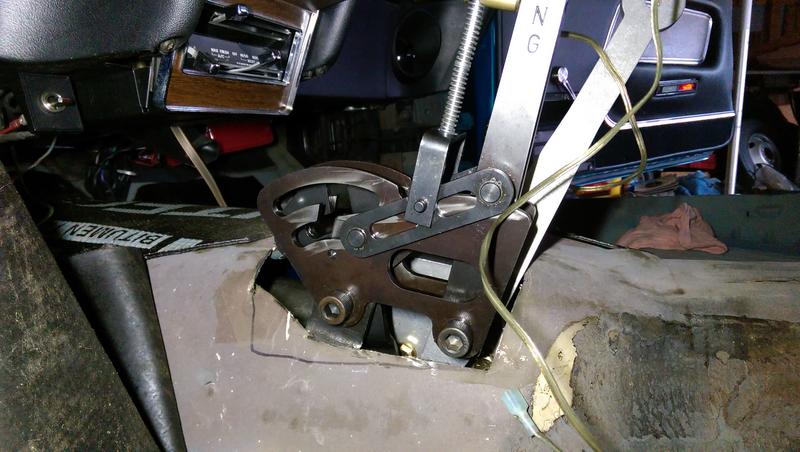

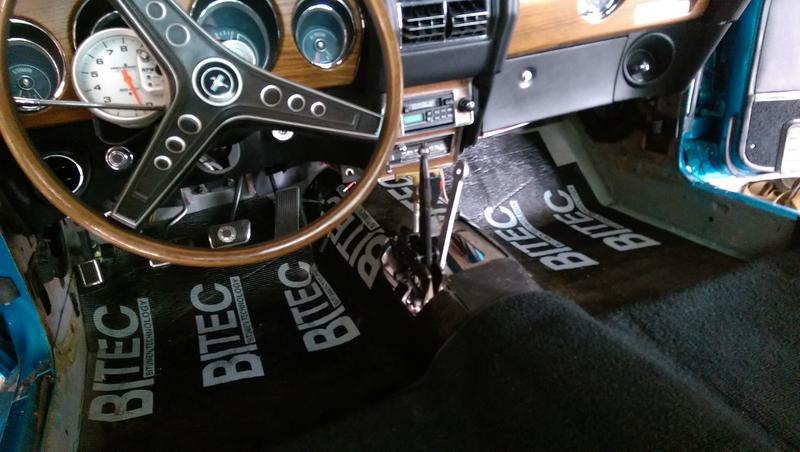


Today, I finished up by re-installing the driveshaft loop, then the driveshaft with the new Strange yoke (Mark Williams was out of the style I needed and wouldn't have them available for another 2 weeks), then laid the carpet back down and trimmed it up and reinstalled my seats and sill plates. I still need to clearance a small spot for the front heim joint for the 3-4 shift rod against the tunnel, but I'll put it on a friends lift to do that because I just can't get enough room for a good swing with the sledge while laying under the car. That should do it for the installation.

Now I just need to finish changing oil, change the plugs and go over some small stuff to make sure everything is working ok, and it should be good for the first passes at the Reunion. With the changes, I'm thinking it should slow me down at least a tenth or two...lol ;D  Now I just need to call the weather guy at Beaver Springs and threaten him to make sure we have some decent weather!

Doug Smith


'69 R-code Mach 1, 427 MR, 2x4, Jerico, 4.30 Locker
'70 F-350 390
'55 Ford Customline 2dr
'37 Ford Coupe

cjshaker

  • Hero Member
  • *****
  • Posts: 4461
    • View Profile
Re: Upgrades to my R-code Mach 1...
« Reply #89 on: April 19, 2019, 12:16:21 PM »
And I'd like to give a big Thank You to forum member Ben (BH107), for turning me on to this transmission. It was one that a friend of his had been running behind an FE Fairlane. Everything was in great shape, and he was awesome to deal with. THANK YOU Ben!!
Doug Smith


'69 R-code Mach 1, 427 MR, 2x4, Jerico, 4.30 Locker
'70 F-350 390
'55 Ford Customline 2dr
'37 Ford Coupe