Author Topic: Installing a Gear Vendors Overdrive to C6  (Read 39137 times)

0 Members and 1 Guest are viewing this topic.

66FAIRLANE

  • Hero Member
  • *****
  • Posts: 558
  • Andy
    • View Profile
Installing a Gear Vendors Overdrive to C6
« on: October 09, 2011, 10:53:48 PM »
Here is a project thread I have been writing on a couple of other boards.

As some of you know I have purchased a Gearvendors Overdrive unit for my 66 Fairlane Hardtop. So I thought I would do a thread on fitting the unit to the C6. For those not familiar with the Gear Vendors units they have been around a long time and I have had my eye on them for ten years or so. With the strong dollar I could no longer help myself.

Information here.
http://www.gearvendors.com/

Fairlane currently runs 3.89 gears with 27" tyres and a 3500rpm flash stall. Long term plans include a mellower cam lower stall and forced induction.  For a few years I have been alternating between 3.89's and 3.55's, but no more. With this unit engaged it will make my 3.89's feel like 3.00's and should make the car more user friendly on longer runs not to mention the fuel and engine wear savings.

Service was good over the phone and the kit despatched in 2 days and arrived about a week after that via UPS.

Here is a pic of the entire kit (uncle Jack's magic elixer was an optional extra :yummy: )


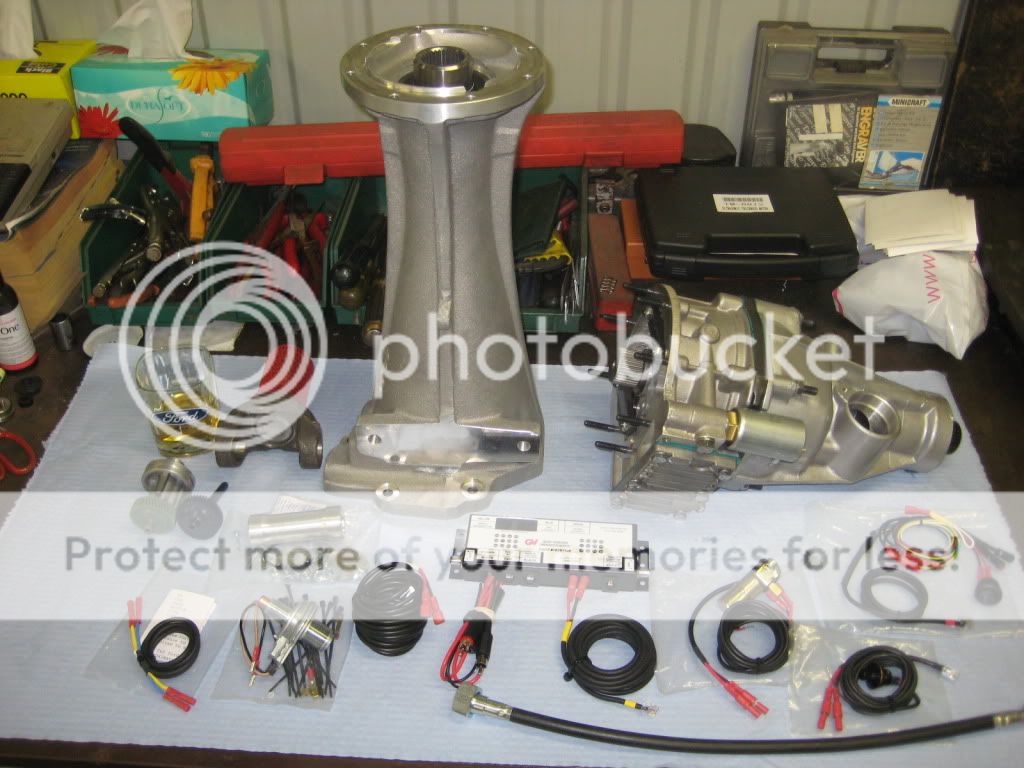
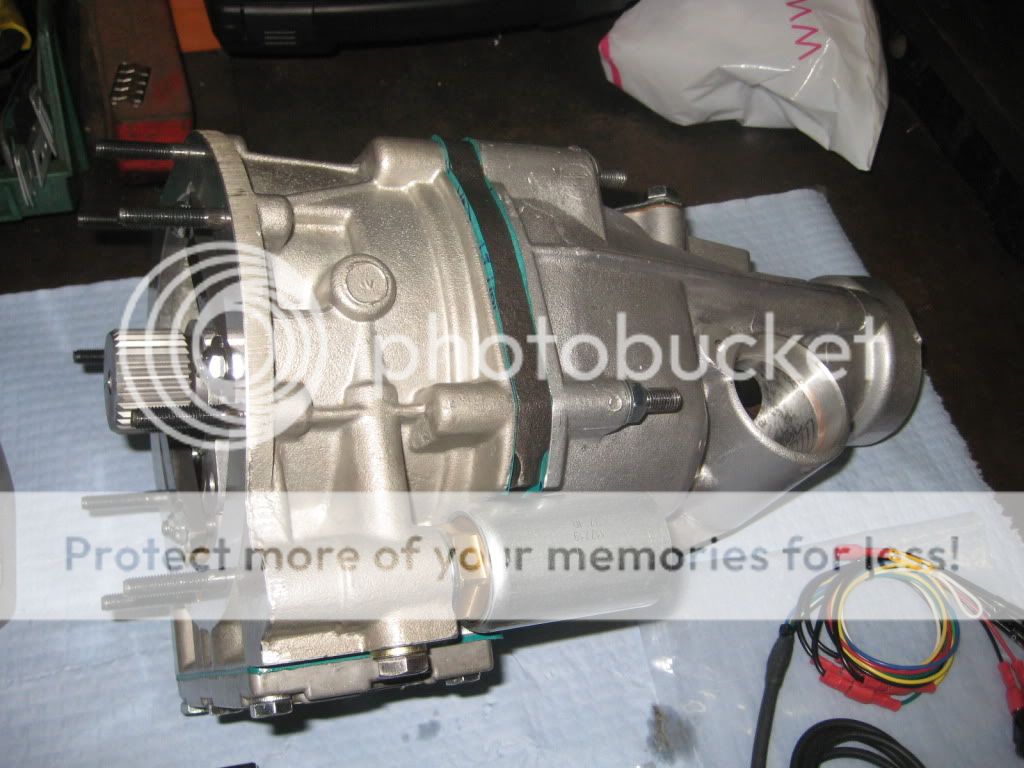
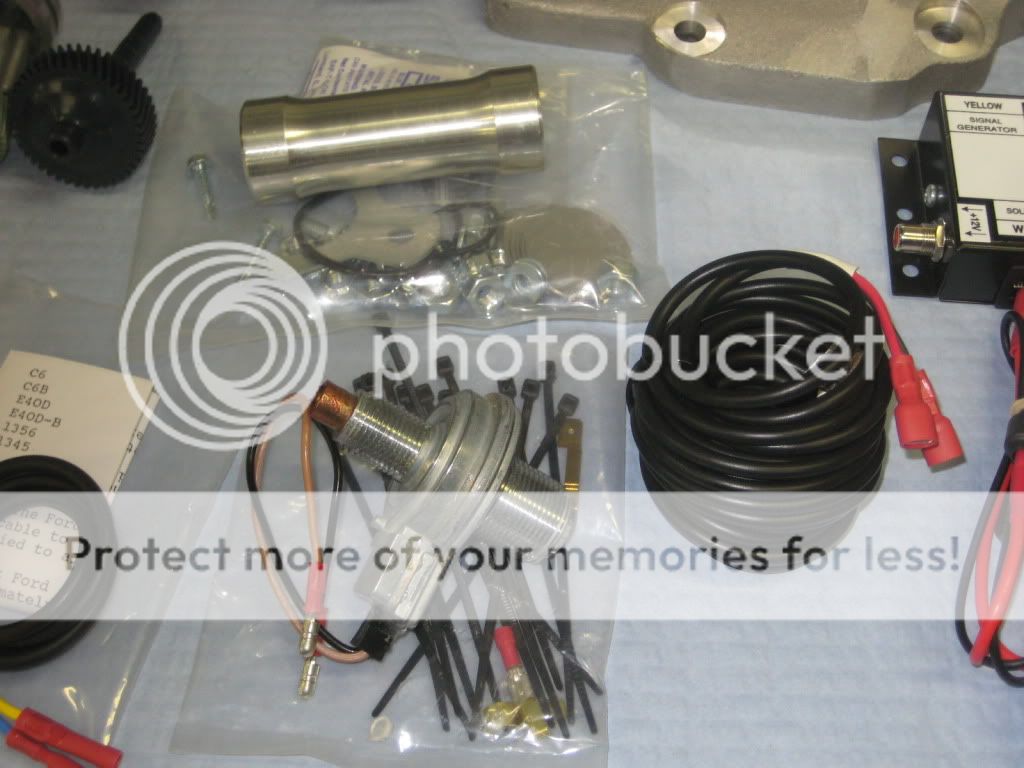
Overdrive unit itself. Uses planetry system and internal pump like an auto trans.


Control unit. Can be mounted hidden away as access is not required.


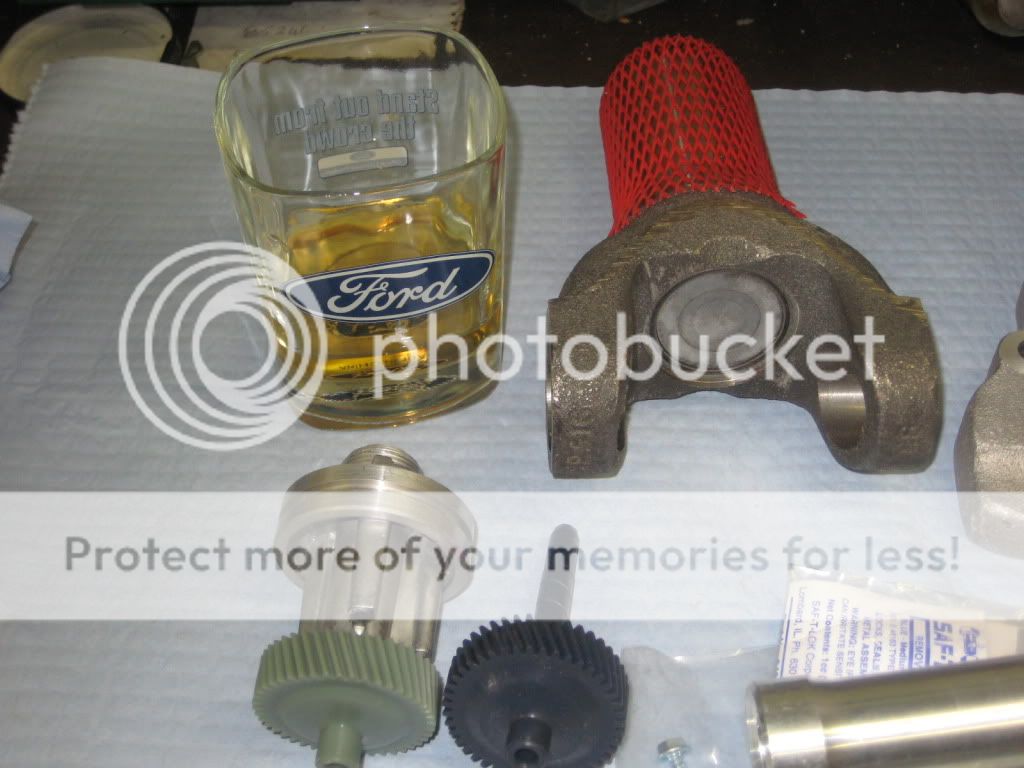
Supplied with new yoke and speedo drive uses TH400 plastic gears. They supply a gear to suit your rear end and tyre size. They also threw in another freebie gear for a smaller tyre size.


Normally supplied with an auto is the floor mounted switch on the left but they also threw in the shifter button in case I want to use that. Also in picture is the rocker switch with two lights connected to switch between modes. This is to be dash mounted.


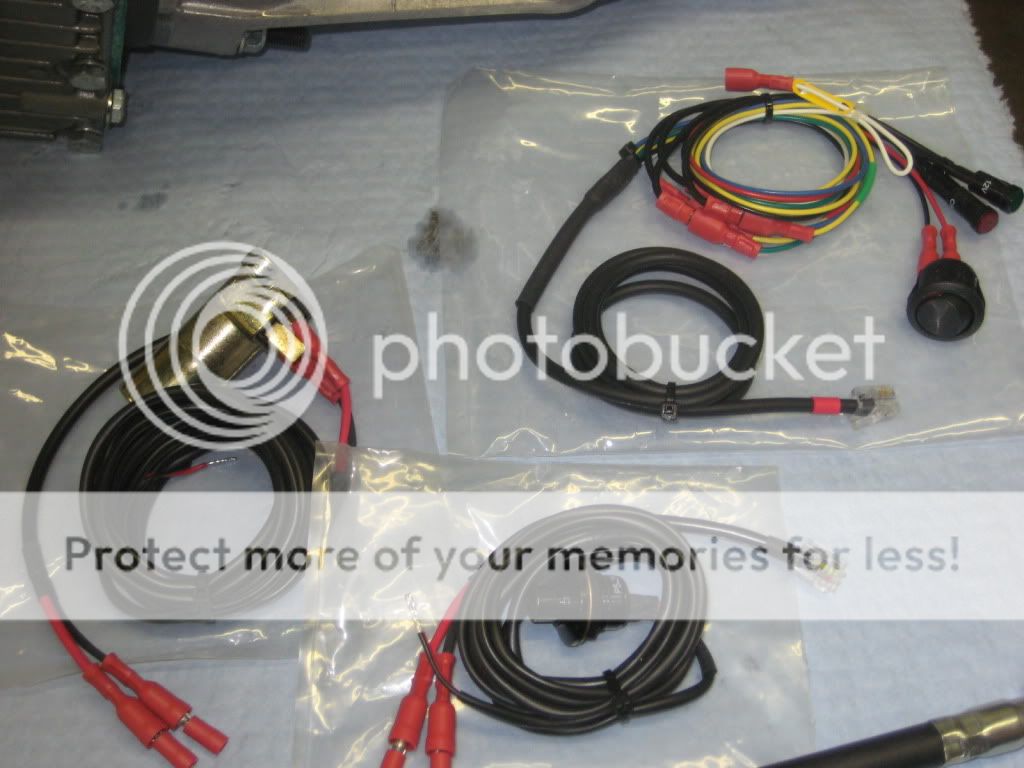
Seen in this pic is the speed sensor and Ford speedo cable adaptor. You keep your original speedo cable.


As the weather is now turning in Adelaide the Fairlane is coming out of its winter hiatus. I want to drive it for at least couple of weeks just to check over everything before I fit this unit.

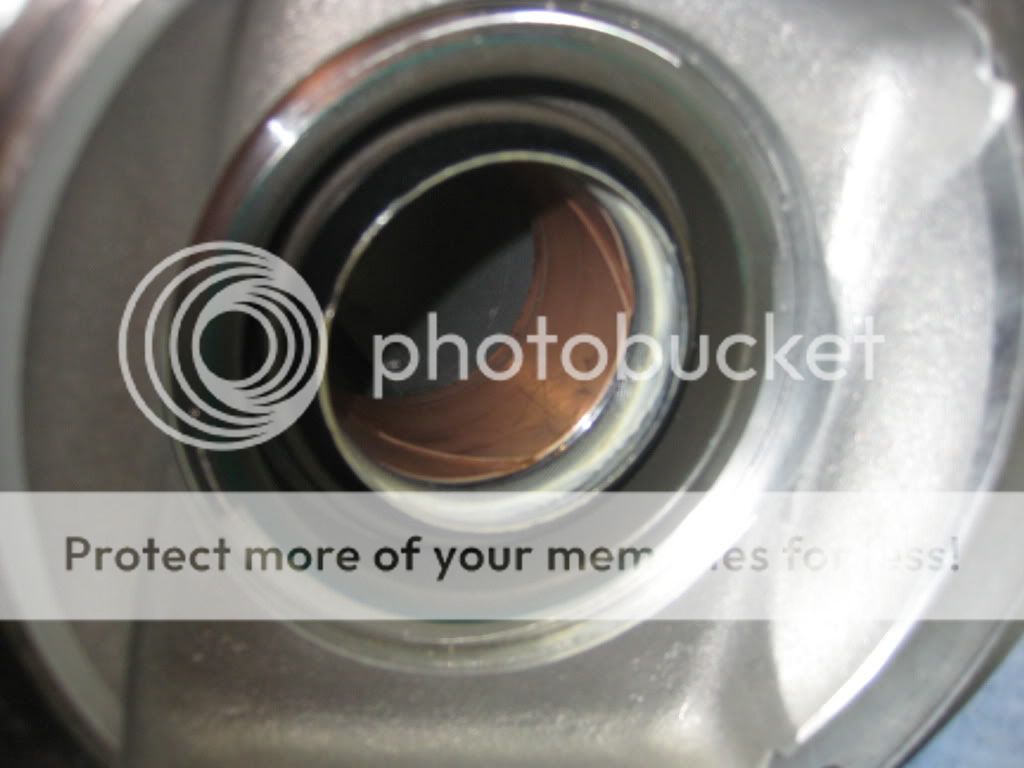
First issue is the adaptor. The coupler slides into the bush nicely until it reaches about 040" from exiting the bush on the inside. It then locks up pretty tight, will no longer rotate and takes much force to push through. I will phone them and seek a response but the inner section of the bush will need work as it is just way too tight.

Coupler inserted until it nips up.


Bush


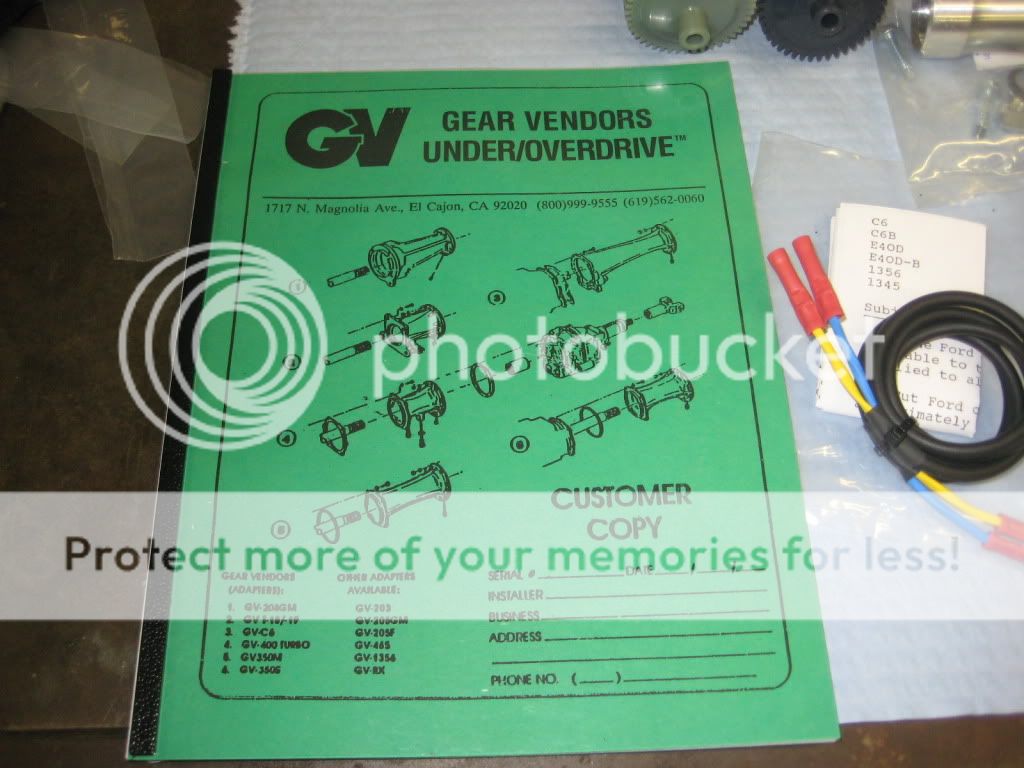
Manual is ordinary and looks like it was done by a computer novice 15 years ago (probably was). They should do better.
« Last Edit: January 19, 2018, 01:16:36 AM by 66FAIRLANE »

66FAIRLANE

  • Hero Member
  • *****
  • Posts: 558
  • Andy
    • View Profile
Re: Installing a Gear Vendors Overdrive to C6
« Reply #1 on: October 09, 2011, 10:56:05 PM »
As I am not doing the mechanical side just yet I thought I would find a place to mount the swith and indicator lights. Didn't really want to put any holes in the dash or console and I am not that fond of tacked on plates.

I have also never liked the factory clocks, I bet they never even worked that well when new! Most aftermarket stereos have clocks anyway.

Friday night I pulled out a spare clock, removed the facia and cut the back off it. I then machined up a new facia from aluminium and cut the holes to suit.


I then painted and fitted it to the modified clock housing.


New "clock" assembled in dash and is a totally reversible modification if the lights annoy me.


Hopefully I will get to the mechanical side soon. It has come out to play over the last few days (first drive since May) and I had forgotten how much fun it is, even with a 6000rpm limit due to weak valve springs (yes they are on the list).

66FAIRLANE

  • Hero Member
  • *****
  • Posts: 558
  • Andy
    • View Profile
Re: Installing a Gear Vendors Overdrive to C6
« Reply #2 on: October 09, 2011, 10:57:39 PM »
I spent some time on it over the weekend. Started out working the tight adaptor bushing with some fine wet and dry, concentrating on the inner most 1/4". about 15 min work had the coupler sliding all the way through the bush and rotating as it should.

Then jacked the car up, pulled crossmember and dropped exhaust off. Unbolted the original output housing and all went without incident. Except for the colourful language. Damn I want a hoist!

Before shot


Cleaned up the gasket surfaces with Prepsol and installed gasket dry as per instructions.

Adaptor next to original housing.


Tranny with no housing


Adaptor installed

66FAIRLANE

  • Hero Member
  • *****
  • Posts: 558
  • Andy
    • View Profile
Re: Installing a Gear Vendors Overdrive to C6
« Reply #3 on: October 09, 2011, 10:59:18 PM »
At this point I am really starting to worry about floorpan clearance. Looks like it is going to be very tight.

Next thing to do is install the coupler in the troublesome bush and check end float. You have to lay a straight edge across the face of the adaptor and measure back to the fully seated coupler and adjust end play. In one of their instructions it says to adjust to 0-.015" and in another it says .005-.035". They supply shims and you stack them in the coupler and replace on the output shaft to acheive desired result. All supplied shims are .024 so I don't know how you are supposed to get it spot on. Anyway mine checked out ok at .015 with 4 shims.

Supplied shims at .024


Coupler installed


Here is a pic showing the input side of the overdrive unit. Pump eccentric is clearly visible.


I then installed the speedo drive unit on the bench rather than under the car as per instructions.


Unit ready to slide under and bolt up.


Then its just a matter of installing the gasket and bolting it in place. Heavy little barsterd. Not as bad as doing a 9" centre though.
« Last Edit: October 09, 2011, 11:00:56 PM by 66FAIRLANE »

66FAIRLANE

  • Hero Member
  • *****
  • Posts: 558
  • Andy
    • View Profile
Re: Installing a Gear Vendors Overdrive to C6
« Reply #4 on: October 09, 2011, 11:02:26 PM »
I then jacked the trans up until it all hit the floor and went about reinstalling the crossmember. Let the fun begin. The crossmember has zero hope of bolting up to its original position. The interference with the floor means that the crossmember is sitting about 15-20mm lower than where it was. For now I have bolted it up with spacers. when the jack was let off the trans it eased on the mount and dropped off the floor about 10mm, about where I want it. At least it will allow me to measure the driveshaft length. Once I have the driveshaft in place I will measure the angles and if not too severe I will modify the crossmember to hold it in the lower position. I will also have to drop the exhaust right off and modify the balance pipe as it hits the overdrive unit and will not bolt back up.

H pipe interference.


Another pic of installed unit looking back.


Tailshaft ready to go out.


Gear Vendors told me it would bolt straight in with no trans tunnel interference although I was was warned by others on another forum I would need a hammer. I suppose I shouldn't complain about the fit as nothing is standard or original on this car. But this is definately not a straight forward installation.

Car will need a 1010mm tailshaft. From centre of slip yoke uni to centre of rear uni. The more expensive and harder to fit "shorty" option is starting to look good.

ToddK

  • Sr. Member
  • ****
  • Posts: 437
    • View Profile
Re: Installing a Gear Vendors Overdrive to C6
« Reply #5 on: October 09, 2011, 11:40:30 PM »
Nice work Andy, and good informative pics. I'm also interested to see how the drive shaft angle has changed, as well as how the car drives when it's all finished. I think the GV unit is a good option compared to fitting a complete new O/D trans, especially as it pretty much bolt on and can be reversed back to original if required.

66FAIRLANE

  • Hero Member
  • *****
  • Posts: 558
  • Andy
    • View Profile
Re: Installing a Gear Vendors Overdrive to C6
« Reply #6 on: October 10, 2011, 04:55:00 PM »
I haven't been able to spend much solid time on this lately. Sometimes life conspires to foil the hotrodder. Anyway I have been able to get an hour here and a couple of hours there and good progress has been made. I have also received my shaft back shortened, balanced, new 1350 weld yoke and new uni's.

I dropped the exhaust off and decided to modify the H pipe for clearence rather than cut it out. The only peice of pipe I had with a suitable radius was stainless so not having any gas for my mig at the moment some high nickel electrodes were in order. It doesn't look real neat but with the prospect of exhaust modifications to come I wasn't too worried.

Here is the peice welded in and fitted up.


Next thing I did was fit the short speedo cable to the OD unit and then fit the electrical speed sensor thingy (forgot what its called) and the Ford cable adaptor. Fit of the original speedo cable is strange as it just pushes in the cylindrical adaptor with the only thing retaining it a 'click' fit of the o-ring inside a groove. I wasn't too keen on this so I put a zip tie on it too. I have also just zip tied all this stuff up and out of the way and will neaten it all up later.


Wasn't all plain sailing though. Initially the original cable would not push in far enough to engage the o-ring groove. Small drive adaptor pin below required shortening by about .080".


I also dropped the unit back off the floor and got up there with some bars and stuff and tried to ease the floor where required. With this and the moving of a brake line I have been able to get the crossmember closer to it's original (well for this car) position. I have two heavy 5mm washers between the crossmember and the chassis. With these in place one side of the OD unit is touching the floor and the other is about (3mm) off.

You can see the washer installed here.


I then ran the wiring through a redundant heater hole for now and plugged everything in.


All thats left to do (after filling it and the C6 up with Dexron III) is to power up the control unit.


I will need to tidy up a lot of stuff and after measuring driveline angles I really need to get that crossmember back up to it's original spot and maybe then some. I want to drive it first and make sure everything is working ok. and then I will sort it. The unit will most likely have to come out again to massage the floor and I don't want to do it twice if there is something wrong. The exhaust will also need modification as it passes very close to the speedo cable and solenoid.

jayb

  • Administrator
  • Hero Member
  • *****
  • Posts: 7405
    • View Profile
    • FE Power
Re: Installing a Gear Vendors Overdrive to C6
« Reply #7 on: October 11, 2011, 08:36:52 PM »
Nice work Andy, and a really informative set of posts.  Thumbs up! :)
Jay Brown
- 1969 Mach 1, Drag Week 2005 Winner NA/BB, 511" FE (10.60s @ 129); Drag Week 2007 Runner-Up PA/BB, 490" Supercharged FE (9.35 @ 151)
- 1964 Ford Galaxie, Drag Week 2009 Winner Modified NA (9.50s @ 143), 585" SOHC
- 1969 Shelby Clone, Drag Week 2015 Winner Modified NA (Average 8.98 @ 149), 585" SOHC


rcodecj

  • Sr. Member
  • ****
  • Posts: 474
    • View Profile
Re: Installing a Gear Vendors Overdrive to C6
« Reply #8 on: October 12, 2011, 10:43:31 AM »
I've always wondered what quirks would be ran into in installing a gear vendors overdrive and although it isn't a mustang install, it is still the best writeup I've seen. Thanks for the info.

66FAIRLANE

  • Hero Member
  • *****
  • Posts: 558
  • Andy
    • View Profile
Re: Installing a Gear Vendors Overdrive to C6
« Reply #9 on: October 15, 2011, 04:20:30 AM »
Well...I measured my driveline angles with car in the air as it was during the install. The important thing is to have the car supported under the diff so it sits at approximate ride height. Doesn't really matter what angle the car is on.

After much research on driveline angles (and there is plenty of misinformation and lack of understanding out there) these are the rules I am playing by, There are only 2:

1) The output shaft of trans and input shaft of diff (yoke) should be parallel to within 1 to 1/2 a degree with the diff pinion being down that 1/2 to 1. Diff pinion angle is all a compromise. With a leaf sprung car the more hp and the more strip time it sees the more angle down on the diff pinion. As this is a street car I will shoot for the 1/2 to 1 degree down. This keeps the operating angles of front and rear unis very close to equal.

2) These shafts should be brought to within that tolerance in such a way as to try and ensure that the operating angle of the unis does not exceed 3 degrees. This is for a hottie. Standard passanger cars & 4wd's etc can tolerate angles up to 7, but angles within 1/2 to 3 degress are more desirable. Operating angles of 0 degrees are a no no.

End of story and no debate will be entered into. There is enough debate out there on other forums and beleive me I think I have read it all!

So here is a pic of driveline angles as measured with those 5mm spacers under the crossmember to 'clear' floor.


This means that either the output shaft or diff pinion has to come up about 4 degrees to make the angles parallel. If I take the pinion up 4 degrees then the operating angles of the unis become large (7 degrees). So obviously the desirable thing is to lift the output shaft, but the floor is in the way. Wanting to take it for a test drive without it shaking like a dog passing you know whats I made up some temporary 3 degree wedges to get the angles close.


Installed


Also the speedo cable hits the floor at a bad angle as is and some massaging here will be necessary also. The unit appears to be loosely based around a GM TH400. I don't know whether all GM transmissions have the speed output pointing up but it seems bloody silly.

Speedo cable into floor.


So I took it for a short drive around a long block. All working properly and I think I am really going to like it. I didn't get on it as they recommend a short break in period and I wasn't really confident of the diff wedges either. Some small vibes but hard to tell what it is with unit on the floor. It was really noticable stationary at idle and just noticable cruising along so it may just be the unit touching the floor.

I got home and am very keen to get the floor sorted and the unit up so I can drive it with confidence and get stuck into it. So out came the interior.


Unfortunately Where the tunnel need altering is right under a brace. Still thinking about this one.


It's Saturday night. I'm gunna go have a bourbon! Cheers.

jayb

  • Administrator
  • Hero Member
  • *****
  • Posts: 7405
    • View Profile
    • FE Power
Re: Installing a Gear Vendors Overdrive to C6
« Reply #10 on: October 16, 2011, 09:45:24 AM »
Looks good.  It's funny how those overdrives fit differently with different cars.  On my Mach 1 and my Shelby clone, I was able to get the overdrive up high enough in the tunnel to get decent driveshaft angles without doing any cutting.  But on my Galaxie, I had to cut a hole in the floor and weld in some sheet metal to make a bump, in order to get the overdrive unit up high enough.  You'd figure it would be the other way around, but for some reason the tunnel was big enough on the Mustangs, and not on the Galaxie.

By the way, I think you've come to the correct conclusions on the driveshaft angles.  The only thing I do different is I set my pinion angle down about 3 degrees, because I'll be running the cars hard on the track with race tires.  For your application, I think your angles are just about right.

Looking forward to the next installment...
Jay Brown
- 1969 Mach 1, Drag Week 2005 Winner NA/BB, 511" FE (10.60s @ 129); Drag Week 2007 Runner-Up PA/BB, 490" Supercharged FE (9.35 @ 151)
- 1964 Ford Galaxie, Drag Week 2009 Winner Modified NA (9.50s @ 143), 585" SOHC
- 1969 Shelby Clone, Drag Week 2015 Winner Modified NA (Average 8.98 @ 149), 585" SOHC


cammerfe

  • Hero Member
  • *****
  • Posts: 1659
    • View Profile
Re: Installing a Gear Vendors Overdrive to C6
« Reply #11 on: October 17, 2011, 01:03:38 PM »
Very informative and well documented!! I've had to do with several GV set-ups, and my own most recent one made use of the 'short' version. It surely helps to keep things compact. Mine went into my '63 F-100 ICB and there was plenty of room. The last one before that was in a '67 Fairlane GTA that had a 460 swapped in, and it required almost a total floor re-work. OOF!

KS

66FAIRLANE

  • Hero Member
  • *****
  • Posts: 558
  • Andy
    • View Profile
Re: Installing a Gear Vendors Overdrive to C6
« Reply #12 on: October 27, 2011, 10:25:08 PM »
Well...I finished the floor modifications but unfortunately the Minister for War deleted my photos off the camera and I now have the interior back in! I removed the brace and cut a slit down the the top of the tunnel about 8". Then cut perpendicular at each end down to near floor level. Opened up the tunnel and welded a strip back in down the top about 1-1/2" wide. Then patched up the rest. Luckily my console still just fits. I also had to pull the floor up where the speedo cable go's.

Measuring my new drive angles I had the trans at 5.5 deg and the diff at 3 deg (without temporary wedge plates). So I removed my temporary wedge plates and angle milled my lowering blocks 1 deg. This means my pinion is down 1.5 deg. I thought I would see how this go's as I can always cut some more angle.

I have again driven it briefly and it felt alright. However I didn't push it and kept the drive brief as the exhaust is now very close to solenoid and speedo cable. Speedo cable is also still on the floor even though I pulled it up a good 1/2". I am booked in with my exhaust guy in the morning to move the pipes and while they are off I will bash, I mean massage, the floor around the cable area some more. Then hopefully that will be it  ;D

66FAIRLANE

  • Hero Member
  • *****
  • Posts: 558
  • Andy
    • View Profile
Re: Installing a Gear Vendors Overdrive to C6
« Reply #13 on: November 03, 2011, 06:30:26 AM »
Well the verdict is in. I fknloveit! Probably only done about 80Km in it but I really do like it. Feels like you are driving a 'real' car again. I haven't tried splitting any shifts yet as the button is yet to find a home. It does seem slow to shift in at slower speeds and I haven't really tried it yet flat out at 'go directly to jail' speeds but I imagine it would shift faster as pump pressure would be up. It does shift out instantly as they claim.

Auto mode: I have been mainly leaving it in this. You turn the unit on with the button and it engages at 40mph. It operates similar to modern trans, staying in this mode all the time, even after ignition off and a restart. It will disengage at 20mph as per earlier stated as it works off hydraulic pressure supplied by the trans oiutput shaft. Reach 40mph again and in it go's.

Manual mode: Basically this means you have to engage the unit with the button. You can engage it at any speed above 20mph for the reason above. It of course disengages itself below 20 mph and when you speed up it is up to you again when to engage it.

It really makes the car a hell of a lot more comfortable to be in. Even tooling along along at 70kmh. It is still a bit weird with the high stall as you don't notice the OD too much when flashing the converter during acceleration or going up hill etc. But it still does work very well and is extemely noticable on flat sections. I can now cruise at 80kmh just under 2000rpm depending on the grade.

I think it will work even better later when I remove 500rpm or more of converter but it is still a fine addition even with 3500+rpm flash.  ;D  ;D

jayb

  • Administrator
  • Hero Member
  • *****
  • Posts: 7405
    • View Profile
    • FE Power
Re: Installing a Gear Vendors Overdrive to C6
« Reply #14 on: November 03, 2011, 08:36:17 AM »
I figured you'd like it, they are great units.  I prefer to leave mine in manual all the time, and just tap the foot switch to go in and out of overdrive as required.  One thing on the shifting is that if you use the recommended GM synthetic gear lube the shifting will be mushier.  Rick Johnson at Gear Vendors recommends normal automatic transmission fluid for performance applications.  Shifting is crisper, but certainly not objectionable like a hard shift kit in an automatic transmission.  According to Rick this change in fluid has no detrimental effects on the life of the overdrive.  As he explained it to me, the GM synthetic lube is designed for people using these things in motorhomes, where a shift that is as unnoticeable as possible is desired.
Jay Brown
- 1969 Mach 1, Drag Week 2005 Winner NA/BB, 511" FE (10.60s @ 129); Drag Week 2007 Runner-Up PA/BB, 490" Supercharged FE (9.35 @ 151)
- 1964 Ford Galaxie, Drag Week 2009 Winner Modified NA (9.50s @ 143), 585" SOHC
- 1969 Shelby Clone, Drag Week 2015 Winner Modified NA (Average 8.98 @ 149), 585" SOHC