I made steady progress this week without any big surprises, despite having limited time to work on the car and engine. Time is running out, though; in exactly five weeks from today, I need to be registering at the track in Topeka for Drag Week 2011! I am still optimistic I can make it, but what happens this coming week will really tell the tale, I think.
Last Monday night after my son's Scout meeting I got out to the shop and finished taking the Hilborn setup off the engine, and then pulled the heads. Of course I was concerned that I might find something dramatically wrong with the heads off, but fortunately everything looked pretty good. I could see carbon tracking between the cylinders indicating that the head gaskets were indeed leaking, but the O-rings and the cylinder liners themselves looked pretty good. The cylinder bores also looked good, but I was surprised at the amount of rust on the faces of the valves, particularly the exhaust valves. I expected to see a little of this because the engine has been together for a couple years, but it seemed that condensation over the winter had been particularly tough on the valves. I had been planning on just taking the heads in assembled and having them planed, but based on the valves condition I decided to take the heads apart. This didn't take long, and the good news was that the seats and the sealing faces of the valves looked pretty good. I loaded the heads and valves up in my truck for the stop the next day at the machine shop.
On Tuesday I dropped the heads and valves off, and arranged with Bryan at R&R Performance to plane the heads the minimum amount, and to bead blast the valves and then touch up their faces. Bryan promised to have them ready for me by noon on Friday. I also stopped by Clark's Copper Head Gaskets and picked up my new head gaskets before returning to work from my lunch break. Tuesday night after work I got back to work on the car itself. I decided to get the headliner installed; not my favorite job, but it needed to be done. I was able to get the headliner and bows put into place over top of the roll cage, and when pulled tight the headliner fit around the cage pretty nicely. That contact cement they give you with the headliner doesn't hold that well, but I was able to get the front of the headliner pulled tight and stuck to the front ceiling of the car. I installed the A pillar molding and the front headliner molding before I called it a night.
Wednesday night I had limited time in the shop but was able to get back out long enough to finish the headliner installation. There's some wrinkles in the headliner because I'm not using the factory padding between the headliner and the roof, but overall it looks OK.
Thursday night I had a free night again so I went back to working on the interior. I installed the sail panels that extend down from the headliner and the rear window in the rear of the interior. I also hooked up the interior lights to the sail panels and ran the wires into the door jamb channels. Then I started on the carpeting over the aluminum covered portion of the interior. I was able to get the big piece cut and installed by the end of the night; I used 3M Super 77 spray adhesive to glue it to the aluminum.
Friday at noon I stopped back at R&R and picked up the heads. I was surprised when Bryan told me that I had one slightly bent exhaust valve! Bryan hadn't marked them when he'd pulled them from the heads since they were all going to get refaced, so I didn't know what cylinder it was from. I decided I'd better have a closer look at the pistons to see if I could see any areas of valve contact before I re-assembled the heads and put them on the car. At home that night I took a closer look at all the cylinders, and I did find some odd markings in the carbon on piston #8. As I was puzzling over this it dawned on me that when we'd run the engine on the dyno with the sheet metal intake, we'd pulled the plugs at one point and found the gap on #8 had closed up. It seemed clear, putting these two pieces of information together, that something had gotten into the #8 cylinder, marked up the top of the piston as it was banging around in there, and closed up the plug gap. Maybe the exhaust valve that was bent had been the #8 valve, and this piece of debris had jammed between the piston and the valve at overlap, bending the head of the valve off center a little. There didn't appear to be any piston to valve contact on any of the pistons, so this was the only reasonable theory that I could come up with. And whatever had gone through the motor had gone through fast, because we hadn't heard anything funny when running the engine, and there weren't more than 10-15 marks in the top of the piston that indicated a foreign object's presence.
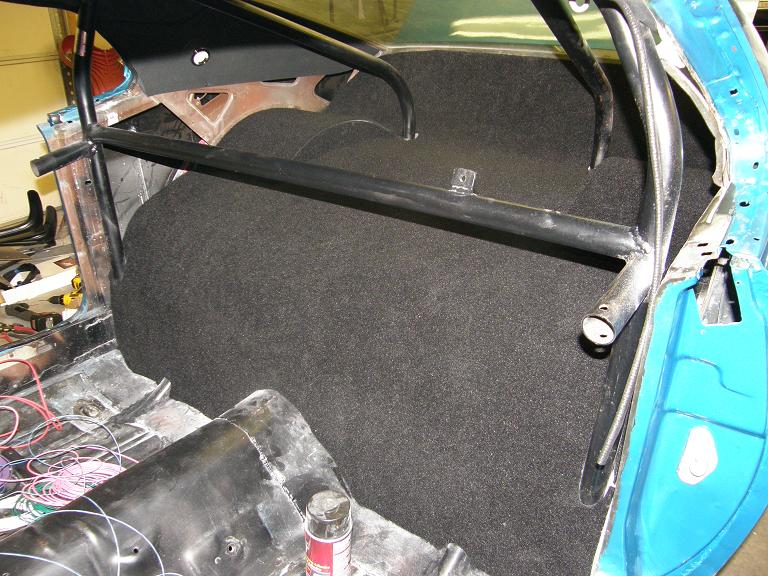
In any case I wasn't planning on putting the engine right back together on Friday night, so I spent the evening getting the carpeting all finished up in the back of the car, except for the side pieces that go up the walls of the interior. I left those off because I was planning on running the wires from the rear end up to the dash area and I wanted the access to pull the wire through. Here's a photo of the rear interior area of the car with the carpeting installed:
On Friday night I also got a start on the wiring to the rear of the car. I had purchased some Painless Wiring wire to match the colors that I had done of the CAD drawing of the wiring on the car, and also some of the wire wrap that Painless offers. This stuff is a LOT better than the cheap plastic convoluted tubing that you can buy at NAPA and lots of other places, and should offer much better abrasion resistance and protection for the wires. Friday night I started with the battery cable, and ran it from the main power shutoff switch up to the dash area, where I was going to install a terminal stud that would split the power to the starter, alternator, EFI box, and other under dash electronics.
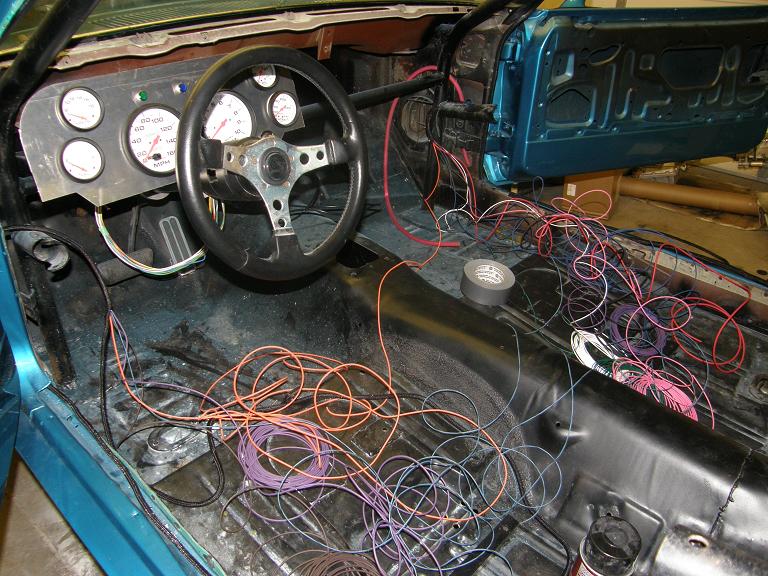
Saturday all day I was tied up with a Scout fundraising project, and didn't get home until 6:00 PM. I was pretty beat because I was outside all day, and it had been pretty hot and humid, but I did get back out to the shop for a couple hours and finished running all the wiring from the rear area of the car up to the dash. This included all the taillight wiring, plus wiring for the electric fuel pump and pump controller and relay. Here's a shot of the inside of the car up by the dash; it's pretty much a rats nest of wiring at the moment, but at least the wires are there now and can be connected when I start the under dash wiring in earnest:
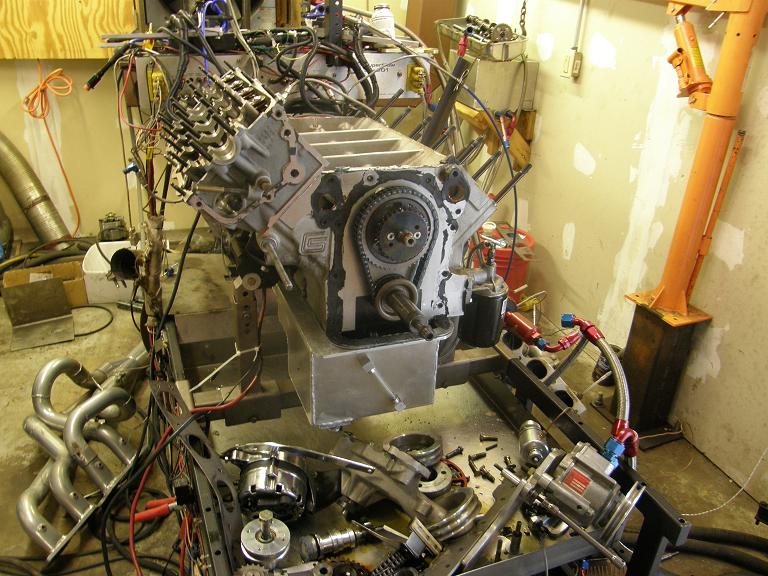
Sunday morning I had to run my son up to the local elementary school where his Scout troop was meeting to go on a week long camping trip. They took off for northern Minnesota around 9:00, and then finally I got back to re-assembling the engine. I did the right side head first, installing new valve seals, the touched up valves, and the springs I'd recently replaced prior to the last dyno session. Then I cleaned up the right side of the cylinder block, and installed and torqued the head in place with a new copper head gasket. At this point the engine looked like this:
A couple of hours later I had the other cylinder head installed and torqued in place. I had used a spare exhaust valve in the #8 exhaust valve position, since this was my best guess of where the bent valve had come from, but I guess with a fresh cut on the valves I could have probably put it anywhere. After the heads were installed I continued working on getting the front end of the engine together. I installed the front timing cover backing plate, and bolted it into position with the gaskets required between the heads and the plate, the block's water pump openings and the plate, and the block's standard FE timing cover gasket and the plate. I like to let the sealer dry on these gaskets for a few hours, because all the bolts have to be removed before the timing cover itself can be put on. This actually worked out pretty well, because I was due at the county fair at 5:00 to watch my daughter pick up all her 4H prizes. Both my son and daughter entered a lot of projects at this year's fair; Katie entered 22 categories, won 17 blue ribbons, and was grand champion in two of the categories. Max entered 14 categories, won 11 blue ribbons, and was also grand champion in two categories. The rocket I helped him with won the reserve champion for that category. Those kids really worked hard on those 4H projects, and while I helped a little, my wife really kept after them to put the projects together, so she gets the lion's share of the credit. It was too bad Max was off at Scout camp, because he couldn't pick up his awards himself. Katie picked them up for him; she was up at the awards line constantly LOL!
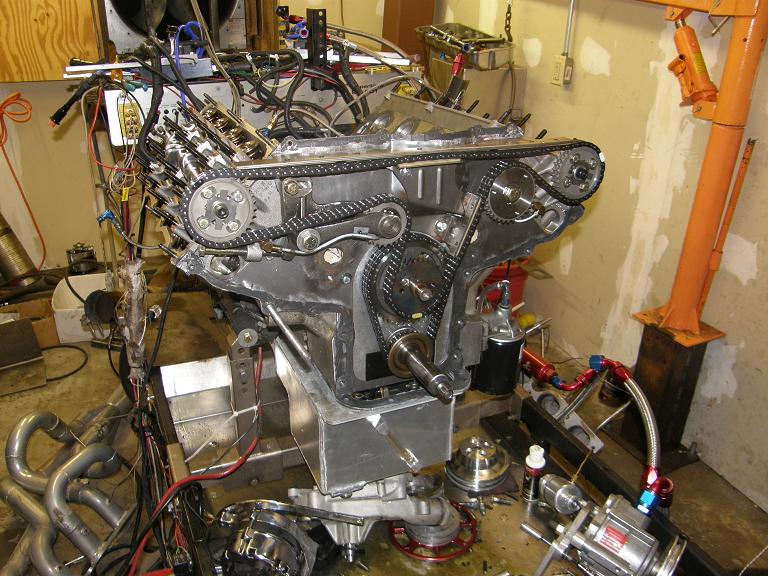
After the awards presentation I took a look around at the kid's projects in the 4H barn and sucked down some fair food of questionable origin before I took off back for home. My wife and daughter had to stay and pick up all the projects after the fair closed at 7:00, so I left them to get back to work on the engine. Tonight I worked on getting the chain drive all set up and timed, including getting the cams installed. When I called it a night tonight, the engine looked like this:
Most of the hard work on the engine assembly is now complete. I have tomorrow and Tuesday off from work, and I think I can get the remainder of the engine assembled tomorrow, and maybe even run it on the dyno before 8:00 PM tomorrow night. If not, I'll run it Tuesday morning, and it still looks like a good possibility that I will get the engine installed in the car by the end of the day Tuesday. By the end of next weekend, if things go according to plan, I should be onto the general wiring of the car, and will have a much better idea of when I'll be on the road. I'll post another update next Sunday.


