Three weeks ago I bought a new CNC machine. It is a monster compared to the one I have, and is easily capable of doing the machining on the FE intake adapters that I'm working on reproducing. It is a bigger machine than I was originally looking for, but actually all the machines I was looking at were going to require some modification of my shop to just fit inside it. The head on this machine goes up to 10 feet high when it's all the way up, and the inside of my shop on the ground floor is only a little over 8 feet high (except by the lift, but I'm not moving that), so I figured I had to cut a hole in the ceiling to make the machine fit. More seriously, the garage door opening, when all the trim is stripped away and the door itself is removed, is only 82" high, and the column on the machine is 86" high. So, I was going to have notch the side of the building so that the machine would fit through the door.
I bought the machine in Tulsa, OK, and had to arrange shipping, so I have had some time to get the shop modified. Two weekends ago I started moving stuff around. I had a steel welding bench that my pal Steve gave me several years ago that I really wasn't using effectively, so I found a home for all the stuff piled on top of it and moved it out into the driveway because Steve has some more room now and wanted it back. Then I moved my powder coating oven to where the steel bench had been, and also moved my bead blast cabinet to a different location. Finally I went down to the local rental place and rented a pallet jack, and moved my existing CNC machine over to where the powder coating oven and bead blast cabinet had been. I planned to put the new CNC machine where my old one had been.
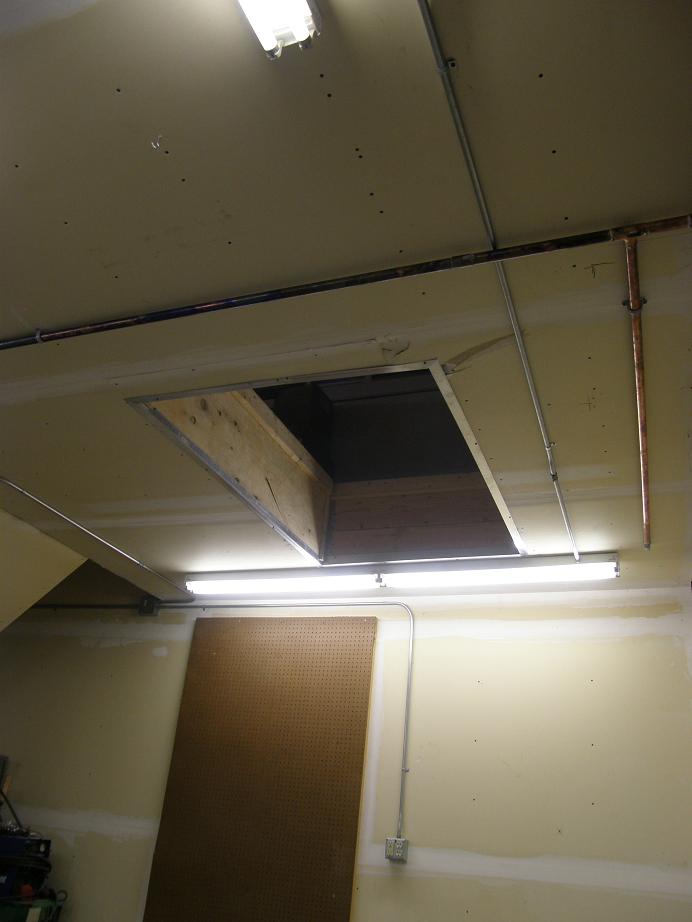
I spent weeknights the following week re-running new air lines and electrical lines to get my old CNC machine hooked back up again, because I was going to need it to finish the brackets on my high riser engine. Then last weekend I tackled the hole in the ceiling. This was no small task, because the ceiling contains a bunch of 18" tall trusses; they allow the new portion of my shop to be completely free of support poles. They span the entire 30 foot length of the shop, and I was going to have to cut two of them out of the way to make the hole in the ceiling that was needed. I started by supporting the ceiling on either side of the hole with temporary support poles, then cut the hole in the sheetrock, and then cut through the two trusses that had to be removed. The hole is fairly close to one wall, but at least twenty feet from the front wall where the garage door was, so I was concerned about supporting the two free hanging trusses on that end. I ended up taking an 8 foot 2X10 and sneaking it up into the ceiling and positioning it against the vertical truss supports, so that it contacted six of them. Then I screwed it in place with some 3" construction screws, so that in effect each of the free hanging trusses was supported by two other trusses. Then at the front and rear of the hole I screwed some 2X12s against each intact truss, and using joist hangers and more 2X10s boxed either end of the hole. I screwed through the 2X10s and into the ends of the cut trusses. Finally I put some 3/4" plywood against the long side of the holes, screwed into the outside trusses. After all that when I pulled the temporary steel posts out of there I still measured about 1/4" of ceiling sag that hadn't been there before. Hopefully it doesn't get any worse. Here's a photo of the hole in the ceiling, with the electrical lines reinstalled:
Earlier this week I had stripped off all the trim around one of my garage doors and measured the beam running across the top. The trusses actually rest on top of this beam, so structurally it is very important to the building. The idea of notching it made me nervous from a structural standpoint, but I figured that if I reinforced it with some steel plates on either side, bolted through the beam, it would regain its original strength after the machine was moved into the shop. I had originally figured that the beam was 84" off the floor, and I needed to cut a notch 90" tall and about 3 feet wide to give me enough room to get the machine into the shop on a fork lift. The beam measured 17" high and 6" wide, and is one of those micro-lam construction beams. I felt comfortable notching it by 6", as long as I could reinforce it with steel afterwards. However, after getting all the trim off the garage door, I was dismayed to find that the beam was only 82" high in the center of the garage door opening, and it was about 82 3/4" high on either end. So, it was sagging as it was, and I was going to have to cut 8" out of the beam, instead of 6".
This realization pushed me into plan B. Tuesday morning I ordered an 8" high, 20 foot long I-beam to install inside the garage, over the garage door opening. The plan was to support the trusses with this I-beam as a supplemental support device, so that when I took 8" out of the micro-lam beam to clear the CNC machine the I-beam could share the load of the trusses. The only real issue with this was the I-beam would be positioned about 8" from the end of the trusses, and of course you really want to support the trusses right at the end (where the micro-lam beam was). I decided to address this issue by screwing an 18" 2X4 vertically along the edge of each truss, right above where the I-beam would be positioned. This would provide support to the truss structure where the I-beam made contact.
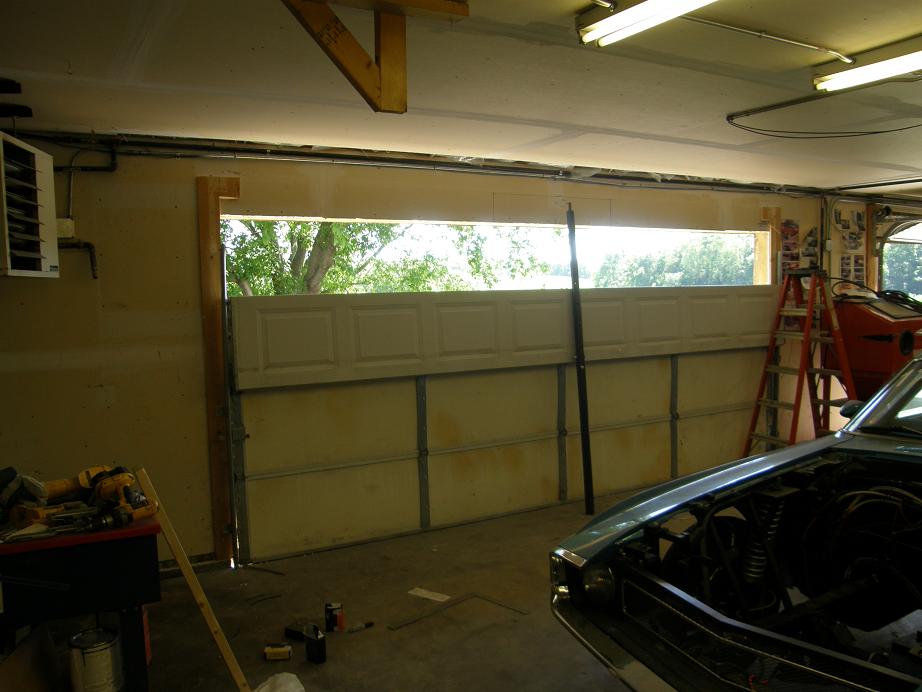
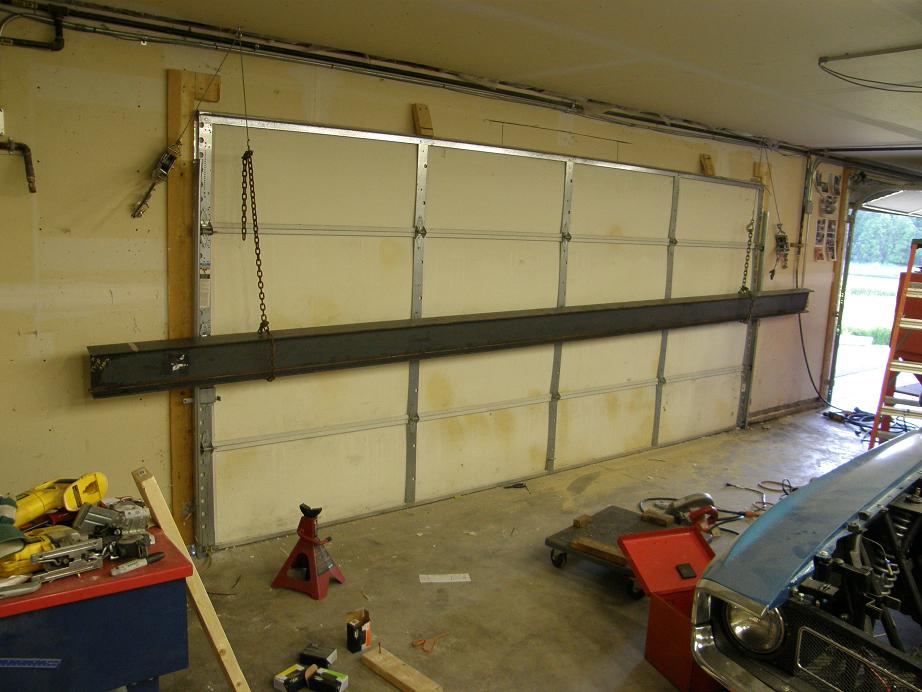
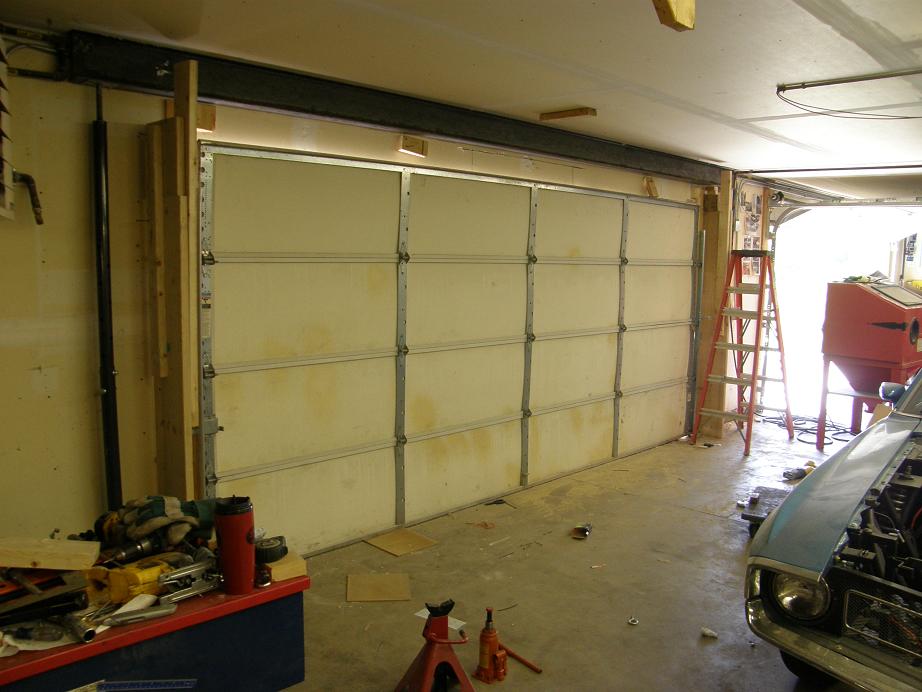
Friday afternoon the steel company dropped the I-beam in my driveway, and Saturday morning I got to work. Here's a photo from the inside showing the garage door opening with all the tracks removed and the top panel folded down, plus the sheetrock on the ceiling cut away so that the I-beam could fit up against the trusses:
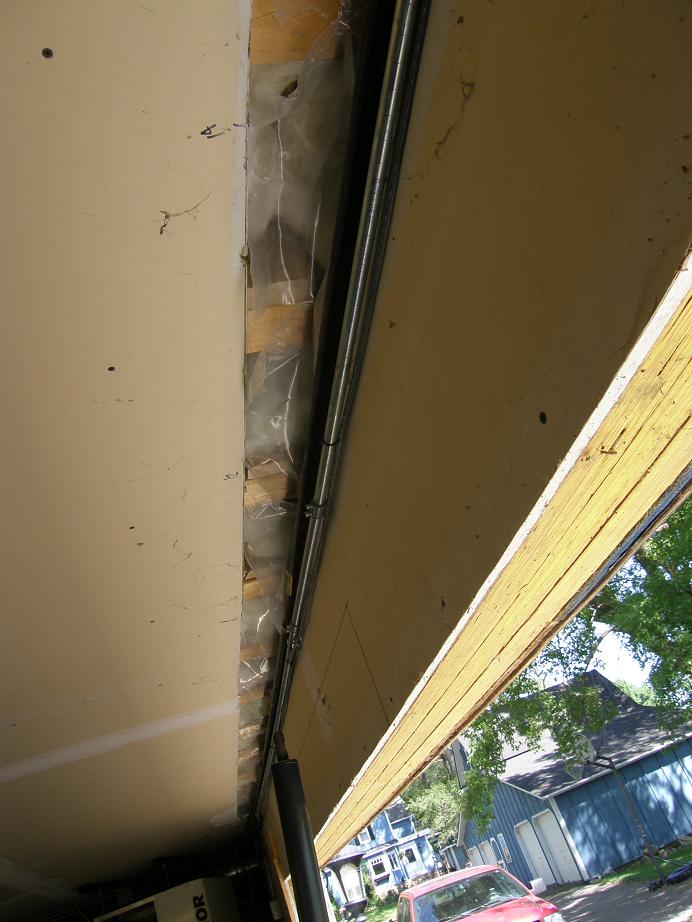
Here's a photo looking up at the hole in the sheetrock. You can see the bottom of the 2X4s that go up vertically from where the I-beam will fit, and screw into the sides of the trusses to provide support:
I rented a 10 1/4" circular saw to cut the notch through the 6" wide micro-lam beam, because my 7 1/4" saw wouldn't go halfway through the beam. I had to make the first cut with this saw on the inside of the garage before installing the I-beam, because after the I-beam was in place there would be no room to put the saw where it needed to be to make the saw cut. So prior to making the cut, I supported the outside of the micro-lam beam with some steel support posts:
I used two come-alongs to get the I-beam up in the air to about four and half feet. Here's the 460 pound I-beam suspended from the come-alongs and some screw eyes screwed into the trusses:
After I got the beam up a ways, I built a temporary support structure out of some 2X12s to position underneath the beam as a safety structure. As I pulled the beam higher and higher with the come-alongs, I would add height to the temporary support structure. This whole process was rather nerve wracking; I just don't trust come-alongs all that much. But I managed to get the beam up to within about a foot of the ceiling with them. From there I took another couple of the steel support poles and put them under the I-beam, then removed the come-alongs and associated hardware. The steel support poles have a 6" jackscrew on top of them, so from there I just jacked the beam up with the jackscrews. The steel support poles are adjustable in length, so I jacked the beam up 6", added more wood to the temporary supports, let the beam down, lengthened the support poles, and repeated until I had the I-beam in place. Here's a shot of the I-beam in its final position, held up by the steel support poles, with the wooden safety supports still in position:
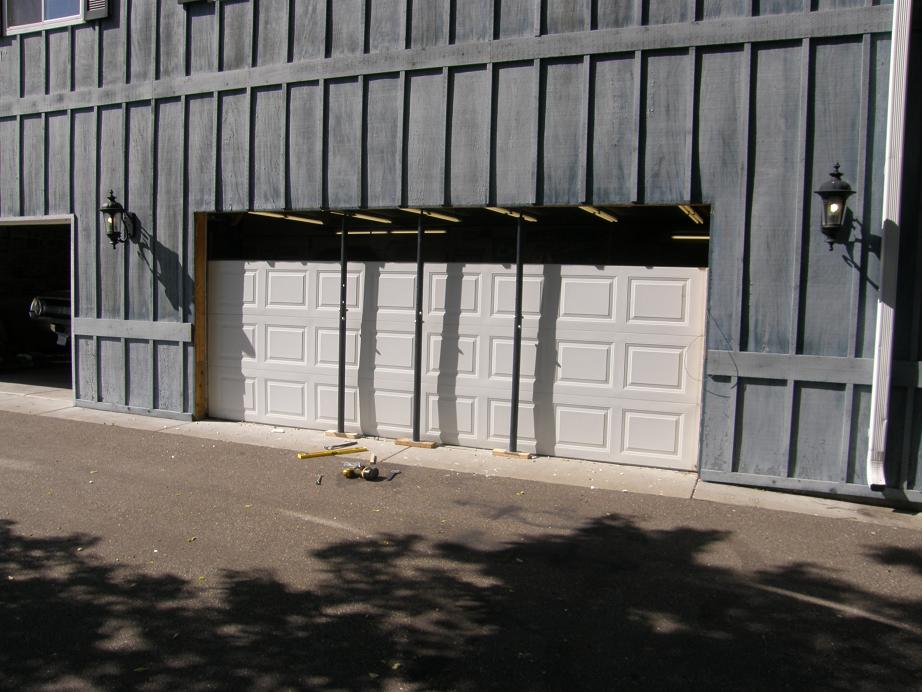
From there I installed some permanent 2X6 supports for the I-beam, then finished the cut in the micro-lam beam from the outside. Even the 10" circular saw had some spots where it didn't get completely through, so I finished those up with a hand saw, then knocked the cutout loose with a rubber hammer. Here's a shot of the outside of the garage door now, with the notch in the beam:
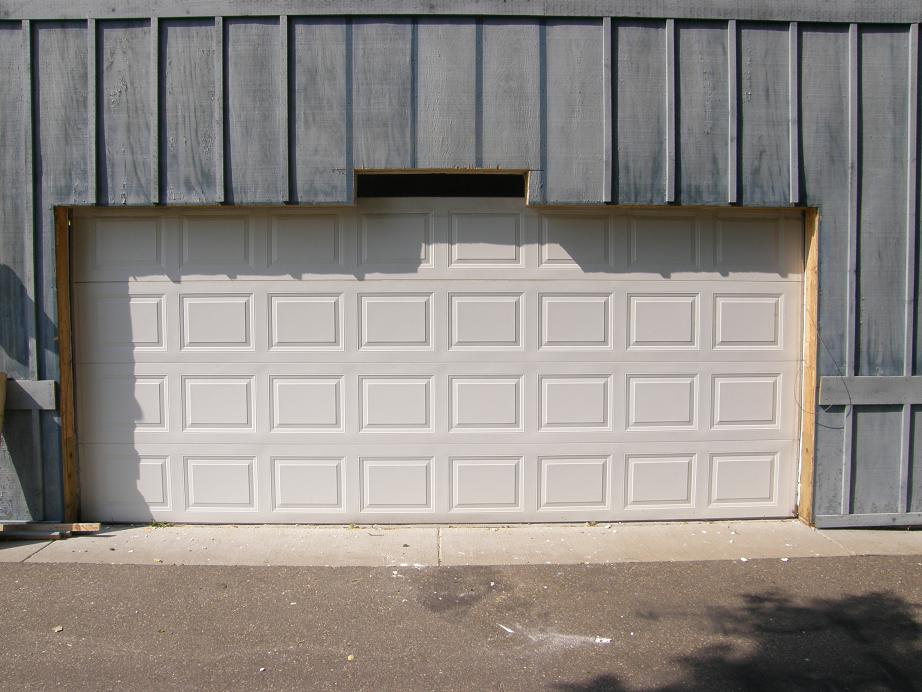
I was pleased to see that there was zero sag in the garage door opening after the modification. It took me all weekend to get to this point, working by myself. This week I need to do more reinforcement of the I-beam supports on the inside of the building, and get the place cleaned up. I think my CNC machine will be delivered on Friday this week. Once it is in place I can finally get back to my high riser project...


