151
Drag Week 2015 / Drag Week 2015 Day 3, Great Lakes Dragaway (Updated 9/18/15)
« on: September 17, 2015, 01:33:25 AM »
***********************Wednesdays events were added part of the way down the page****************
Before I get into what happened today, here are few more details about the positively hellish day on Tuesday. Leaving the hotel Tuesday morning, we were driving directly into the rising sun in the east, and with no defrosters in the car, and limited ability with my wipers and a towel to keep the windshield clear, I had to come to a dead stop about 50 yards after leaving the hotel parking lot; I just couldn't see well enough to drive. Eventually we got the windshield cleared and by shielding my eyes and sticking my head out the window, I finally got the car moving down the frontage road without hitting anything. Leaving the frontage road and going out onto the main road, we were again headed directly east, but with the surrounding traffic we were able to stay located in our lane and keep up safely with the traffic. But visibility of the road signs was pretty much non-existent, and as a result we ended up missing our turn to the North to get to the track. Turning my car around with the trailer attached is no mean feat, but we found a large enough parking lot to do it, and headed back the other direction at least we could see what we were doing. The delays got us to the track late, but only by a half hour or so.
At the track we got the car changed into race trim, and then I looked at the steering rack. I had suspected that it had moved, but a visual inspection didn't show anything real obvious. However, one of the nylon bushings that held the rack in place appeared to have gone slightly concave, and in the direction that would have caused the offset steering wheel I was dealing with. So, I loosened the clamps and with a hammer and drift, tapped the steering rack back in the opposite direction. It didn't even really appear to move, even after several hard taps, but looking at it closely afterwards it didn't appear pushed quite into the concave portion of the nylon bushing. I figured I'd done the best I could with that, so I tightened the clamps on the rack, put the car back on the ground, and took a test drive around the pits. I was very happy to see that the steering appeared to be back to normal, with no pulling in evidence.
I went over to the track restrooms to change into my racing gear, and then took the car out to the staging lanes. I was pretty excited about this, because I'd never had a chance to race at this famous track before. It was pretty cool going under the building and coming up to the burnout box, where so many famous racers had gone before. I basically planned to duplicate my run at Gateway, except maybe leave a little higher on the RPMs with the trans brake. On the launch, though, the car didn't feel the same as it had at Gateway, not quite as controlled. Nevertheless, it did go straight down the track, and my shift was on time, so overall it felt like a pretty good run.
As I came back down the return road I stopped at the timing shack, and the slip said 8.88 at 149. Just a little better than Gateway, which was cool. I continued down the return road, but just as I got even with the starting line, the car sputtered and died. I started it and it fired right up, but then quit again almost immediately. Then it refused to start at all. Great, what now?
I got out of the car and got some help from some of the guys hanging around the track to push the car out of the way of the return road. Eventually Joel and Jeff (Joel's helper, aka Trunk Monkey in Training) and I pushed the car all the way back to the pits so I could work on it. After first thinking it was the ignition switch and finding that to be functioning properly, I started checking the cam and crank sensors. The cam and crank sensors have a connector that screws on the end, and contains two LEDs. The green LED shows that the sensor has power, and the yellow LED flashes when the crank or cam spins. The crank sensor's yellow LED was not flashing when I turned the engine over, and when I pulled the connector to check the voltages on the pins, one voltage was not correct.
At this point, the problem was either the cable with the connector on the end was bad, or the voltages feeding the cable were no longer correct. The only way to figure out which was which was to pull the wiring harness out from under the dash. This is a real pain on my car, because its jammed in their pretty tight; here's a picture of the wiring panel removed, and sitting in front of the front seat:
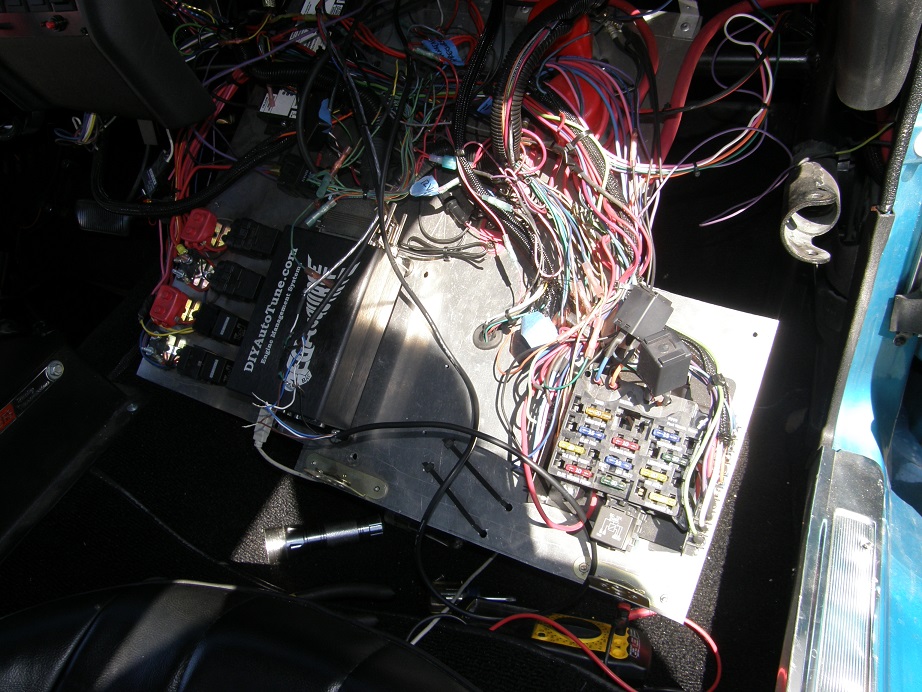
Quite a mess as you can see, but at this point I was able to confirm that the voltages feeding into the cable were correct. So, the problem had to be the cable itself.
This would have been a major problem except that I had ordered a spare cable and sensor a couple weeks ago, to bring with me on the trip. So, I pulled out my spare cable and began to wire it in. This was no easy task given where the cable had to be routed, and I just twisted and the taped the cable ends to the correct wires in the EFI system (rather than soldering or crimping them), but when I hit the key, the car started right up. Somewhat relieved, I worked on getting the wiring panel put back in the car, while Steve got the car ready for the road. We finally go out of Indy around 1:30. I counted myself lucky that the failure occurred after a good run; if it had happened before I'd gone down the track, I don't know if I'd have been able to get it fixed in time to make a pass on Tuesday.
Rather than starting off with the directions from Hot Rod to the next track, Steve and I headed back to our hotel from the previous evening. The FedEx package with my spare starters had arrived. Now I had the spares I needed in case the next starter gave up. There was a restaurant near the hotel, so Steve and I decided to have a quick lunch. We didn't have much to eat at all on Monday, and we wanted to avoid that same thing happening on Tuesday, because being hungry just tires you out all that much more. Finally by 3:00 we were back on the road headed for the track, and ready to start the 280 mile road trip.
Everything was going more or less according to plan until we hit the first check point. Going around the corner to get into the lot, we suddenly heard a very loud, screeching sound, like metal on metal. What the heck was that? We made it into the lot, stopped the car, and took the picture, which was the first order of business:
Next we pulled the car forward into a nearby parking lot, still making this horrible noise, and tried to figure out what was going on. I jacked up the front of the car and spun the front wheels, and they both seemed to be fine. But when I jacked up the rear end of the car, the rear tires were locked. For a moment I thought I'd blown the rear end out of the car. With Steve watching under the car, I decided to start it up and see where the noise was coming from. Steve stopped me immediately, and said it was the driveshaft hitting the driveshaft loop. I had just had a problem with that before I'd left for the event, and had clearanced the loops, but suddenly it was hitting again. I crawled under the car to look at everything, and tried to figure out what was going on. Then, suddenly, I saw it:

The photo shows my upper Watts link bar. The locknuts on the bar have come loose, and the bar was unscrewing itself from the rod ends. In the process it was getting longer, and forcing the rear end of the car towards the driver's side. Eventually, the driveshaft started hitting.
Thankfully, this was an easy fix. I just twisted the rod to screw the rod ends back in, and tightened the lock nuts. Problem solved! Steve and I were on our way.
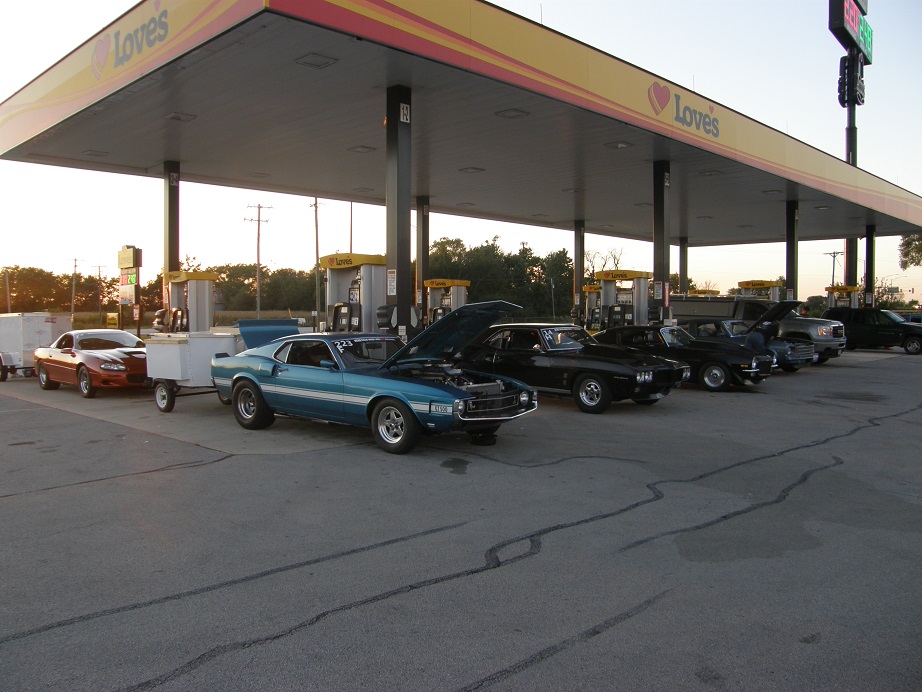
After we had traveled about 200 miles total for the day, we stopped to get gas at this truck stop, with a bunch of other Drag Week folks, including Vince Rasch (black Firebird), Norm (black Camaro), and Tom (blue Nova). Here's a picture of the gas station assemblage:
From this point we got onto the freeway, including an Illinois tollway. Unfortunately, the gas we got at this station proved to be of poor quality compared the fuel we had been getting on the road previously. Despite being 93 octane, the engine was prone to detonation with this fuel. Normally this engine will run easily on the 91 octane 10% ethanol blend that we get in Minneapolis, and it had run fine on other 93 octane fuels on this trip, but not the stuff. The engine would hardly idle, and when I had to stop to pay tolls it was a challenge to keep the engine running.
Finally though we got off the freeway and got some fuel from a different station, and the engine went back to behaving normally. We rode through a few county roads and into a small town to hit our second checkpoint of the day, at the 250 mile mark. However, just as we were approaching the checkpoint, the engine started to clatter a little. Ruh-roh... We made it to the check point and stopped to take a picture:
At the checkpoint we bumped into Kevin and his Shelby; Kevin was proceeding slowly with his 4.56 gears, but had been ahead of us because of our late start. We decided to go across the street from the checkpoint to a Big Lots parking lot, and see if we could figure out what was going on with the car. On the way across the street the clattering became noticeably louder. By the time I shut the car off, I was pretty convinced it was valvetrain. It was loudest coming from the left side, so after giving the car some time to cool, and resigning myself to the fact that, despite the late hour, I was in for a roadside repair, I pulled the right valve cover. This is what I saw:
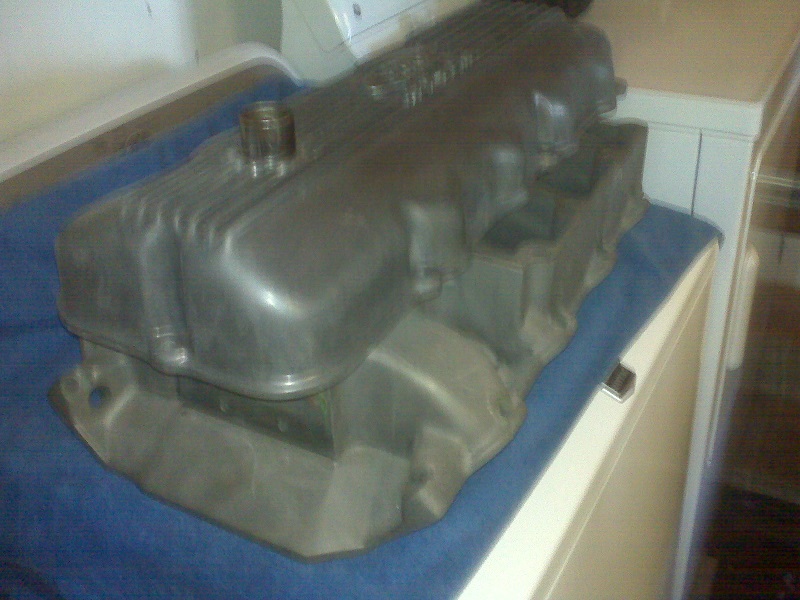
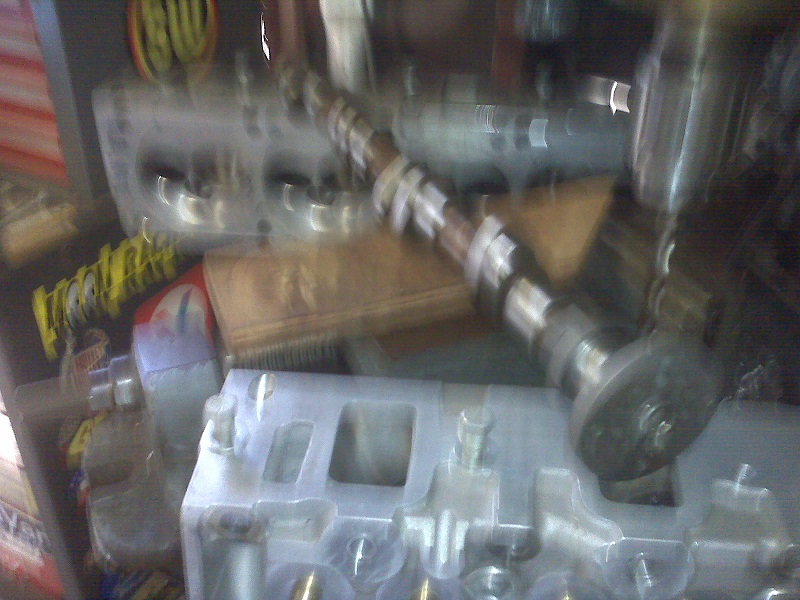
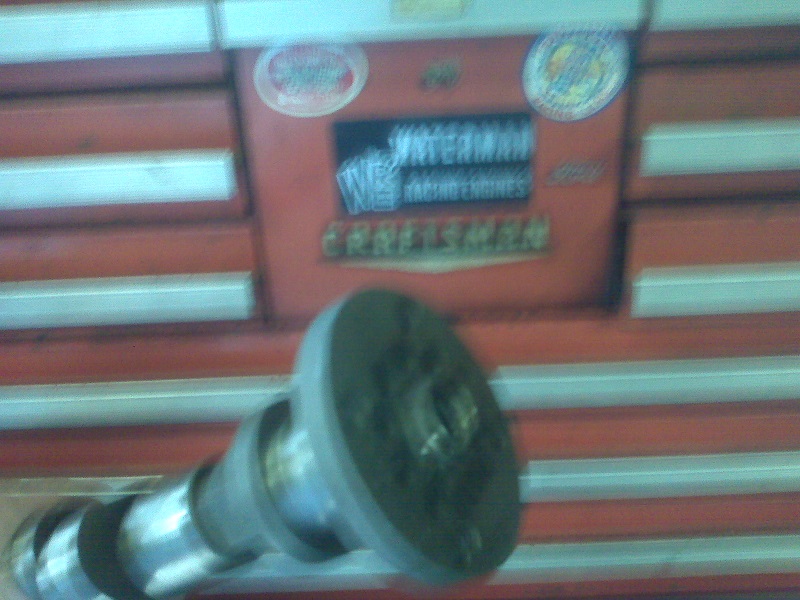
The #5 exhaust rocker is shot. The needle bearings in the roller wheel are completely gone, and the wheel banging on the cam lobe was the source of the noise. The cam lobed appeared to be somewhat scarred up, but it felt quite smooth, so I was pretty sure I could use it again, and didn't have to change cams (I did bring spares). Steve, Kevin and I set about the work to get the top end of the left head apart. Its no fun working on a hot motor in the dark, but we eventually got it apart. After removing the rockers and shafts, I went in there with a magnet and got the smashed bits of roller bearings out of the head. I was pleased to see that they had not made their way down to the oil drain at the back of the head yet, so probably the little shards of steel had not ended up in the pan.They all seemed to be localized right around the failed rocker. After carefully picking all that stuff out, I dug out a spare rocker arm and replaced the #5 exhaust rocker on the shaft. We re-assembled the top end of the engine, and thankfully on startup the engine sounded fine again. That failed rocker had really made some noise!
By the way, I saw some of the other posts on the failed rocker arm, and the rocker adjusters did not fail on this rocker. In fact, outside of the first batch of T&D rockers that I received, which had substandard adjusters, I have never had an adjuster failure. Bill Conley's videos prove that they smoke after a short period of time at high RPM, but I'm down the track in less than 9 seconds with this car, and don't think that its an issue.
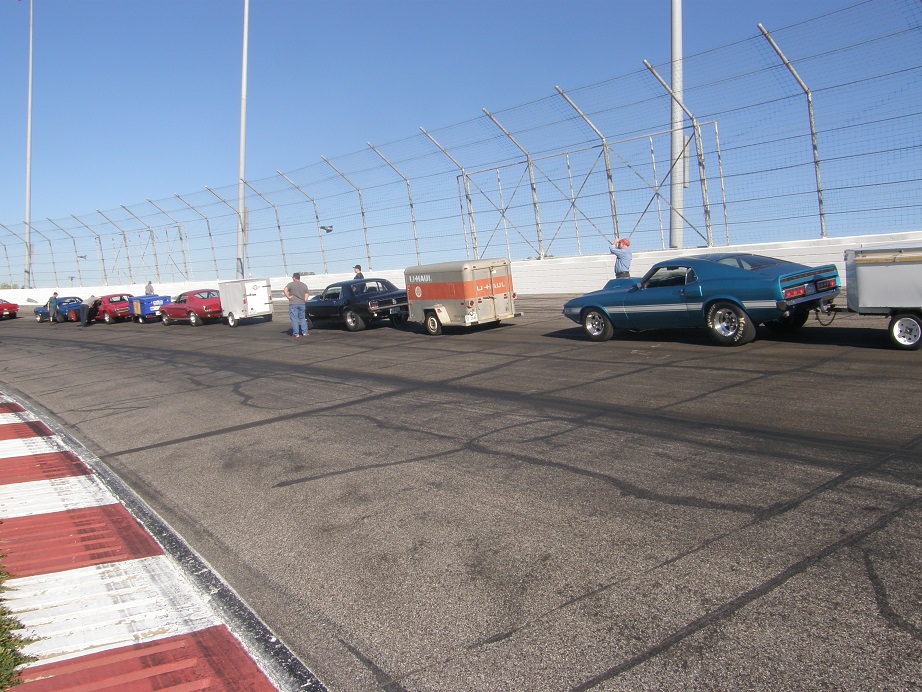
Here's a picture of the cars sitting in the parking lot during the repair:

We finally got back on the road around midnight, and made it through the rest of the route and to the hotel by about 1:00 AM. I put the quick post from yesterday up on the board, and then fell asleep as soon as my head hit the pillow.
This morning we were up at 6:30, ready to head to Great Lakes Dragaway for Day 3 of Drag Week. And I apologize, but I'm just going to have to finish this post tomorrow, because its 1:30 AM and I have to be up again tomorrow early for the race.
******************************* Updated from this point forward ******************
When we arrived at the track Great Lakes was jammed; I couldn't believe the number of spectators that showed up for the event. Someone told me that this track actually runs six days per week, which is really, really great for the local racers. Most of the rest of the competitors were already there and getting their cars ready, and cars were already going down the track too. Steve and I took our time getting the car ready to race, and I also had decided to do an oil change on the car, so we did that also. Finally I changed into my racing clothes and headed to the staging lanes about 10:00. We waited in the lanes for a while, and when I finally got to the head of the line they directed me to the right lane. I did a decent burnout and staged the car, hoping for a better launch than I'd had at Indy now that I'd found and fixed the problem with the Watts linkage. Unfortunately, when the car left it went right this time, and within 100 feet I was out of the groove and had to shut down. I decided to hot lap the car, and went right back around to the staging lanes, but it was now 10:30 and they had closed the lanes to the class cars, and were running the Street Machine Eliminator cars, so I had to go back to the pits and wait until noon for the open session.
Back in the pits Joel called me. Someone he knew who was familiar with the track had been watching the live feed, and called Joel to tell him that I'd lined up way to the right of the groove at the starting line. Great Lakes has a weird burnout box, that goes uphill, and the car tends to go right on the burnout. Apparently a lot of people (including me) were pulling straight forward out of the box; the groove did appear to be there because of the rubber, but there was probably no VHT on that area of the track. So if I got the right lane again it sounded like I should be lined up a couple feet to the left of where I'd been. A few other people told me that the left lane seemed to be a lot better than the right. When I got back up for the next session I decided I'd try to run the left lane.
While waiting for the Street Machine cars to run, Steve and I talked a little more about the car's tendency to go right on the first pass. When we'd made the repair to the Watts linkage on Tuesday, we hadn't really adjusted the loose link so that it was equal in length to the other link. I decided to get under the car and check that, and found that the rod I'd adjusted was now a good 1/2" shorter than the other rod. I loosened the nuts and readjusted the link so that they were the same. The driveshaft was now a lot closer to the loop than it had been, but I still had clearance, so I figured it would be OK.
In the pits, the number of spectators was unbelievable, people were just crowding around the cars. Brad Dyer came over to see how I was doing; he had run a 9.06, so the pressure was on me to make a decent pass next time around. We talked a little about our cars; Brad's weighs about 200 pounds more than my car does, but his weight distribution is better; my car is 58/42, pretty nose heavy despite the aluminum engine. Nevertheless, I'll bet Brad is making a little more power than my car, because he is running very similar times with a heavier car. Then I bumped into Roger Tangorra, who I raced against in Modified NA in my Galaxie back in 2009. Roger is a friend of Brad's and Curt Johnson's, and was driving Curt's dad's car back then. Then, sure enough Red Johnson came by and said hello. I think Red said he was 82 years old, and he's still out at the track! If I make it to 82, I want to be out at the track too.
I walked around the pits for a while and went over to see Brad's car, and talked with him for a while. He was still complaining about traction problems. Seems to me its a great sleeper car, a green Nova with a white top, single 4 dominator carb, etc. That engine makes some serious power to run in the 8s.
Finally they started calling the class cars back to the lanes, and I got in line right away. I wanted to have plenty of time to make several passes in case I continued to have problems. This time they steered me to the left lane, and I took my time to do a good burnout and make sure I was lined up in the groove at the starting line. However, I blew the launch on that pass; I revved the engine too high, then released the transbrake button as I was off the throttle, then got back on the throttle. The car stayed in the groove and ran 9.11 with a very poor 1.44 60'. Well, at least I had a pass that was not too far off of what the car was running, but after the first two days I'd been hoping for 8s at every track, and that wasn't getting it done. More importantly, that pass was not as fast as Brad's, so I'd be giving up some of the lead if I turned that one in. It was pretty much a no brainer to try again.
Back in the pits I did some checks on the car, including tire pressure, and then hopped back in to go up to the lanes. They were starting to clear out a little now; towards the end of the Drag Week race day, the track opens up more and more and you can get to the starting line a lot quicker. This time I only had to wait 5 minutes and I was back at the line, in the left lane again. This time the leave was good and the car felt really strong and... then it quit 100 feet down the track. Just like someone shut off a switch. As I coasted down the track I was sure that I had some kind of electrical problem. Maybe the crank sensor again? Or a short in one of the power wires, or maybe this was the ignition switch? The car finally rolled to a dead stop on the track, and I was just about to get out and wave for a tow, but just for grins I put the car in park and tried the key. The engine fired right up! WTF??
I put the car in gear and drove back to the pits. Was the problem fuel? I had Steve splash another couple gallons of race fuel in the tank just to be certain, checked a few other things, and didn't find any issue. I went out to try again, hoping that the issue was intermittent and I could get a good pass in. But the same thing happened again; out probably 50 or 60 feet, the car just quit again. This time I slammed on the brakes instead of coasting down the track, jammed it into park, hit the key, and the car started right up again. I drove back to the pits pretty much mystified by the car's behavior.
Back in the pits I decided that I'd better run a datalog on the EFI system during the next pass to see if I could figure out what was going on. Logically it seemed like an electrical problem, but I couldn't shake the feeling that it was fuel related. I looked in the tank and sure enough there was plenty of fuel in there, but after getting set up to run the datalog I thought that to eliminate any fuel pump issue, I could just hard wire the electric fuel pump to the battery to eliminate that possibility. This was going to be pretty easy because I have an Aeromotive fuel pump controller in the trunk. This controller gets four wires for the fuel pump: power and ground from the battery to the controller, and power and ground from the controller to the pump. All four wires were connected to the controller via a four position terminal block. I could just remove the wires from the terminal block and tie them together. I opened the trunk and looked at this setup, and just instinctively reached in to tug on the wires. To my surprise, one of the ground wires pulled right out of the terminal block! I let go of it, and the tension of the wire put it right back in place! Ah HAH! I got a trouble light and looked at the terminal block, and sure enough, the screw for the wire had backed out a little. It looked like when I accelerated, the inertial force on the wire pulled it far enough out of the terminal block to kill the fuel pump. Then, when the car slowed down, the wire popped back into place and made contact.
I loosened the screw even more, shoved the wire back into its spot on the terminal block, and tightened the heck out of the screw. I wasn't 100% sure that this was the problem, but it sure looked like it. At this point I was running out of time; less than one hour remained for me to make a pass. I quickly got the car ready to go and went up to the staging lanes. There was almost nobody there, so I just stopped in the lanes long enough to get strapped in and get my helmet on, and I was motioned up to the burnout box. I did my normal burnout, staged the car, started the datalogger, and pulled into the beams. The car launched really hard and straight, and this time it didn't quit! I had a good run going and I knew it. The shift light flashed, and I went for second - and inexplicably went right by into neutral! The engine banged off the rev limiter as I pulled the lever back to second and continued down the track. I was filled with rage; how could I have screwed up that shift??
As I came down the return road I had already decided to hot lap the car; I was just angry with myself about missing that shift, and I was not going to let that pass stand. At the timing shack they gave me the slip, and the car had run a 1.282 60 foot time, best ever. I was on my way to at least an 8.80 pass before I shoved that shifter too far forward. I kept going right down the track road to the staging lanes, and it was a good thing that nobody got in my way, because I was in the mood to run something over. I didn't event take off my belts and helmet or pull down the window net, and there was nobody in line, so I rolled right around to the left lane burnout box again. I did the burnout and pulled to the line, and tried to leave exactly the same way as before. The launch was good, but not as good as the previous one. This time I paid attention and did not miss the shift. As I crossed the finish line I knew I had a good pass. Coming around to the timing shack Joel was standing there and gave me a thumbs up. The slip said 8.943@ 150.00 MPH. Finally! A pass that should keep me ahead of Brad in the race.
When I got back to the pits I got out of the car and relaxed for a few minutes, but then I heard a piece of bad news. Someone told me that Brad's car was on the trailer! He came up a couple minutes later to congratulate me on the pass, and said he broke a connecting rod and was done. I sure could empathize with him on that, based on what happened to me last year. Brad and I had been having a good race, and at this event its good to have someone pushing you to go faster, so I felt like it was a loss for both of us. No one wants to win at Drag Week because the other guy breaks. I gave Brad my condolences, and wished him luck on the repair. He's a really nice guy, and a great competitor, and I hope I see him again next year at Drag Week.
After relaxing for a while I turned in my time slip and Steve and I got the car back in street trim. The directions said it was only a 160 mile trip today, which seemed pretty easy after 260 miles and 285 miles the first two days. Of course, the directions were screwed up, and they missed counting a 22 mile section in the middle, but it was still a fairly short trip. With his 4.56 gears Kevin was running slower than Joel and I during the trips between tracks, but we ran with him for a while Wednesday afternoon. Here's a shot of his car ahead of mine, through the windshield:
A few miles down the road we hit the checkpoint, a drive-in:
We made it to Cordova around 8:00 PM, and went right by the track and across the river into Iowa towards our hotel. We stopped at a local place called Sneaky Pete's for dinner. I thought it was fitting that I get a picture of my SOHC powered car, in front of Sneaky Pete's:

We got back to the hotel by about 11:30, and I typed my blog for a while but then got really tired and hit the sack by 1:30 AM. Sorry I had to type the second half of this post later, I just couldn't get it done Wednesday night.
Before I get into what happened today, here are few more details about the positively hellish day on Tuesday. Leaving the hotel Tuesday morning, we were driving directly into the rising sun in the east, and with no defrosters in the car, and limited ability with my wipers and a towel to keep the windshield clear, I had to come to a dead stop about 50 yards after leaving the hotel parking lot; I just couldn't see well enough to drive. Eventually we got the windshield cleared and by shielding my eyes and sticking my head out the window, I finally got the car moving down the frontage road without hitting anything. Leaving the frontage road and going out onto the main road, we were again headed directly east, but with the surrounding traffic we were able to stay located in our lane and keep up safely with the traffic. But visibility of the road signs was pretty much non-existent, and as a result we ended up missing our turn to the North to get to the track. Turning my car around with the trailer attached is no mean feat, but we found a large enough parking lot to do it, and headed back the other direction at least we could see what we were doing. The delays got us to the track late, but only by a half hour or so.
At the track we got the car changed into race trim, and then I looked at the steering rack. I had suspected that it had moved, but a visual inspection didn't show anything real obvious. However, one of the nylon bushings that held the rack in place appeared to have gone slightly concave, and in the direction that would have caused the offset steering wheel I was dealing with. So, I loosened the clamps and with a hammer and drift, tapped the steering rack back in the opposite direction. It didn't even really appear to move, even after several hard taps, but looking at it closely afterwards it didn't appear pushed quite into the concave portion of the nylon bushing. I figured I'd done the best I could with that, so I tightened the clamps on the rack, put the car back on the ground, and took a test drive around the pits. I was very happy to see that the steering appeared to be back to normal, with no pulling in evidence.
I went over to the track restrooms to change into my racing gear, and then took the car out to the staging lanes. I was pretty excited about this, because I'd never had a chance to race at this famous track before. It was pretty cool going under the building and coming up to the burnout box, where so many famous racers had gone before. I basically planned to duplicate my run at Gateway, except maybe leave a little higher on the RPMs with the trans brake. On the launch, though, the car didn't feel the same as it had at Gateway, not quite as controlled. Nevertheless, it did go straight down the track, and my shift was on time, so overall it felt like a pretty good run.
As I came back down the return road I stopped at the timing shack, and the slip said 8.88 at 149. Just a little better than Gateway, which was cool. I continued down the return road, but just as I got even with the starting line, the car sputtered and died. I started it and it fired right up, but then quit again almost immediately. Then it refused to start at all. Great, what now?
I got out of the car and got some help from some of the guys hanging around the track to push the car out of the way of the return road. Eventually Joel and Jeff (Joel's helper, aka Trunk Monkey in Training) and I pushed the car all the way back to the pits so I could work on it. After first thinking it was the ignition switch and finding that to be functioning properly, I started checking the cam and crank sensors. The cam and crank sensors have a connector that screws on the end, and contains two LEDs. The green LED shows that the sensor has power, and the yellow LED flashes when the crank or cam spins. The crank sensor's yellow LED was not flashing when I turned the engine over, and when I pulled the connector to check the voltages on the pins, one voltage was not correct.
At this point, the problem was either the cable with the connector on the end was bad, or the voltages feeding the cable were no longer correct. The only way to figure out which was which was to pull the wiring harness out from under the dash. This is a real pain on my car, because its jammed in their pretty tight; here's a picture of the wiring panel removed, and sitting in front of the front seat:
Quite a mess as you can see, but at this point I was able to confirm that the voltages feeding into the cable were correct. So, the problem had to be the cable itself.
This would have been a major problem except that I had ordered a spare cable and sensor a couple weeks ago, to bring with me on the trip. So, I pulled out my spare cable and began to wire it in. This was no easy task given where the cable had to be routed, and I just twisted and the taped the cable ends to the correct wires in the EFI system (rather than soldering or crimping them), but when I hit the key, the car started right up. Somewhat relieved, I worked on getting the wiring panel put back in the car, while Steve got the car ready for the road. We finally go out of Indy around 1:30. I counted myself lucky that the failure occurred after a good run; if it had happened before I'd gone down the track, I don't know if I'd have been able to get it fixed in time to make a pass on Tuesday.
Rather than starting off with the directions from Hot Rod to the next track, Steve and I headed back to our hotel from the previous evening. The FedEx package with my spare starters had arrived. Now I had the spares I needed in case the next starter gave up. There was a restaurant near the hotel, so Steve and I decided to have a quick lunch. We didn't have much to eat at all on Monday, and we wanted to avoid that same thing happening on Tuesday, because being hungry just tires you out all that much more. Finally by 3:00 we were back on the road headed for the track, and ready to start the 280 mile road trip.
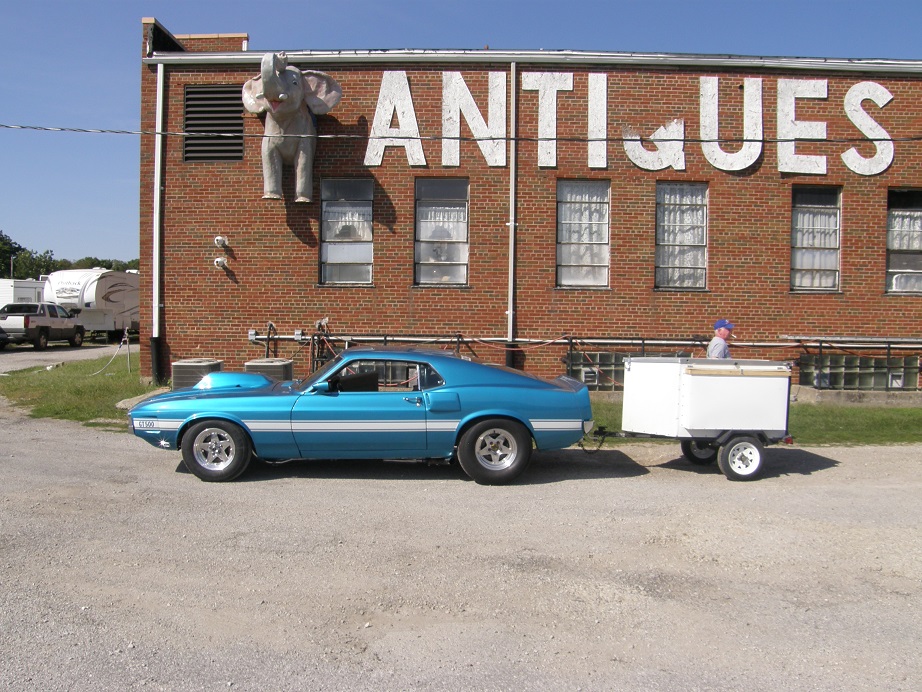
Everything was going more or less according to plan until we hit the first check point. Going around the corner to get into the lot, we suddenly heard a very loud, screeching sound, like metal on metal. What the heck was that? We made it into the lot, stopped the car, and took the picture, which was the first order of business:
Next we pulled the car forward into a nearby parking lot, still making this horrible noise, and tried to figure out what was going on. I jacked up the front of the car and spun the front wheels, and they both seemed to be fine. But when I jacked up the rear end of the car, the rear tires were locked. For a moment I thought I'd blown the rear end out of the car. With Steve watching under the car, I decided to start it up and see where the noise was coming from. Steve stopped me immediately, and said it was the driveshaft hitting the driveshaft loop. I had just had a problem with that before I'd left for the event, and had clearanced the loops, but suddenly it was hitting again. I crawled under the car to look at everything, and tried to figure out what was going on. Then, suddenly, I saw it:
The photo shows my upper Watts link bar. The locknuts on the bar have come loose, and the bar was unscrewing itself from the rod ends. In the process it was getting longer, and forcing the rear end of the car towards the driver's side. Eventually, the driveshaft started hitting.
Thankfully, this was an easy fix. I just twisted the rod to screw the rod ends back in, and tightened the lock nuts. Problem solved! Steve and I were on our way.
After we had traveled about 200 miles total for the day, we stopped to get gas at this truck stop, with a bunch of other Drag Week folks, including Vince Rasch (black Firebird), Norm (black Camaro), and Tom (blue Nova). Here's a picture of the gas station assemblage:
From this point we got onto the freeway, including an Illinois tollway. Unfortunately, the gas we got at this station proved to be of poor quality compared the fuel we had been getting on the road previously. Despite being 93 octane, the engine was prone to detonation with this fuel. Normally this engine will run easily on the 91 octane 10% ethanol blend that we get in Minneapolis, and it had run fine on other 93 octane fuels on this trip, but not the stuff. The engine would hardly idle, and when I had to stop to pay tolls it was a challenge to keep the engine running.
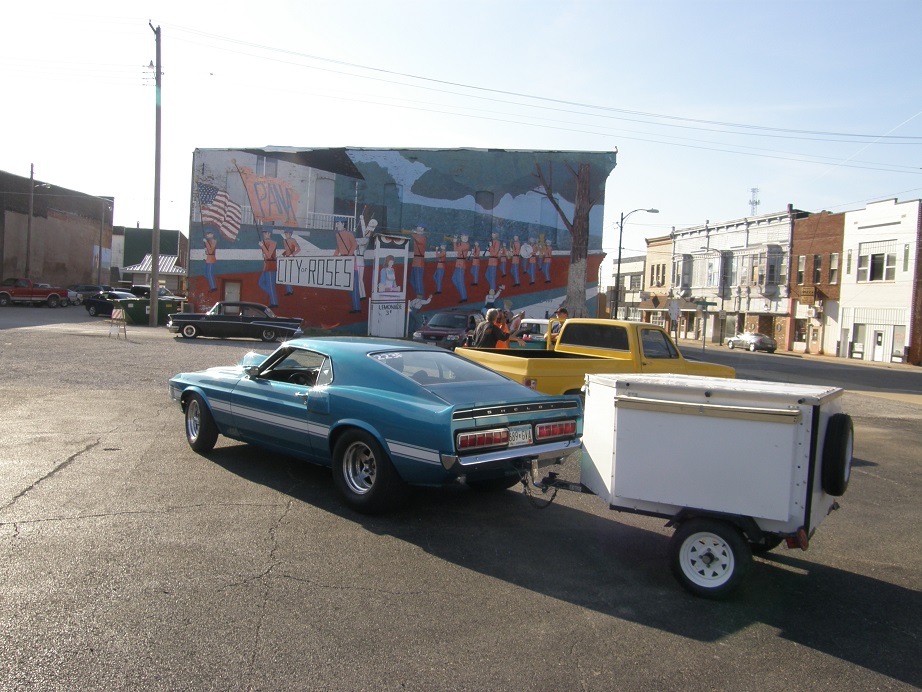
Finally though we got off the freeway and got some fuel from a different station, and the engine went back to behaving normally. We rode through a few county roads and into a small town to hit our second checkpoint of the day, at the 250 mile mark. However, just as we were approaching the checkpoint, the engine started to clatter a little. Ruh-roh... We made it to the check point and stopped to take a picture:
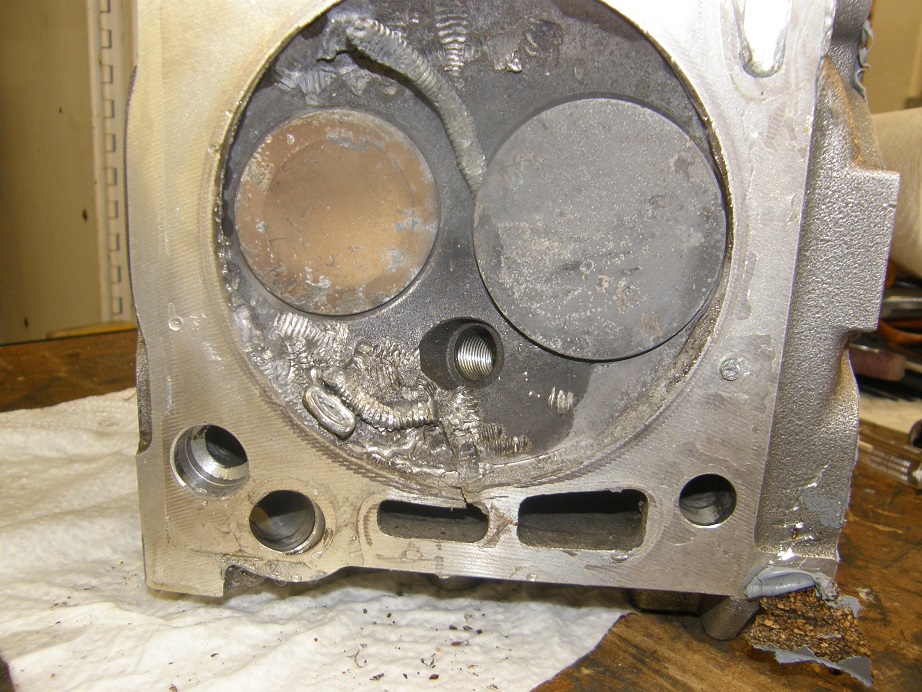
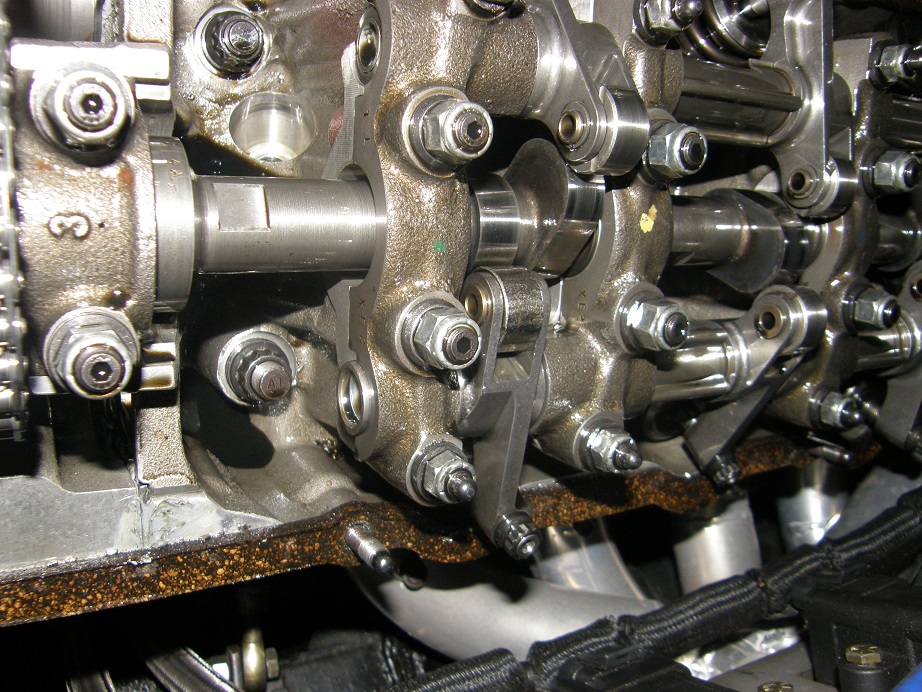
At the checkpoint we bumped into Kevin and his Shelby; Kevin was proceeding slowly with his 4.56 gears, but had been ahead of us because of our late start. We decided to go across the street from the checkpoint to a Big Lots parking lot, and see if we could figure out what was going on with the car. On the way across the street the clattering became noticeably louder. By the time I shut the car off, I was pretty convinced it was valvetrain. It was loudest coming from the left side, so after giving the car some time to cool, and resigning myself to the fact that, despite the late hour, I was in for a roadside repair, I pulled the right valve cover. This is what I saw:
The #5 exhaust rocker is shot. The needle bearings in the roller wheel are completely gone, and the wheel banging on the cam lobe was the source of the noise. The cam lobed appeared to be somewhat scarred up, but it felt quite smooth, so I was pretty sure I could use it again, and didn't have to change cams (I did bring spares). Steve, Kevin and I set about the work to get the top end of the left head apart. Its no fun working on a hot motor in the dark, but we eventually got it apart. After removing the rockers and shafts, I went in there with a magnet and got the smashed bits of roller bearings out of the head. I was pleased to see that they had not made their way down to the oil drain at the back of the head yet, so probably the little shards of steel had not ended up in the pan.They all seemed to be localized right around the failed rocker. After carefully picking all that stuff out, I dug out a spare rocker arm and replaced the #5 exhaust rocker on the shaft. We re-assembled the top end of the engine, and thankfully on startup the engine sounded fine again. That failed rocker had really made some noise!
By the way, I saw some of the other posts on the failed rocker arm, and the rocker adjusters did not fail on this rocker. In fact, outside of the first batch of T&D rockers that I received, which had substandard adjusters, I have never had an adjuster failure. Bill Conley's videos prove that they smoke after a short period of time at high RPM, but I'm down the track in less than 9 seconds with this car, and don't think that its an issue.
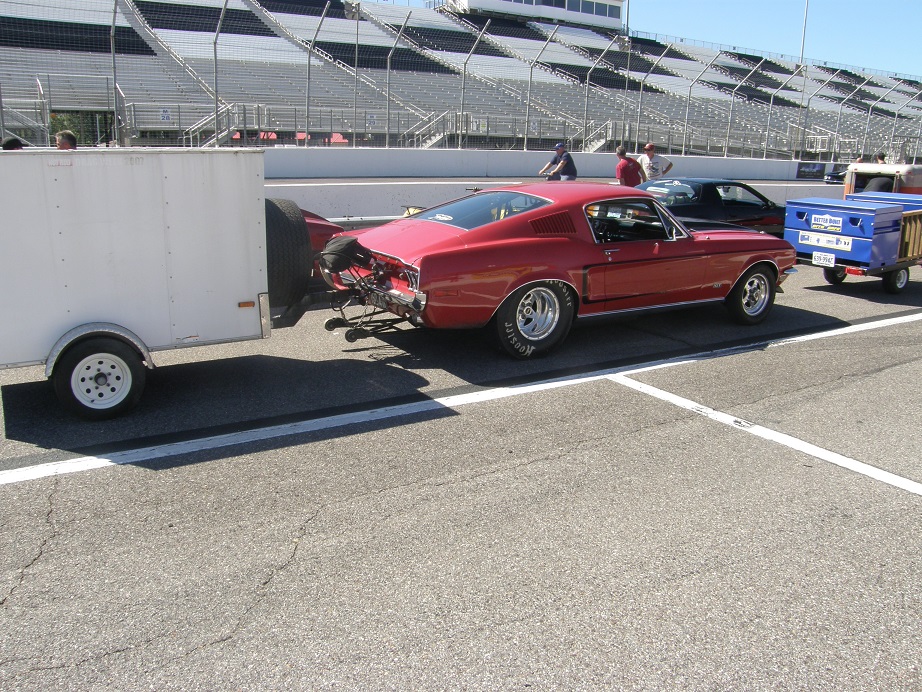
Here's a picture of the cars sitting in the parking lot during the repair:
We finally got back on the road around midnight, and made it through the rest of the route and to the hotel by about 1:00 AM. I put the quick post from yesterday up on the board, and then fell asleep as soon as my head hit the pillow.
This morning we were up at 6:30, ready to head to Great Lakes Dragaway for Day 3 of Drag Week. And I apologize, but I'm just going to have to finish this post tomorrow, because its 1:30 AM and I have to be up again tomorrow early for the race.
******************************* Updated from this point forward ******************
When we arrived at the track Great Lakes was jammed; I couldn't believe the number of spectators that showed up for the event. Someone told me that this track actually runs six days per week, which is really, really great for the local racers. Most of the rest of the competitors were already there and getting their cars ready, and cars were already going down the track too. Steve and I took our time getting the car ready to race, and I also had decided to do an oil change on the car, so we did that also. Finally I changed into my racing clothes and headed to the staging lanes about 10:00. We waited in the lanes for a while, and when I finally got to the head of the line they directed me to the right lane. I did a decent burnout and staged the car, hoping for a better launch than I'd had at Indy now that I'd found and fixed the problem with the Watts linkage. Unfortunately, when the car left it went right this time, and within 100 feet I was out of the groove and had to shut down. I decided to hot lap the car, and went right back around to the staging lanes, but it was now 10:30 and they had closed the lanes to the class cars, and were running the Street Machine Eliminator cars, so I had to go back to the pits and wait until noon for the open session.
Back in the pits Joel called me. Someone he knew who was familiar with the track had been watching the live feed, and called Joel to tell him that I'd lined up way to the right of the groove at the starting line. Great Lakes has a weird burnout box, that goes uphill, and the car tends to go right on the burnout. Apparently a lot of people (including me) were pulling straight forward out of the box; the groove did appear to be there because of the rubber, but there was probably no VHT on that area of the track. So if I got the right lane again it sounded like I should be lined up a couple feet to the left of where I'd been. A few other people told me that the left lane seemed to be a lot better than the right. When I got back up for the next session I decided I'd try to run the left lane.
While waiting for the Street Machine cars to run, Steve and I talked a little more about the car's tendency to go right on the first pass. When we'd made the repair to the Watts linkage on Tuesday, we hadn't really adjusted the loose link so that it was equal in length to the other link. I decided to get under the car and check that, and found that the rod I'd adjusted was now a good 1/2" shorter than the other rod. I loosened the nuts and readjusted the link so that they were the same. The driveshaft was now a lot closer to the loop than it had been, but I still had clearance, so I figured it would be OK.
In the pits, the number of spectators was unbelievable, people were just crowding around the cars. Brad Dyer came over to see how I was doing; he had run a 9.06, so the pressure was on me to make a decent pass next time around. We talked a little about our cars; Brad's weighs about 200 pounds more than my car does, but his weight distribution is better; my car is 58/42, pretty nose heavy despite the aluminum engine. Nevertheless, I'll bet Brad is making a little more power than my car, because he is running very similar times with a heavier car. Then I bumped into Roger Tangorra, who I raced against in Modified NA in my Galaxie back in 2009. Roger is a friend of Brad's and Curt Johnson's, and was driving Curt's dad's car back then. Then, sure enough Red Johnson came by and said hello. I think Red said he was 82 years old, and he's still out at the track! If I make it to 82, I want to be out at the track too.
I walked around the pits for a while and went over to see Brad's car, and talked with him for a while. He was still complaining about traction problems. Seems to me its a great sleeper car, a green Nova with a white top, single 4 dominator carb, etc. That engine makes some serious power to run in the 8s.
Finally they started calling the class cars back to the lanes, and I got in line right away. I wanted to have plenty of time to make several passes in case I continued to have problems. This time they steered me to the left lane, and I took my time to do a good burnout and make sure I was lined up in the groove at the starting line. However, I blew the launch on that pass; I revved the engine too high, then released the transbrake button as I was off the throttle, then got back on the throttle. The car stayed in the groove and ran 9.11 with a very poor 1.44 60'. Well, at least I had a pass that was not too far off of what the car was running, but after the first two days I'd been hoping for 8s at every track, and that wasn't getting it done. More importantly, that pass was not as fast as Brad's, so I'd be giving up some of the lead if I turned that one in. It was pretty much a no brainer to try again.
Back in the pits I did some checks on the car, including tire pressure, and then hopped back in to go up to the lanes. They were starting to clear out a little now; towards the end of the Drag Week race day, the track opens up more and more and you can get to the starting line a lot quicker. This time I only had to wait 5 minutes and I was back at the line, in the left lane again. This time the leave was good and the car felt really strong and... then it quit 100 feet down the track. Just like someone shut off a switch. As I coasted down the track I was sure that I had some kind of electrical problem. Maybe the crank sensor again? Or a short in one of the power wires, or maybe this was the ignition switch? The car finally rolled to a dead stop on the track, and I was just about to get out and wave for a tow, but just for grins I put the car in park and tried the key. The engine fired right up! WTF??
I put the car in gear and drove back to the pits. Was the problem fuel? I had Steve splash another couple gallons of race fuel in the tank just to be certain, checked a few other things, and didn't find any issue. I went out to try again, hoping that the issue was intermittent and I could get a good pass in. But the same thing happened again; out probably 50 or 60 feet, the car just quit again. This time I slammed on the brakes instead of coasting down the track, jammed it into park, hit the key, and the car started right up again. I drove back to the pits pretty much mystified by the car's behavior.
Back in the pits I decided that I'd better run a datalog on the EFI system during the next pass to see if I could figure out what was going on. Logically it seemed like an electrical problem, but I couldn't shake the feeling that it was fuel related. I looked in the tank and sure enough there was plenty of fuel in there, but after getting set up to run the datalog I thought that to eliminate any fuel pump issue, I could just hard wire the electric fuel pump to the battery to eliminate that possibility. This was going to be pretty easy because I have an Aeromotive fuel pump controller in the trunk. This controller gets four wires for the fuel pump: power and ground from the battery to the controller, and power and ground from the controller to the pump. All four wires were connected to the controller via a four position terminal block. I could just remove the wires from the terminal block and tie them together. I opened the trunk and looked at this setup, and just instinctively reached in to tug on the wires. To my surprise, one of the ground wires pulled right out of the terminal block! I let go of it, and the tension of the wire put it right back in place! Ah HAH! I got a trouble light and looked at the terminal block, and sure enough, the screw for the wire had backed out a little. It looked like when I accelerated, the inertial force on the wire pulled it far enough out of the terminal block to kill the fuel pump. Then, when the car slowed down, the wire popped back into place and made contact.
I loosened the screw even more, shoved the wire back into its spot on the terminal block, and tightened the heck out of the screw. I wasn't 100% sure that this was the problem, but it sure looked like it. At this point I was running out of time; less than one hour remained for me to make a pass. I quickly got the car ready to go and went up to the staging lanes. There was almost nobody there, so I just stopped in the lanes long enough to get strapped in and get my helmet on, and I was motioned up to the burnout box. I did my normal burnout, staged the car, started the datalogger, and pulled into the beams. The car launched really hard and straight, and this time it didn't quit! I had a good run going and I knew it. The shift light flashed, and I went for second - and inexplicably went right by into neutral! The engine banged off the rev limiter as I pulled the lever back to second and continued down the track. I was filled with rage; how could I have screwed up that shift??
As I came down the return road I had already decided to hot lap the car; I was just angry with myself about missing that shift, and I was not going to let that pass stand. At the timing shack they gave me the slip, and the car had run a 1.282 60 foot time, best ever. I was on my way to at least an 8.80 pass before I shoved that shifter too far forward. I kept going right down the track road to the staging lanes, and it was a good thing that nobody got in my way, because I was in the mood to run something over. I didn't event take off my belts and helmet or pull down the window net, and there was nobody in line, so I rolled right around to the left lane burnout box again. I did the burnout and pulled to the line, and tried to leave exactly the same way as before. The launch was good, but not as good as the previous one. This time I paid attention and did not miss the shift. As I crossed the finish line I knew I had a good pass. Coming around to the timing shack Joel was standing there and gave me a thumbs up. The slip said 8.943@ 150.00 MPH. Finally! A pass that should keep me ahead of Brad in the race.
When I got back to the pits I got out of the car and relaxed for a few minutes, but then I heard a piece of bad news. Someone told me that Brad's car was on the trailer! He came up a couple minutes later to congratulate me on the pass, and said he broke a connecting rod and was done. I sure could empathize with him on that, based on what happened to me last year. Brad and I had been having a good race, and at this event its good to have someone pushing you to go faster, so I felt like it was a loss for both of us. No one wants to win at Drag Week because the other guy breaks. I gave Brad my condolences, and wished him luck on the repair. He's a really nice guy, and a great competitor, and I hope I see him again next year at Drag Week.
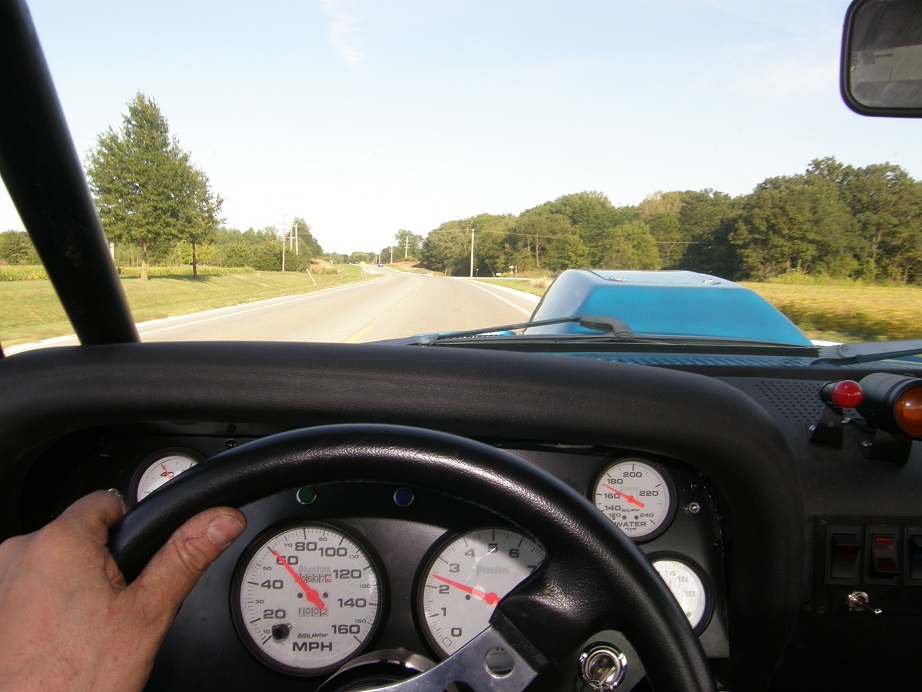
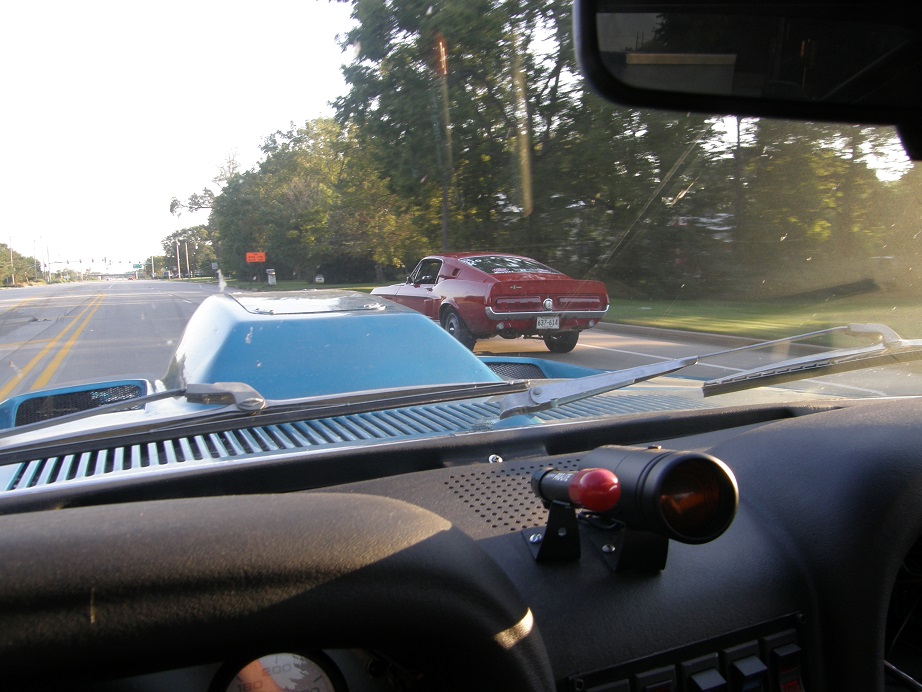
After relaxing for a while I turned in my time slip and Steve and I got the car back in street trim. The directions said it was only a 160 mile trip today, which seemed pretty easy after 260 miles and 285 miles the first two days. Of course, the directions were screwed up, and they missed counting a 22 mile section in the middle, but it was still a fairly short trip. With his 4.56 gears Kevin was running slower than Joel and I during the trips between tracks, but we ran with him for a while Wednesday afternoon. Here's a shot of his car ahead of mine, through the windshield:
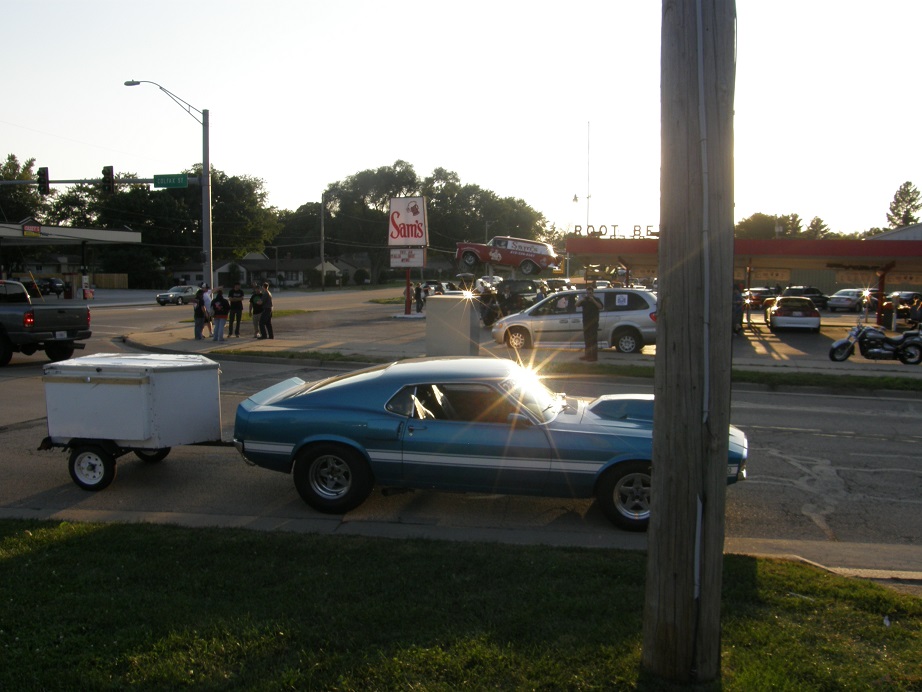
A few miles down the road we hit the checkpoint, a drive-in:
We made it to Cordova around 8:00 PM, and went right by the track and across the river into Iowa towards our hotel. We stopped at a local place called Sneaky Pete's for dinner. I thought it was fitting that I get a picture of my SOHC powered car, in front of Sneaky Pete's:
We got back to the hotel by about 11:30, and I typed my blog for a while but then got really tired and hit the sack by 1:30 AM. Sorry I had to type the second half of this post later, I just couldn't get it done Wednesday night.


 They had already called the class cars to the lanes, so I went up there and got into the third group of cars that were going to run. The guy in front of me turned out to be in my class, and also from the Minneapolis area, so we talked for a while about cars in our area. His car was a mid 60s Nova with a small block and a Hilborn injection setup converted to EFI. He was figuring on running mid 10s, and thought he wouldn't be competitive but wanted to run the event and see if he could finish. I told him about all my troubles over the last four years, and he asked me when I was planning to break this year