Finally got a chance tonight to sit down and finish with this week's installment. After the chain and all the drive components were installed, on Saturday evening I put the front cover on. For some reason, for me anyway, this is always a big pain. The covers never really seem like they want to fit right, and it is always kind of a fight to get them on there. The big issue seems to be getting the nose of the stub cam through the bearing that is pressed into the cover, and getting the top of the cover over the top chain guide. I usually have to have a plastic hammer nearby to help tap the cover into place.
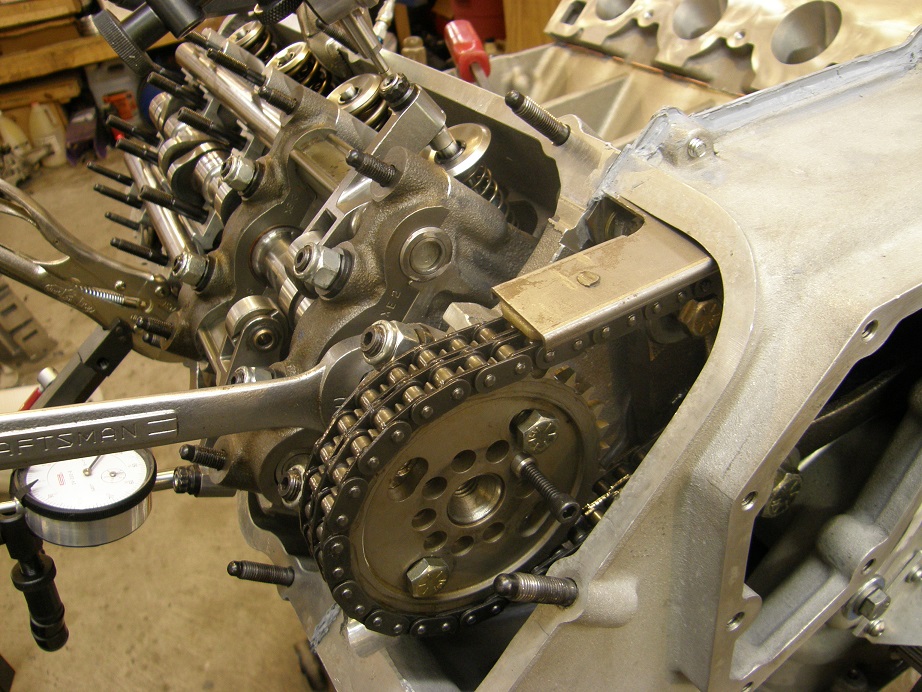
In one of the previous photos you can see the gaskets required between the backing plate and the front cover. Those need to be glued in place on the backing plate with sealer, and then more sealer used on the front cover side before you try to install the front cover. In front of the front cover the water pump bolts on, but I don't even try to install the water pump at this point; it will take you plenty of time to install the front cover alone. Before putting the sealer on the front cover side of the gaskets I always like to test fit the front cover to see what I'm in for. This time it looked like it would more or less go on OK, with some of the usual convincing. I made sure that I had all the bolts I needed handy, then put the sealer on the front cover side of the gaskets and started the installation. The nose of the stub cam is what really indexes the front cover, so you've got to make sure that you have that lined up before you can start pressing the cover into place. As you try to push the front cover into position the stub cam will want to slide back into the block; I use a 3/8" bolt with some washers as kind of a puller, to pull the nose of the stub came through the bearing. Picture below:

As you are tightening that bolt you need to be working the top of the cover into place over the top chain guide. Once the stub cam is pulled flush with the front surface of the bearing, the little bolt puller arrangement won't work anymore. Then its time to go to the pry bar, which by the way is right out of the Ford shop manual. Here's a photo of me prying the stub cam forward some more:
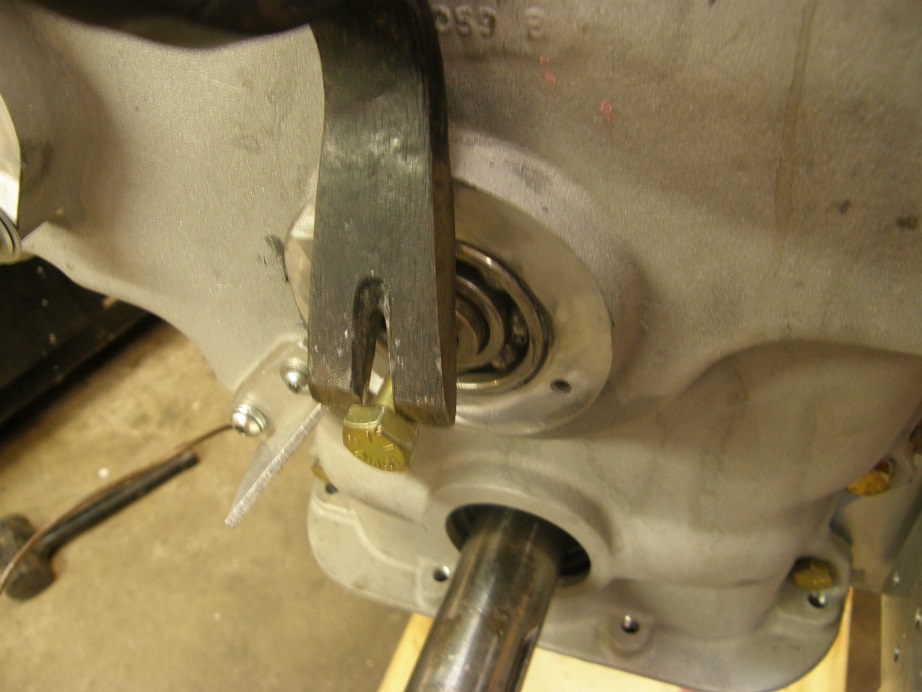
As you pry forward on the stub cam you need to be moving the front cover back into position, and you can start getting some of the bolts in place. Finally when the stub cam is pulled far enough through the bearing you will expose the snap ring groove in the stub cam. By this time you can tighten the four water pump bolts (even though the water pump is not installed yet; these are dummy bolts just to hold the front cover in place, and seal it to the backing plate), plus the remaining bolts in the front cover. The last ones I do are the top four bolts that hold the backing plate to the front cover. These are 1/4-20 bolts, and usually they are kind of difficult to get into place. There is also a gasket that can be used between the top of the backing plate and the top of the cover, but I never use it; it always seems to be more trouble than it is worth. I fill the gap between the front cover and the backing plate at the top with sealer, then draw them together with the four bolts, and wipe off the excess sealer. It always seems to seal up fine that way. Here's a picture of the front cover installed at this point:
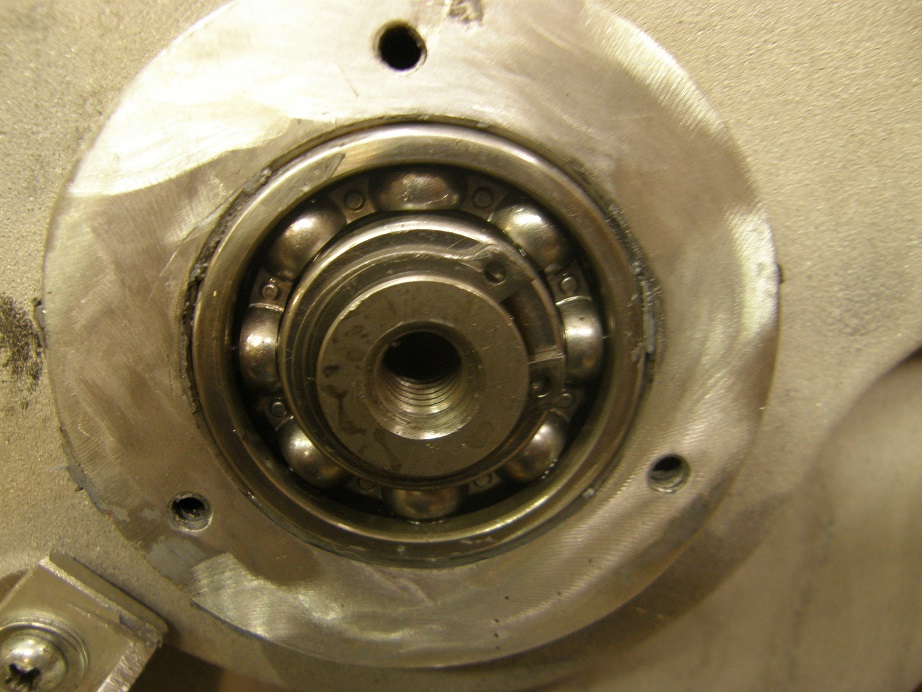
Once the cover is finally in place you can install the snap ring on the stub cam. This is not some garden variety snap ring, it is a much thicker than usual snap ring, special for this application. Make sure that the stub cam is pulled out enough to expose the whole groove, and then use a heavy duty snap ring pliers to install the snap ring. Here is a photo of the end of the stub cam with the snap ring installed:
I called it a night at that point, feeling the need for an adult beverage

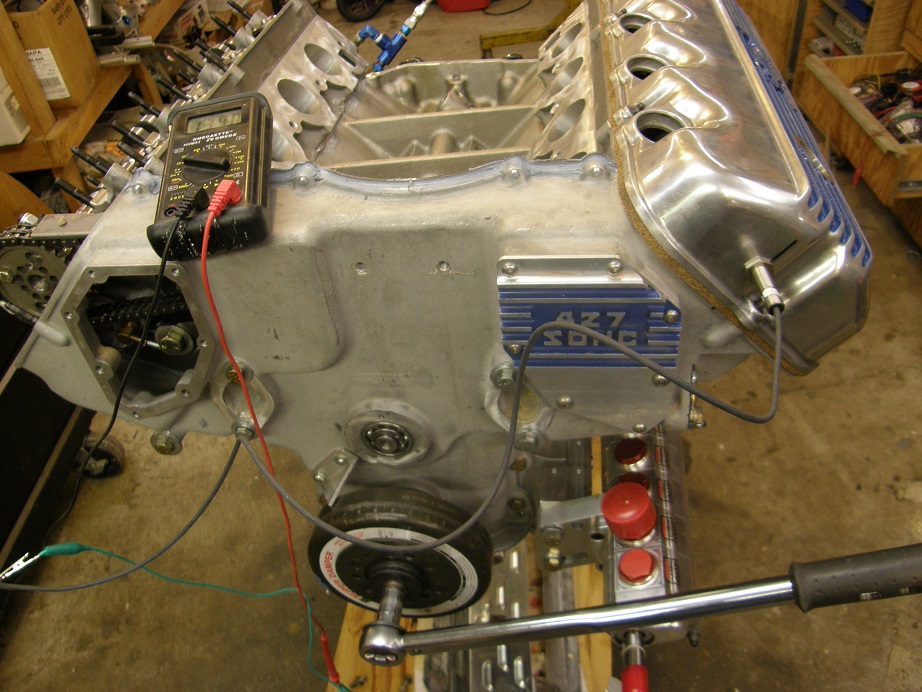
On Sunday I went back out to the shop to check my piston to valve clearances and degree the cams. First I installed the crank sleeve and the harmonic balancer, which is a fully degreed ATI unit, making the use of a degree wheel unnecessary. Then I tightened the chain up to where I thought it should be when the engine was warmed up and running. It's kind of hard to describe this, but as you tighten the tensioner bolt and keep your finger on the chain through the inspection cover opening, you can feel the chain start to get tight. At some point the chain will feel pretty tight and it will start to get a little bit harder to turn the tensioner bolt. At this point you are starting to stretch the chain, which I prefer to avoid. There was a recommendation to torque the tensioner bolt to 110 in-lb in a book I read a while back, but it didn't really specify whether the tensioner bolt was lubricated or not, or with what lubricant, so I'm not sure how reliable that figure is. For what its worth, where I was comfortable tightening the tensioner bolt turned out to be about 60 in-lb. 110 in-lb was only about 3/8 turn more.
Also please note that this is being done with the engine cold for purposes of timing the cams; with an aluminum block and heads, you don't want to start the engine with the chain this tight, because when the block and heads expand the chain will stretch. Normally I try to tension the chain with the engine hot after it has been running for a while and then shut off. I think this gives you the correct tension. The chain will be looser of course when the engine cools. I would probably back the chain tensioner bolt off 3/8 of a turn or so before starting the engine for the first time, and then retension the chain when the engine warms up.
Finally it is worth pointing out that the valve springs acting on the cam can make the chain appear looser or tighter than it really is. If you get used to opening up the inspection cover and pushing down on the chain to gauge its tension, you can get fooled by this because the valve springs might be twisting one cam one way and the other cam the other way, therefore making one half of the chain tighter and the other half looser. To get a really good feel for the chain tightening, you need to pull the rocker shaft clips and move the 1,2,3,6,7,and 8 cylinder rockers over so that they are not acting on the valve springs, and then move the crankshaft so that the engine is between the #5 and #4 firing strokes. This way the #4 and #5 rockers (which are not able to be slid out of the way on the rocker shafts) will be on the heels of the cams, and so no torque from the valvesprings can be imparted to the chain through the camshafts. At this point you can get a true feel for the chain tension.
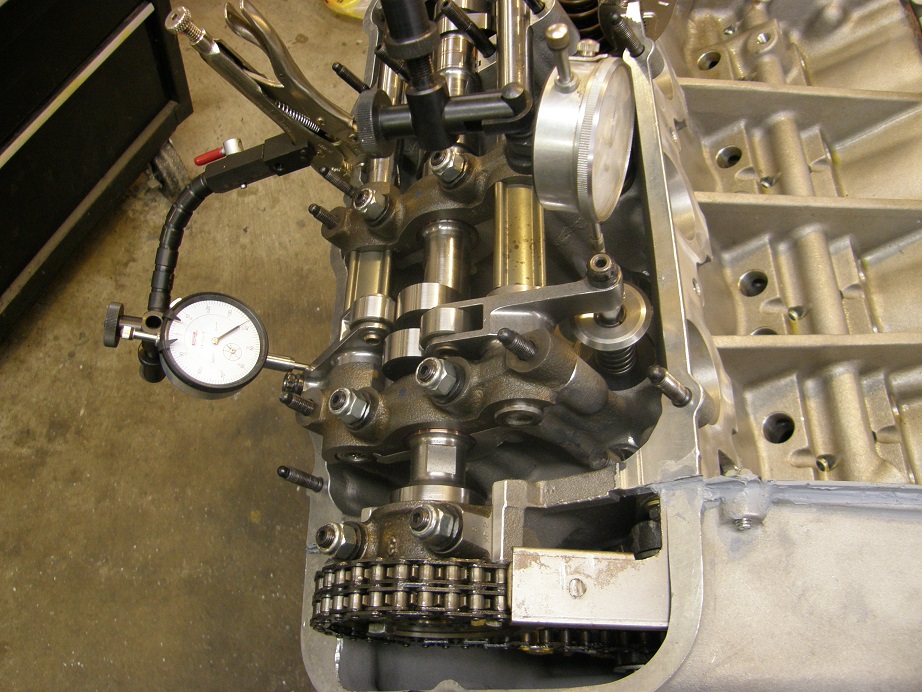
Of course I hadn't installed any of the rockers yet, except for the ones on the checker springs, so I didn't have to worry about any of that on Sunday. I tensioned the chain to a point where I was satisfied with it, and then degreed the right camshaft using the intake centerline method that Comp Cams recommends. I started off with the right cam straight up, and it came in at 116 for the ICL. Then I checked and recorded piston to valve clearance, and moved to the next pin because I wanted to advance the cams as far as possible. Here's a picture of my setup with two dial indicators, allowing me to check piston to valve clearance for both valves at the same time:
Continuing to move the alignment pin and check piston to valve clearance I got all the way down to 101 degrees in 3 degree increments. After 101 degrees I ran out of PV clearance, but I don't think I'll have to go that far anyway. But now I know what the limits are. Here's a photo of moving the cam with the alignment pin pulled out so it is not engaging the holes in the cam, and the 7/8" wrench on the flats of the cam:
To start with I set the ICL back to 107 on the right cam. I decided to leave it at that point and not do the left cam, but when I do it I'll check cylinder #6, because it will make for easier math since it is 360 crankshaft degrees apart from cylinder #1. I usually set the left cam to be 3-4 degrees retarded as compared to the right cam; I did a bunch of experiments on this with my first SOHC dyno mule back in 2007, and found that at 7000 RPM the right cam retarded 2 degrees, and the left cam actually advanced about 1.5 degrees. So, I keep them separated by this amount and figure at speed that my cam position is about in the middle.
Next I pulled the checker springs and installed the real valve springs on number 1. I just used compressed air in the cylinder and a lever type spring compressor that I fabricated several years ago. Here's a photo:

It was about the end of the day on Sunday, and I wanted one last job that wasn't too difficult, so I decided to figure out where and how to install the cam sensor. This sensor needs to fire after cylinder #8 sparks, but before cylinder #1, so that when the ECU sees the cam sensor fire it knows that the next cylinder that fires will be #1. This is necessary for a full sequential EFI setup. I had been hoping to be able to put the sensor in the timing cover, but prior to installing the timing cover I figured out that this was not going to be possible, so instead I decided to put it in the valve cover. I will be using a long bolt in one of the cam gear bolt positions as a target for this sensor, which is a magnetic sensor that will turn on whenever a ferrous target comes in close proximity. It took me longer than I thought to get this set up properly, but finally I had the valve cover drilled, the sensor and target installed, and the electronics powered up so I could read the sensor when it turned on. Here's a picture:
After some adjustments I got the cam sensor to trigger about 60 degrees before #1 fired, which will work just fine.
Next weekend I have a full 3 days on this project. I should be easily able to get the rest of the engine together, save for whatever fabrication is required for the crank sensor and dry sump pump drive. I'm looking forward to seeing the whole engine back together again. I'll post another update next Monday.


