It's been a pretty exciting few days on this project. Our first stab at building the mold for the Calliope heads ended when we were not able to make up a good water jacket core from the Ford tooling; we figure that Ford had a machine that blew the sand into these cores, and the foundry we are at didn't have an equivalent machine. Starting in January Dan and his brother Derek worked to pour some plastic resin into the Ford molds, to make plastic models of the water jacket cores. These were then glued together into a model of the complete water jacket. After this model was test fit into one of the drag molds that we made at the foundry, the model was 3D scanned and a file was created electronically. This electronic model was then provided to the 3D sand printing place, and after a couple weeks Dan had some one piece, 3D printed sand water jacket cores.
We were able to get into the foundry last Friday. The water jacket core fit perfectly. We also had the pattern guy at the foundry, because he was needed to cut the gating and the risers in the correct position so that the head would pour properly. This was a bit of a shot in the dark, and we figured we had a 50/50 chance to get good castings out of the first pours, but even if the first ones were no good we would be able to modify the gating and riser system to make corrections.
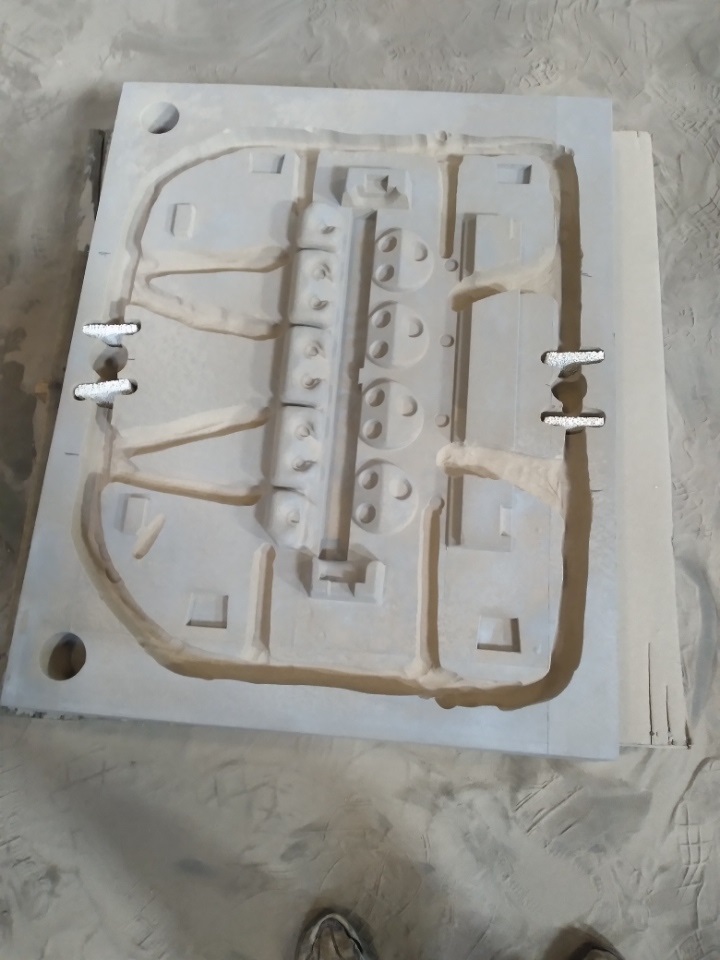
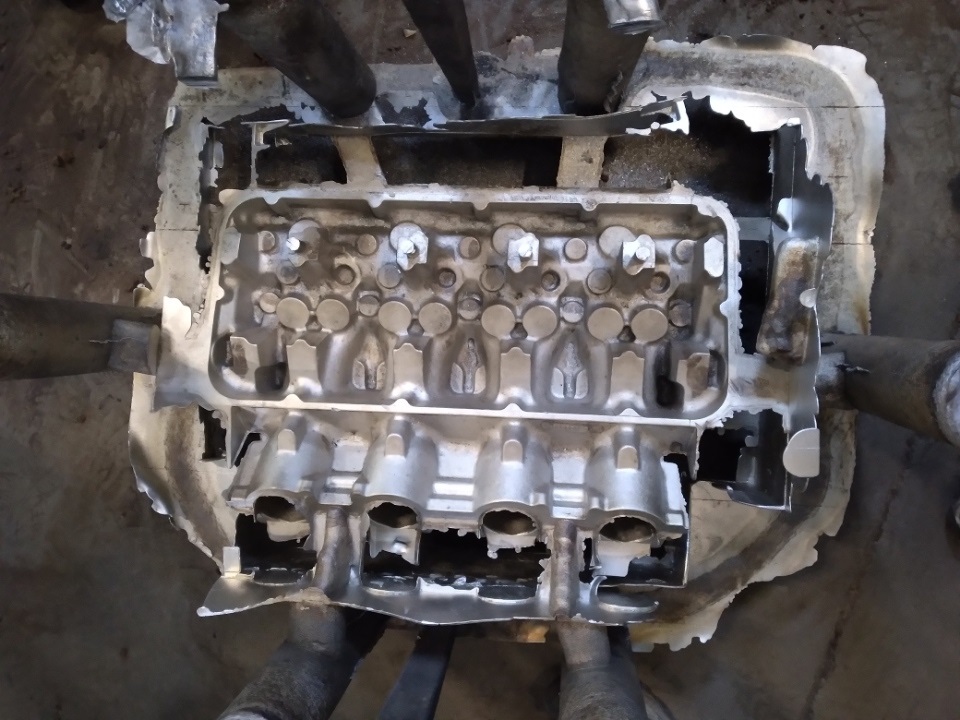
The two pictures below show the drag mold with the gating cut into it, and also with the 3D printed water jacket core installed:

Here's a couple shots of the completed mold before the top was installed:

Starting at the foundry at 5 AM, it took us almost until noon to get the gating cut in the sand, the molds assembled, and two of the heads poured. It took about 7 ladles of aluminum to fill the mold, which is a lot, but the foundry guys got it done and the pour went smoothly. We left the foundry on Friday feeling hopeful about the results.
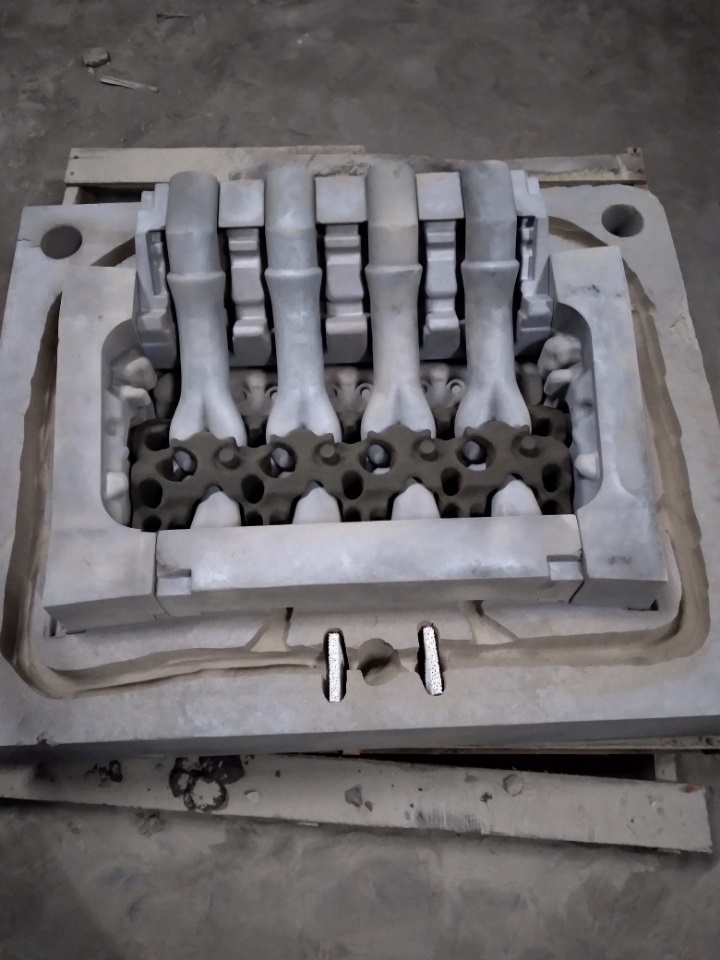
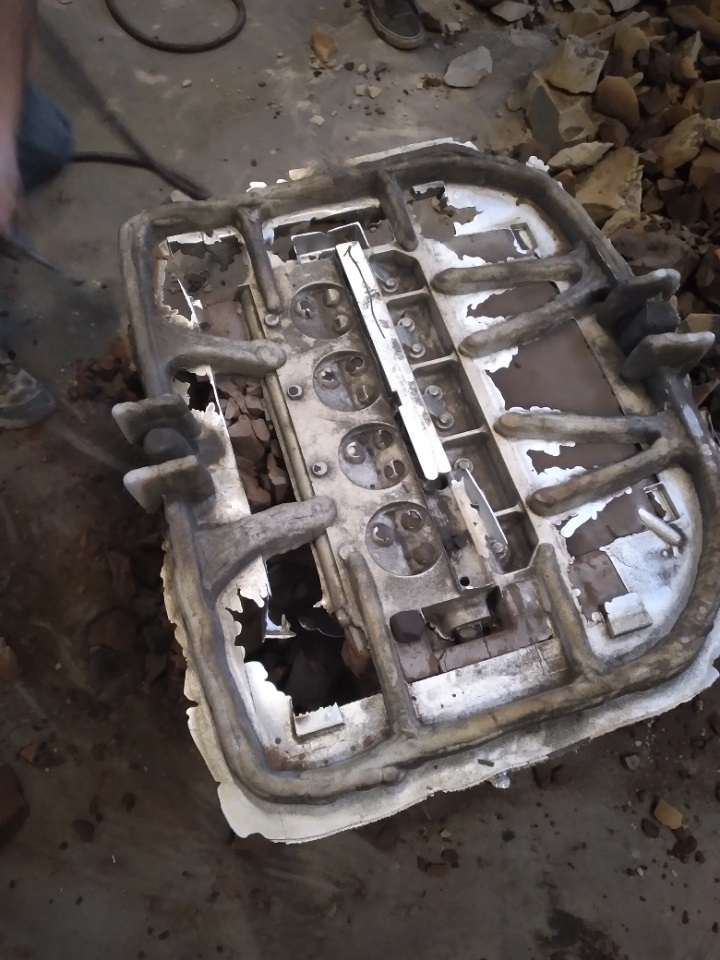
This morning was breakout. Each mold probably used close to 1000 pounds of sand, and the sand is like a rock, so sledge hammers and impact hammers were needed to clear all the sand away from the castings. Took probably 30 minutes or more to do the first one, but when we got the sand off initial inspection of the castings looked good! Pictures of the raw castings are below:
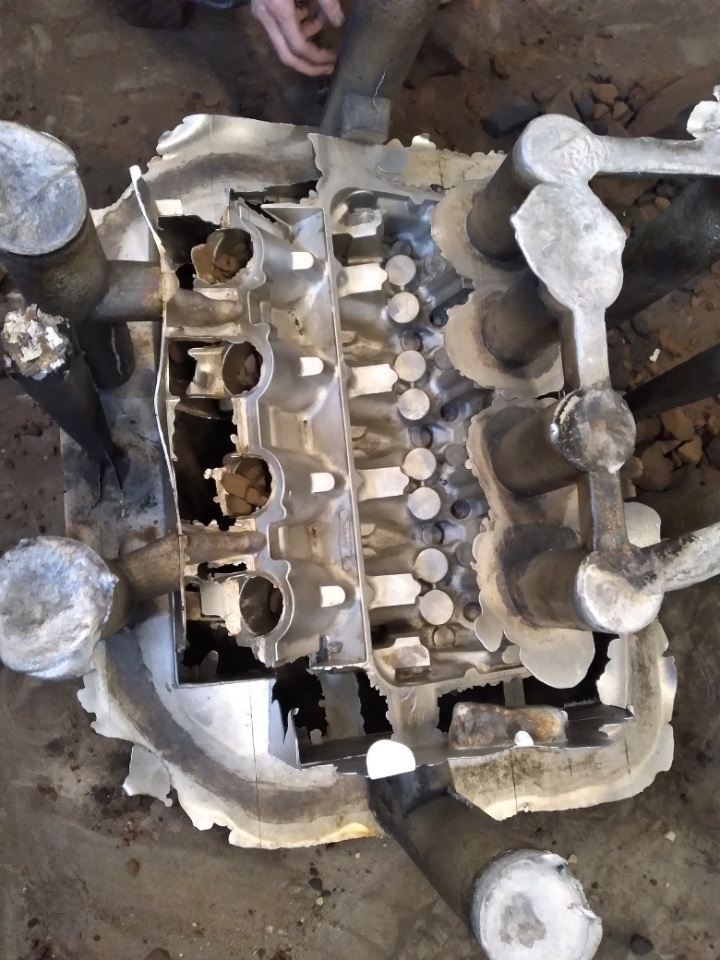
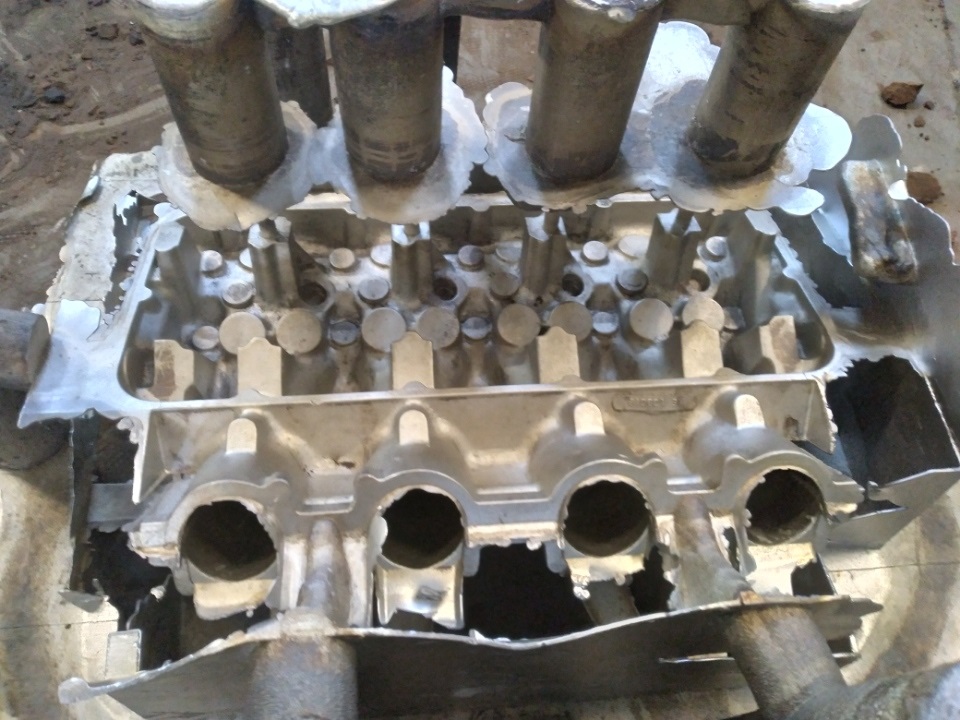
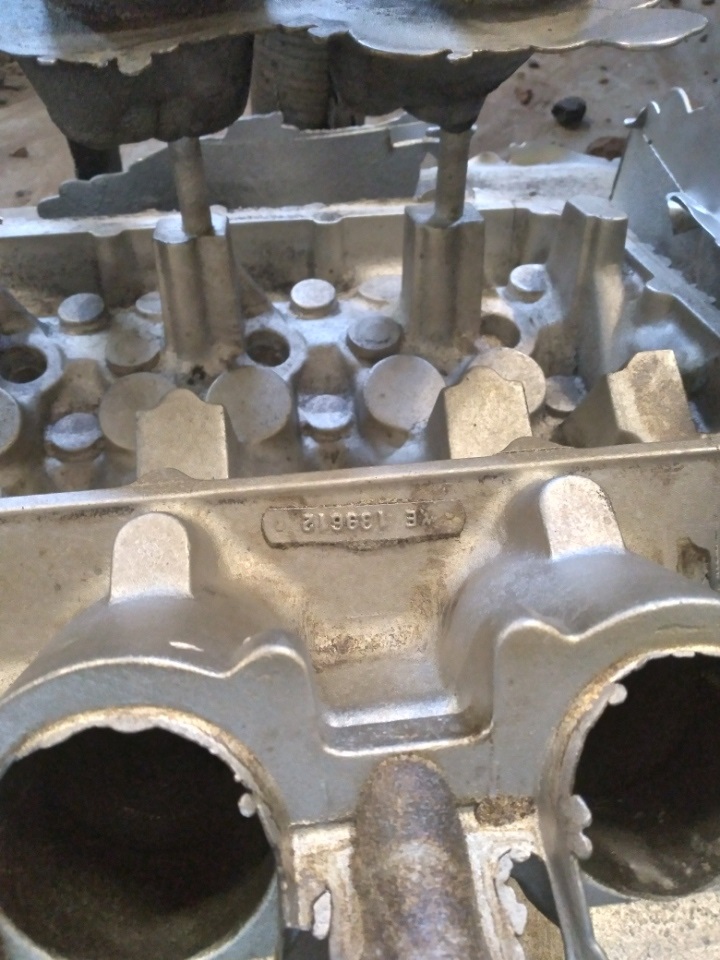
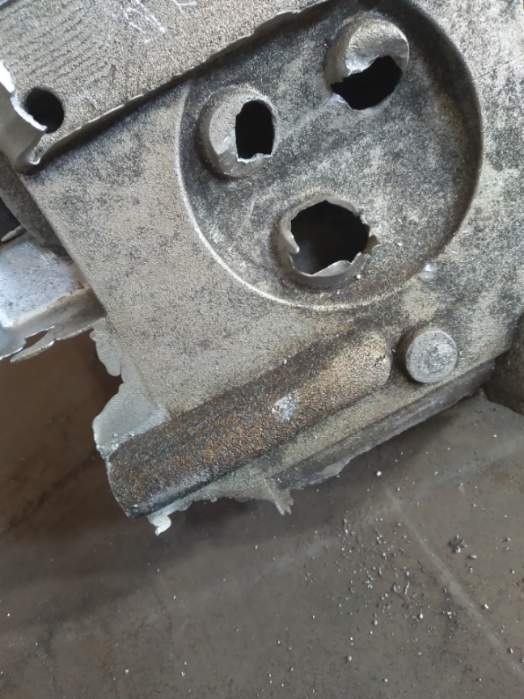
Normally the foundry trims the gating and risers off the raw casting, to leave the "trimmed" casting, but Dan couldn't wait LOL! He ran off to Menards to get a Sawzall and an electric impact and cut the gating and risers off himself. This also gave us access to clear all the sand out of the ports and do a detailed inspection of the inside of the ports. I was worried about this part because the port walls aren't that thick near the water jacket, and if the pour hadn't gone just right, we could see some casting voids in this area. But to my surprise and relief, both castings looked excellent. One of the castings had a minor porosity issue in the valve cover area, that can easily be welded; other than that, they are beautiful! Here are some pictures of one of the trimmed castings:

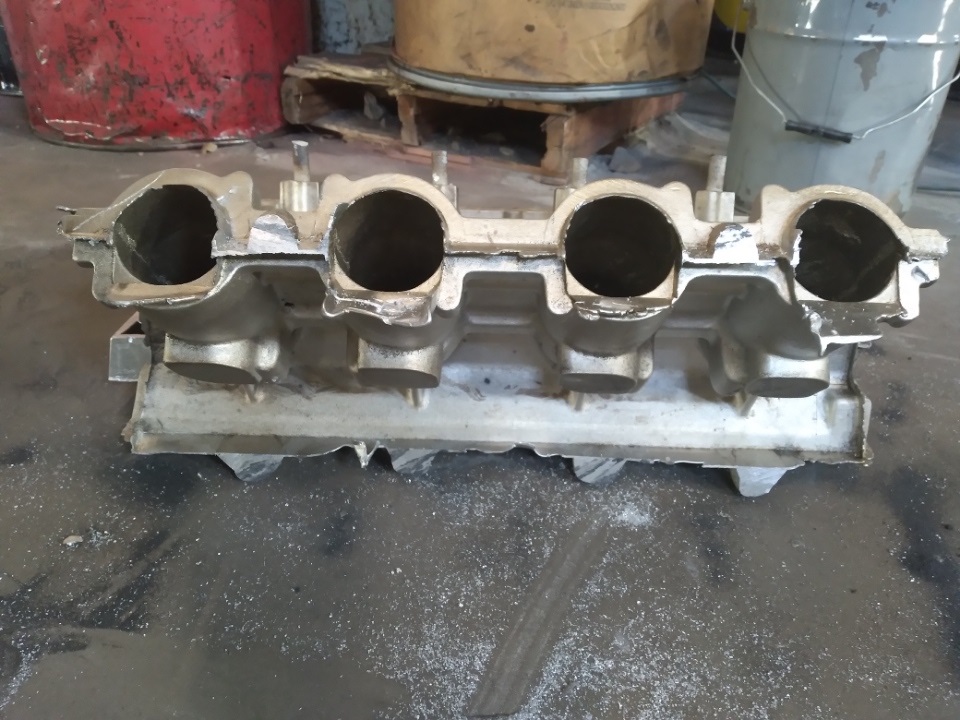
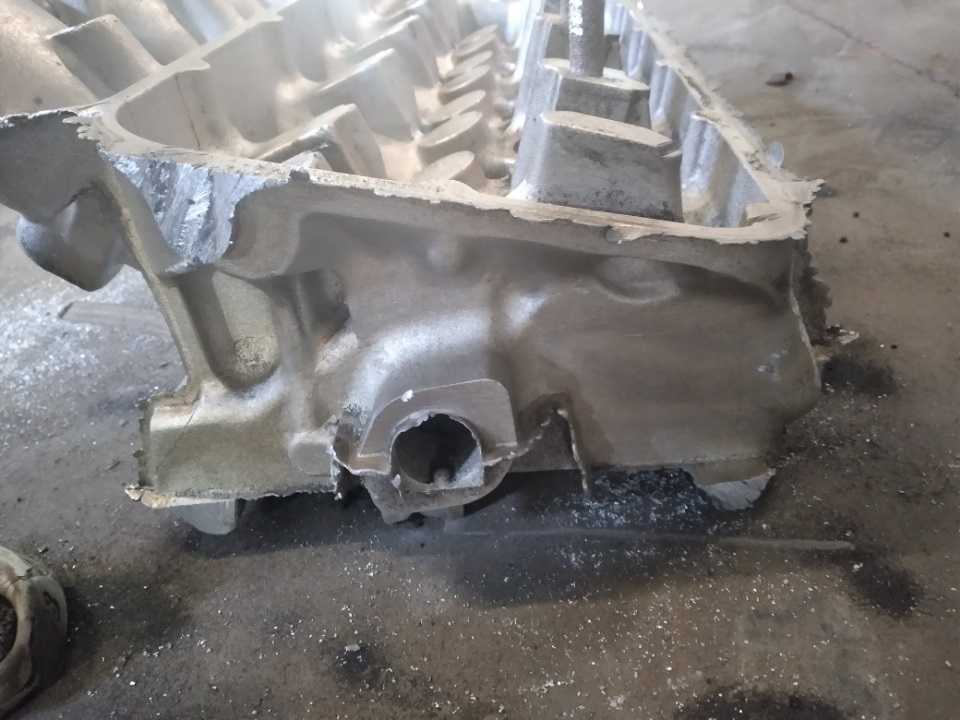
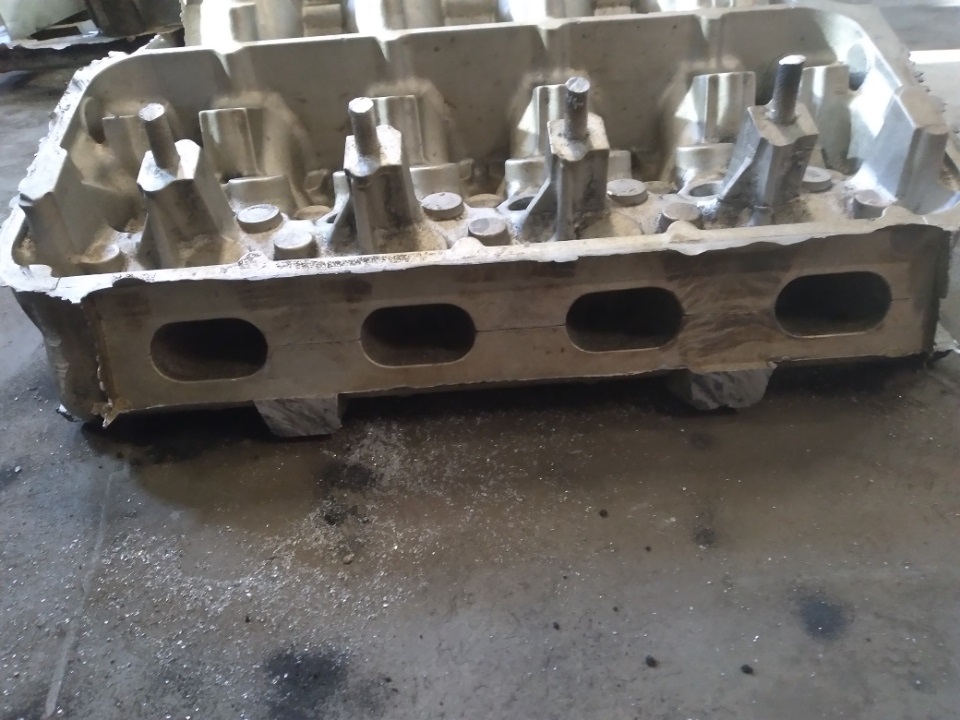
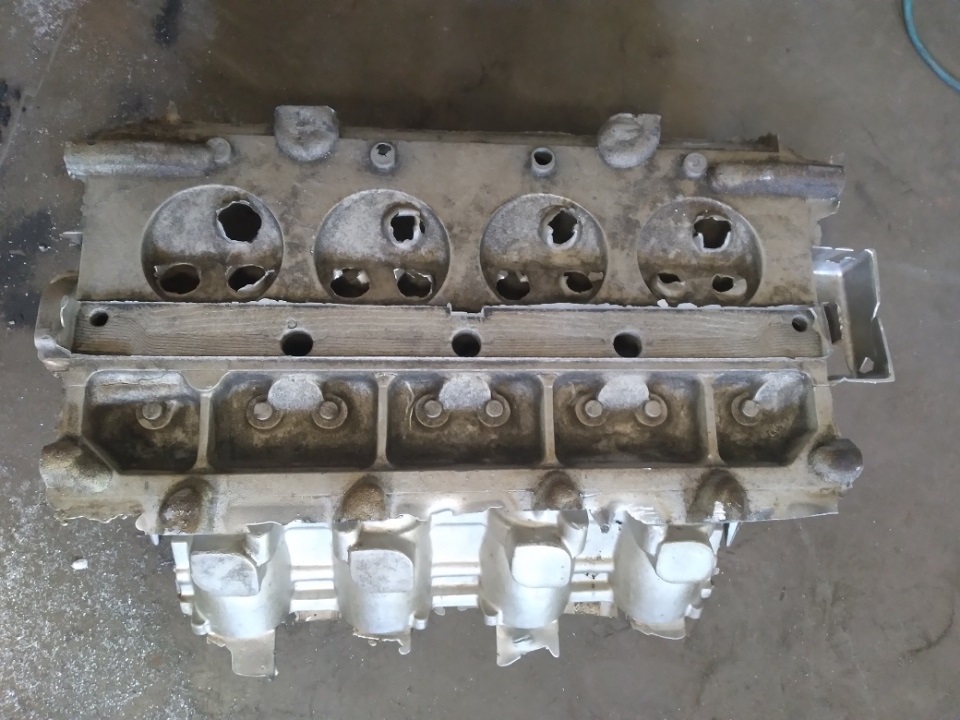
The trimmed castings weigh 67 pounds! I guess heads get a little heavy when the intake manifold is included in the head. I think it is just super cool that no one has seen a casting like this since the Ford foundry guys in 1967!
Next steps on these castings are to have the foundry deburr and heat treat them to T6; then it's time for machining them. It will be a while on this because we will need to design and build fixtures, then write the CNC programs and start the machining operations. We have a strategy on this already, but still need to settle on valve seats, valve guides, etc. Dan has found the guy with all the blueprints for this engine and has purchased them, so hopefully soon we will have blueprints to guide our CNC programming. We are still a long ways away from having a running engine, but with the heads in process we have a pretty good start. I will update this thread with new information as it becomes available - Jay


