Still nothing from the guys at Hot Rod about whether or not my car can run in the Modified class at this year's event. Yesterday Power Tour started, so I'm guessing that the editors are going to be completely occupied with that for the next week, so I doubt that I will hear anything next week either. Nothing like being up in the air...
In any case, I'm continuing work on the car under the assumption that I'll be able to run it at this year's event. Wednesday this week my rear Centerline wheels finally showed up. I'd been seemingly waiting forever for these wheels; I had originally ordered them from Summit in February I think, and then delivery had been delayed several times, and finally at the end of April the postcard from Summit said that the wheels wouldn't be ready until the end of June. Forget that! I called Summit and cancelled the order, and then called Centerline directly and ordered the wheels. They said they would have them to me in about three weeks. It ended up taking them four weeks, but at least they showed up before the end of June.
However, when they arrived they weren't exactly as I had specified them. When using drive studs in the rear axles, you have to use these 1 1/4" diameter aluminum sleeves for the lug nuts to seat against. The Centerline wheels as delivered would not allow the 1 1/4" sleeves to fit properly against the wheel. Centerline offers special machining in order to allow the sleeves to fit, and I had ordered this special machining with the wheels. But when I pulled the wheels out of the box, the machining had not been done.
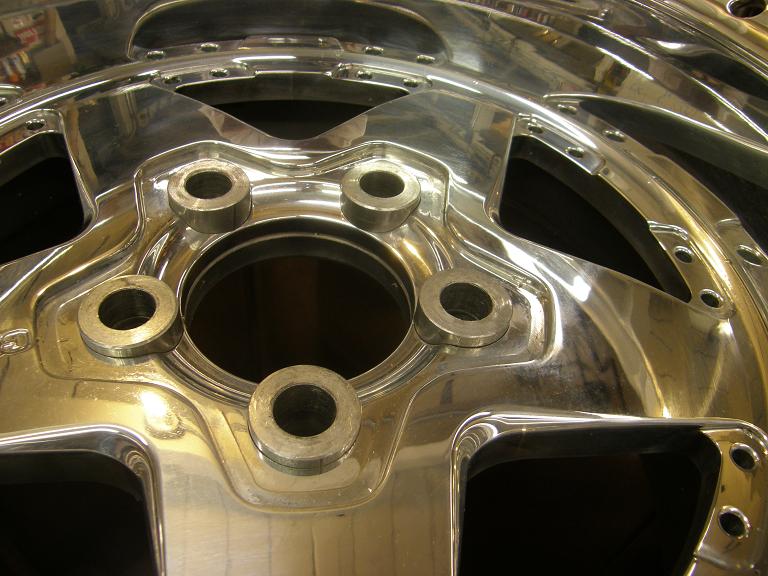
I could have put the wheels back in the box and sent them back to Centerline, but the machining operation wasn't all that complex, and I didn't want to have to deal with the shipping and the possibility of waiting even longer to get the wheels back, so I decided to throw the wheels on my CNC machine and cut the countersinks myself. Here's a photo of the one of the wheels showing the lug nut area, with one of the aluminum sleeves positioned where it was supposed to fit:

I had to enlarge the counterbore for the sleeve by about .100" or so. I set up the wheel on the CNC machine and found the center of two of the holes, then used some math to find the other three centers. Then I wrote a quick program to enlarge the holes; here's the machine running the program:

After the program ran I test fit all the sleeves in the holes, as shown in the following photo:
I repeated the process on the other wheel. I ended up staying up pretty late on Wednesday night getting this done, but then on Thursday I was able to drop the wheels and tires off to get the tires mounted, and now I have them ready to go on the car as soon as the suspension is installed.
On the bodywork front I'd decided that I wanted to try to get all the removable pieces from the car finish sanded this weekend, and then put up in the paint booth so that I could paint the underside of the hood, trunk lid, the door jams, etc. Saturday I spent nearly the whole day wet sanding and touching up these pieces to make them ready to paint. By the end of the night I had everything finish sanded, and had most of the pieces upstairs in the booth, except for the doors. Sunday morning Steve stopped by for a couple hours to give me a hand, and lend a fresh set of eyes to the bodywork on the quarter panels and roof. While I worked on getting the doors ready to come off, Steve block sanded the quarters again, and found one little ding on the passenger side quarter that I had missed. He also pointed out that the wheelwell down near where I had extended it on the passenger side was not the same as the driver's side, and gave me some ideas on how to address this. I might have missed either of these problems if left on my own.
Steve helped me carry the doors upstairs to the booth and then took off, and I spent until about 2:00 PM getting the jam areas prepped and ready for paint. After a final cleaning with wax and grease remover, I decided to let the panels dry until 5:00 and do a little more work on the car. I was at the point where the side scoops could be attached, but I needed to get them aligned properly and the holes drilled in the quarter panels. Also, the fit of the scoops to the quarter panels was not very good, so I wanted to improve that by filling in the gaps and make a nice tight fit. The scoops still had to be removable, though, so I could paint the quarter panel underneath.
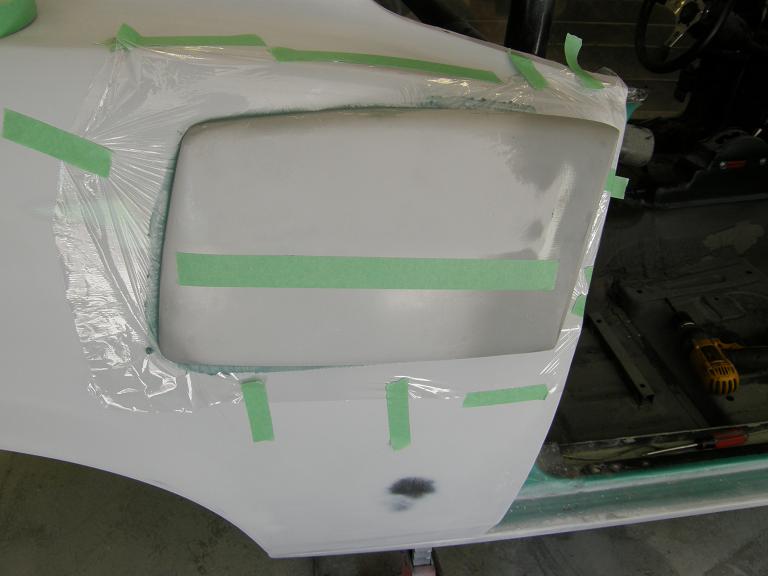
I taped the scoops to the quarter panels and took some measurements until I felt like I had them on there correctly, then I drilled the mounting holes. I wanted to use some Duraglas to add to the scoops, filling in any gaps between them and the quarter panel. The way I've always done this is to use Saran wrap as a barrier to keep the Duraglass from sticking to the panel. I snuck into the house and grabbed the wife's Saran wrap while she wasn't looking, and then taped it in place on the quarter panels where the side scoops were positioned. I poked holes in the Saran wrap where the scoops bolted on, and then mixed up a batch of Duraglass and coated the sides of one of the scoops with it. After bolting the scoop into position I smeared the Duraglas into any of the gaps where it hadn't already gone in, and let it dry. Here's a picture of the scoop attached in this fashion:
When I remove the scoop the Saran wrap will peel right off, and I can do the bodywork on the scoop to smooth out the sides where the Duraglas was added. The scoop will be a nice tight fit to the quarter.
I repeated this process with the scoop on the other side, and then around 5:00 headed back upstairs to paint the panels I'd prepared earlier. I was using a new kind of sealer on this paint job, and I wanted to try that out on the underside of the hood and trunk lid before I shot it on the exterior surfaces of the car. The sealer is based on the K36 primer/surfacer, but uses some clear and reducer as an additive, plus a different catalyst than the normal K201. I mixed up a small batch of this stuff and shot it on to the trunk and hood. It seemed to go on really well, so I think it should be no problem to use it on the exterior surfaces when I go to paint the entire car.
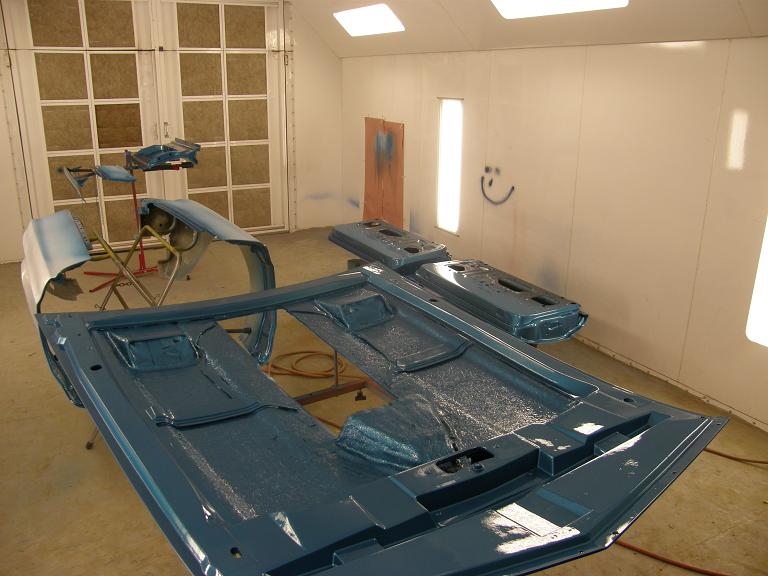
After the sealer dried for a half hour I shot the color on the jam areas and under the hood and trunk lid. After a couple weeks of bodywork I was really getting tired of sanding, and had been looking forward to seeing the Gulfstream Aqua color on some panels. I laid on three coats of the color, and since this is a two part base coat / clear coat system, then put on another couple coats of clear. It took me until 7:30 to get finished, but everything looked pretty good when I was done, and I finally had a chance to see the color on the panels. Here's a photo of the paint booth after I finished the last coat of clear:
With the car disassembled now I'm ready to start cleaning and painting the chassis and frame of the car. I have to disassemble the front suspension, finish up some of the welding work, pull the engine and trans, and the clean and paint everything front to back under the car. I expect that this will take me most of next week and next weekend, but hopefully I'll have the suspension in the car at that point. Then I'll be able to finish up the bodywork the following week, and roll the car up to the paint booth by Father's day weekend. On that Saturday I should be able to jam the basic body of the car, then reassemble the doors, trunk, hood, front fenders, etc., and hopefully paint the exterior surfaces of the car on Father's day. After that, I'm down to getting the car assembled, which will hopefully be a little more fun and go a little more quickly than all this stupid bodywork

I'll post another update next week.


