Show Posts

This section allows you to view all posts made by this member. Note that you can only see posts made in areas you currently have access to.


Messages - AlexS

Pages: [1]
1
Member Projects / Re: 1970 F250 Crew Cab Pickup
« on: December 30, 2018, 11:13:19 PM »
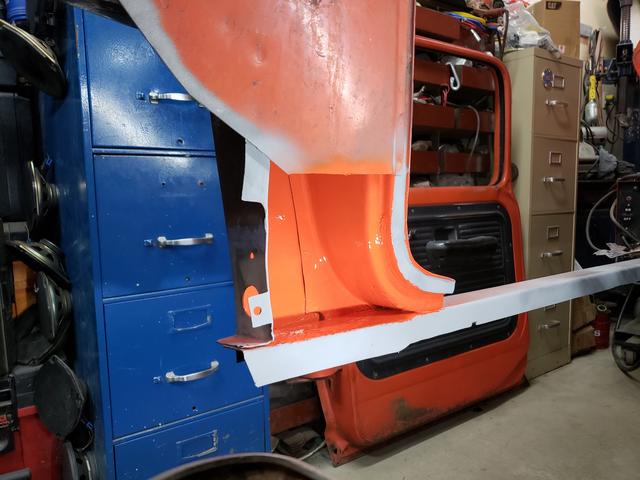
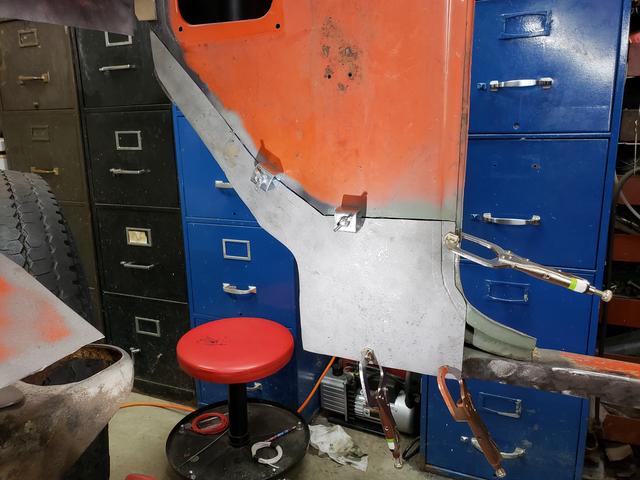
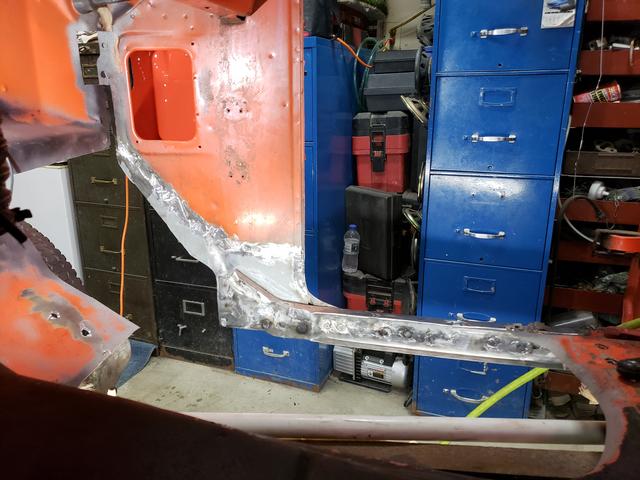
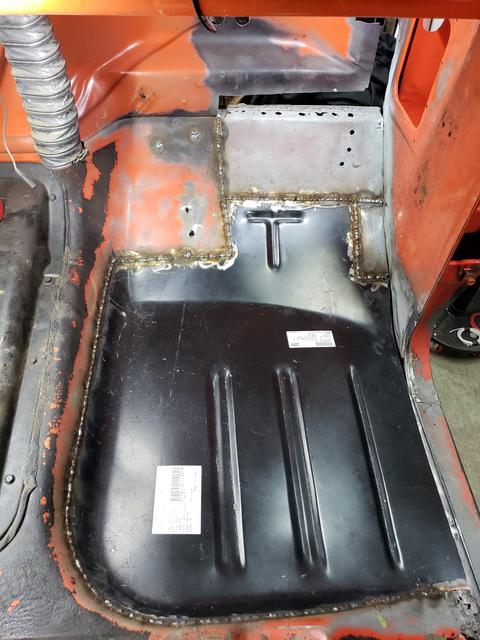
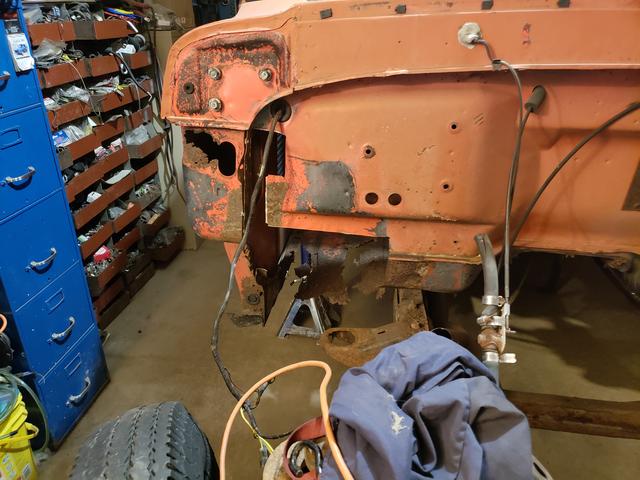
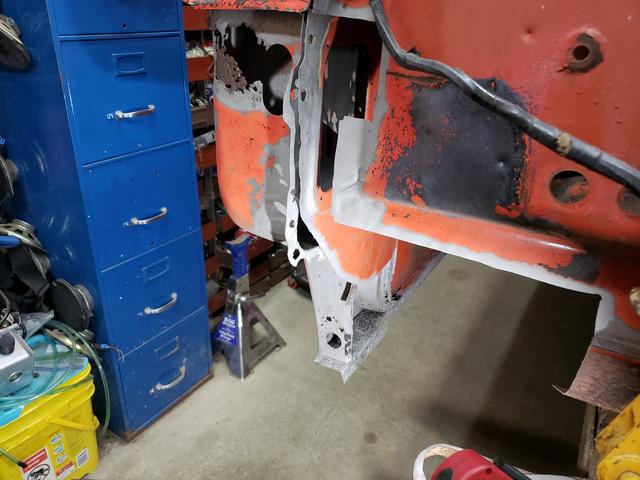
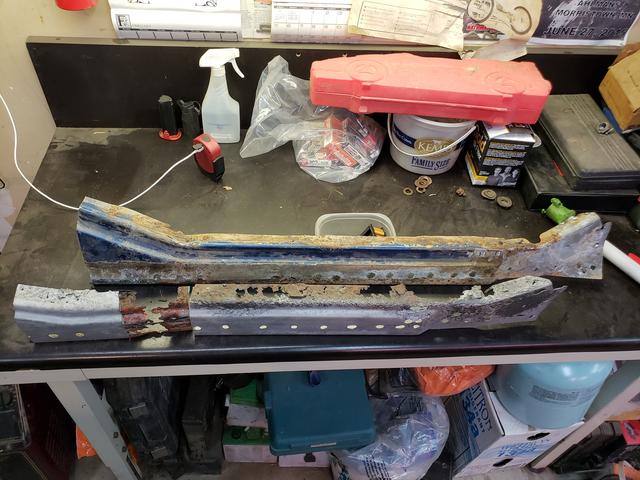
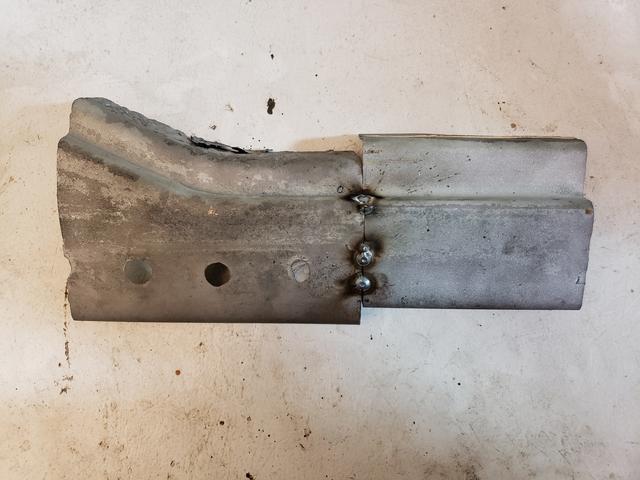
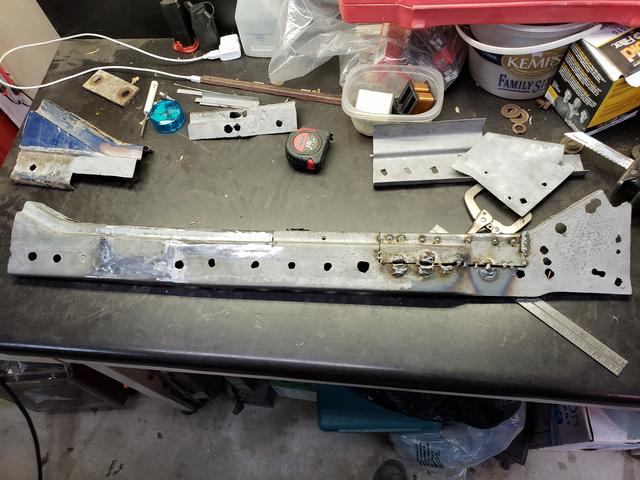
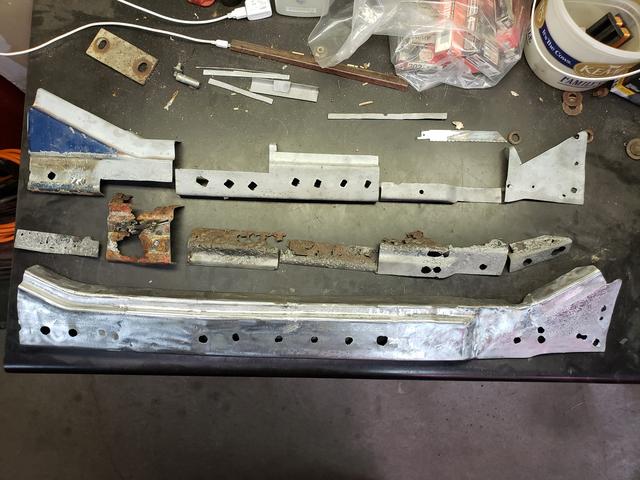
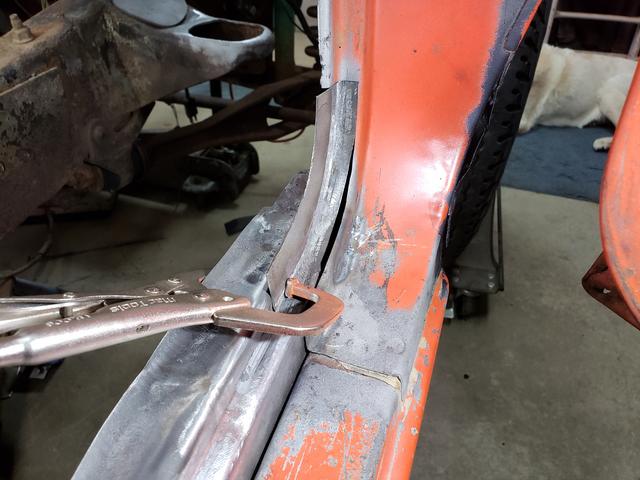
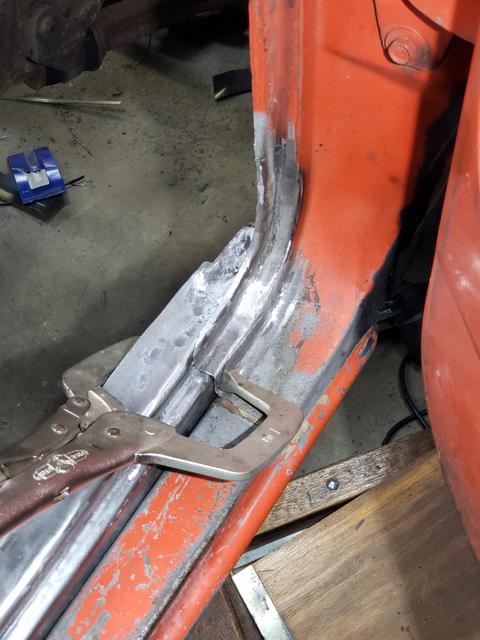
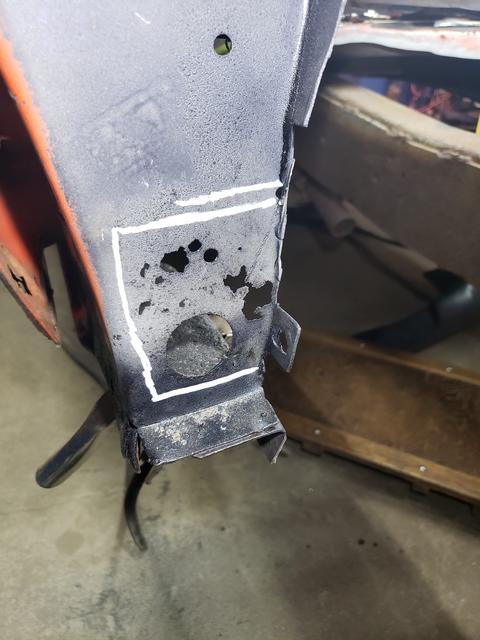
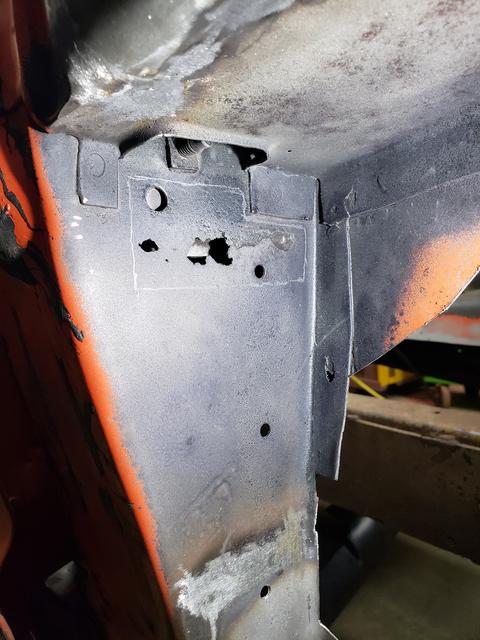
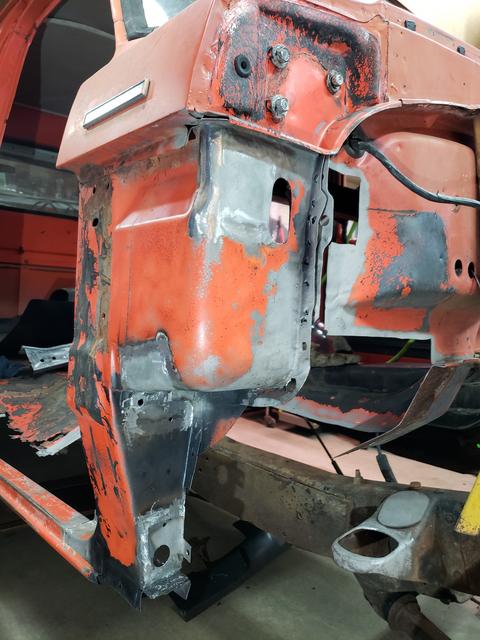
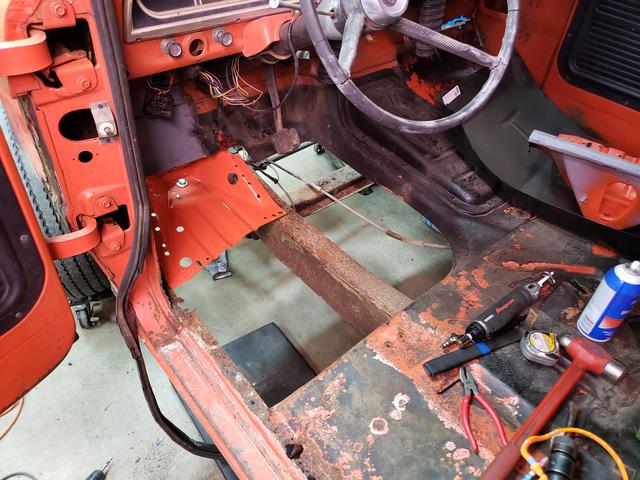
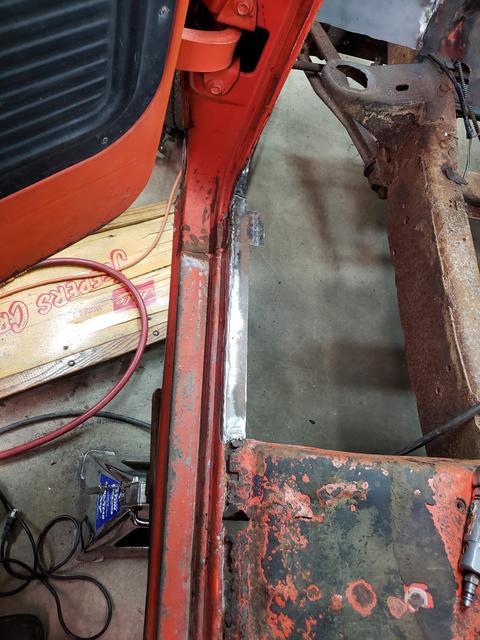
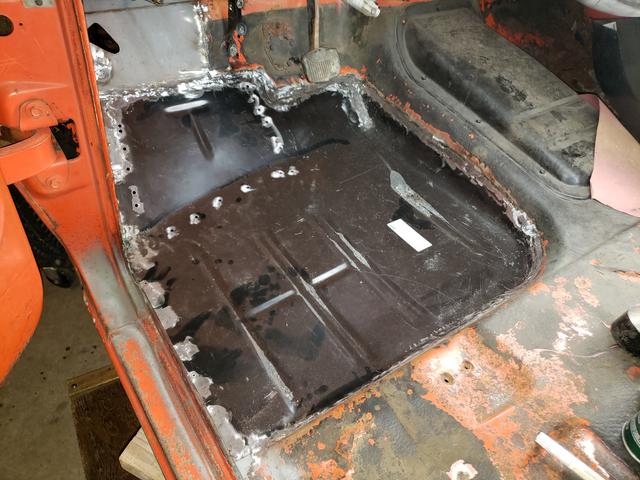
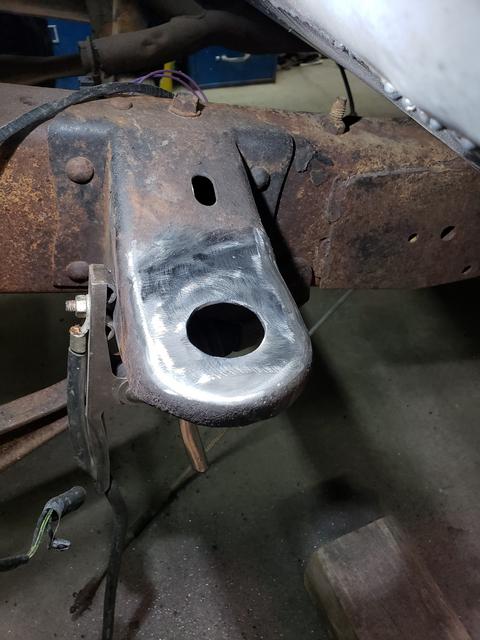
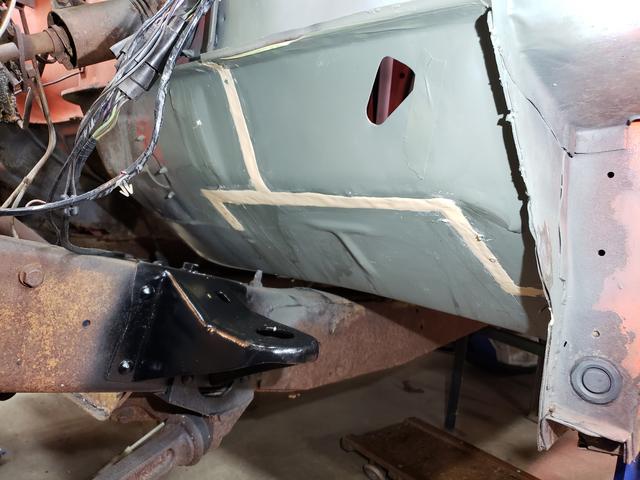
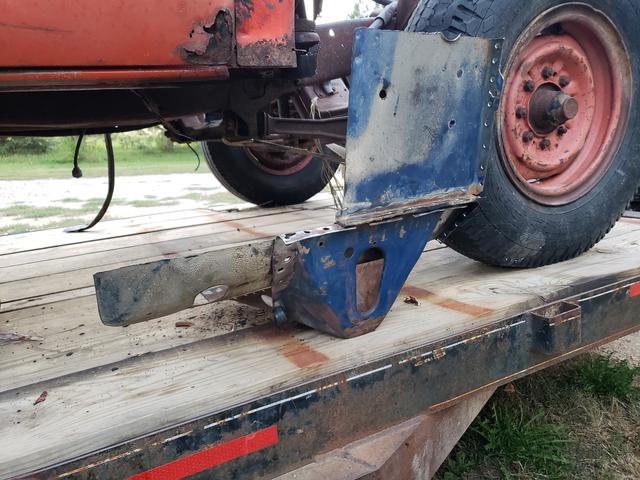
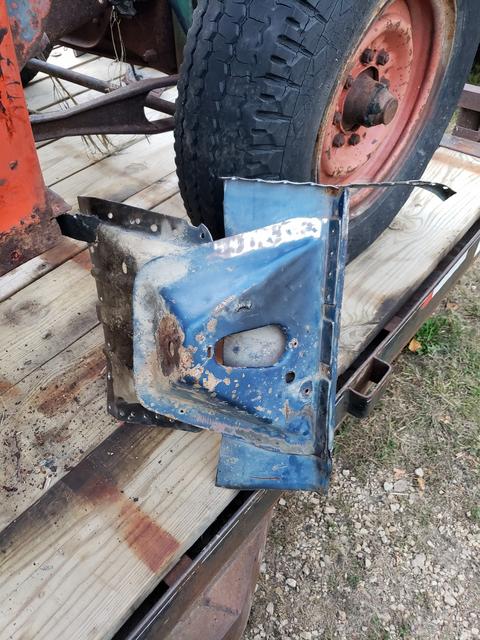
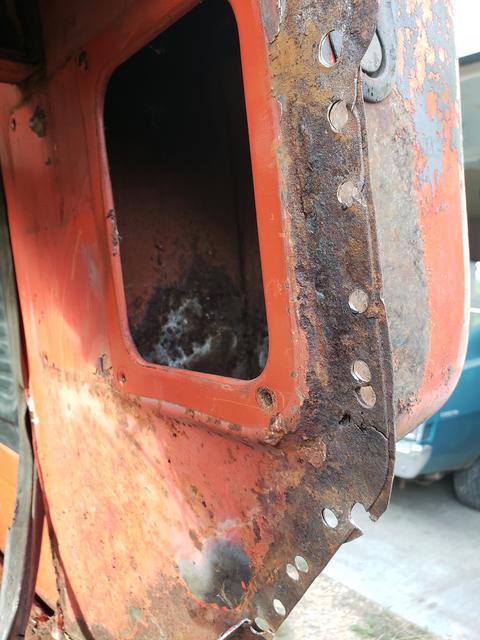
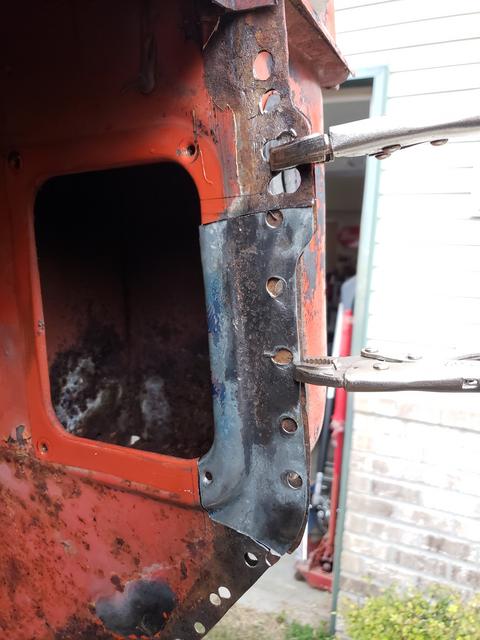
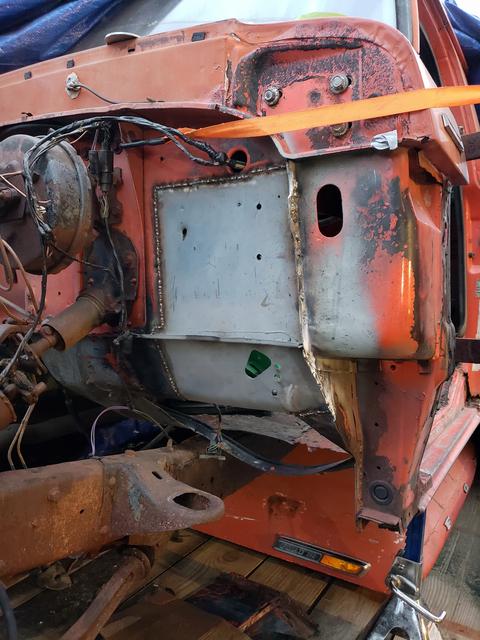
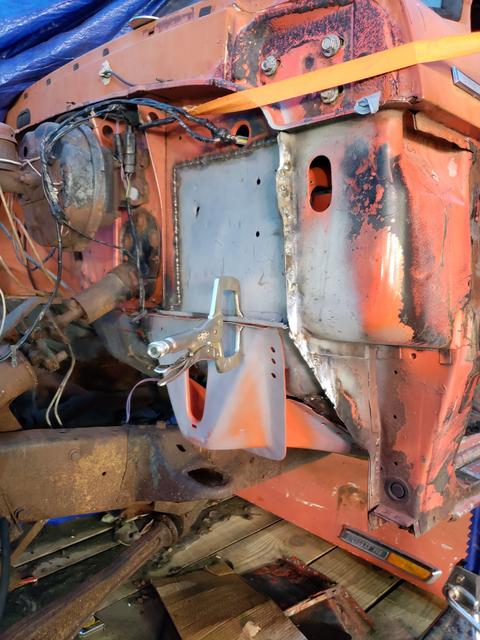
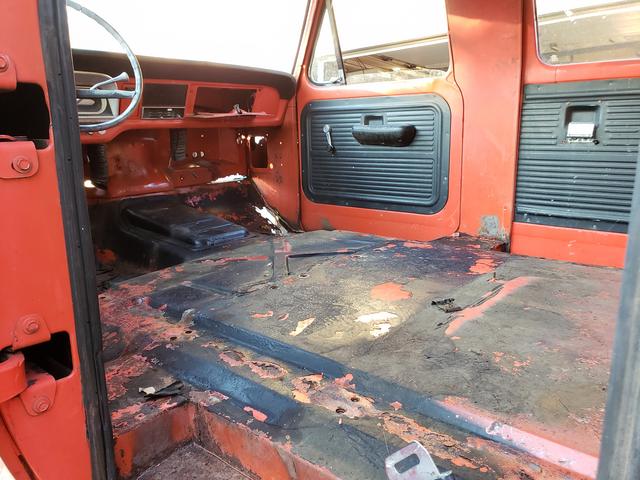
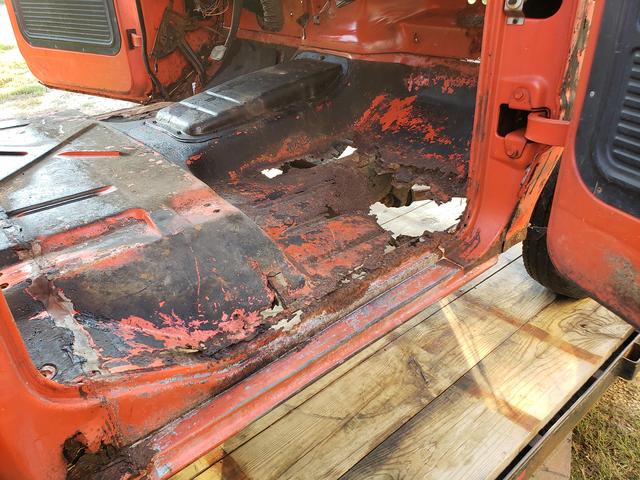
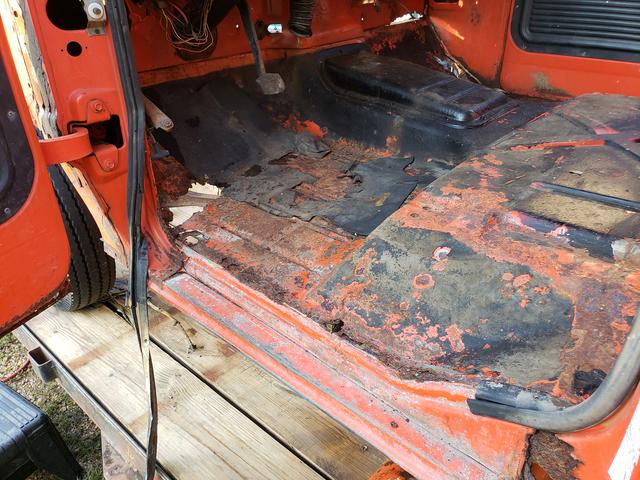
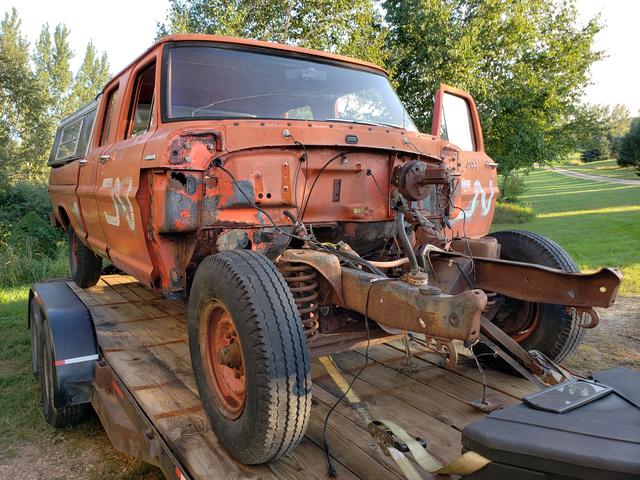
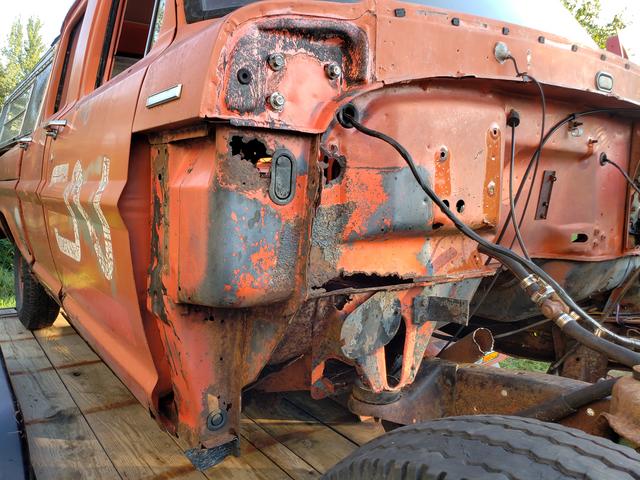
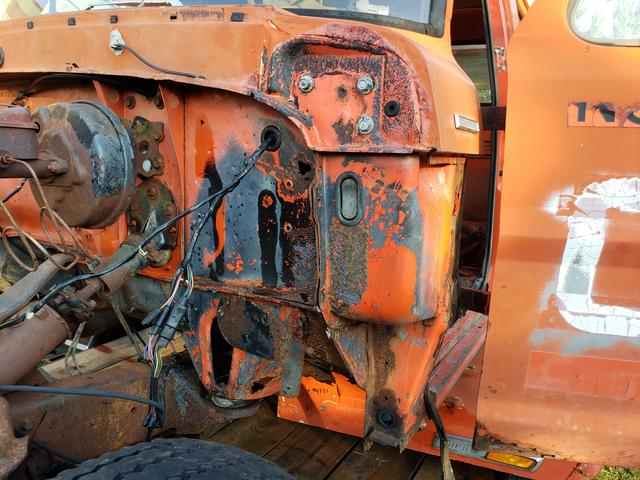
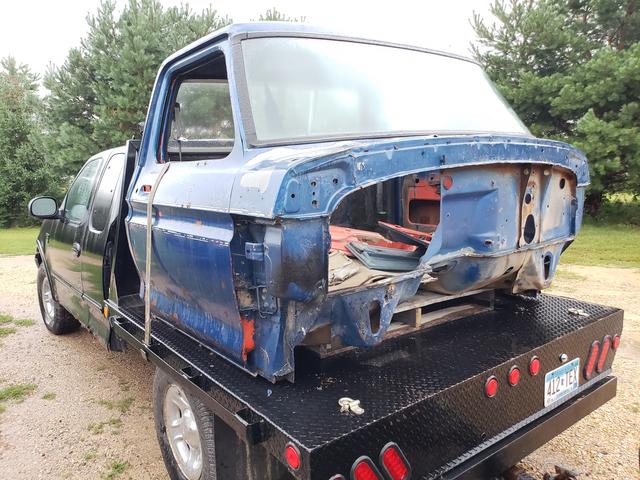
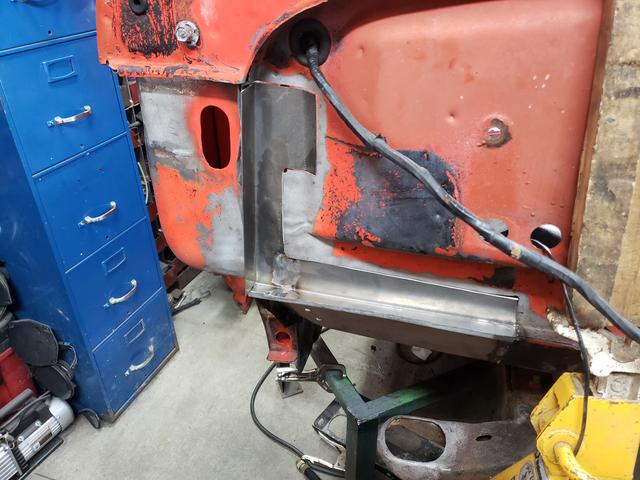
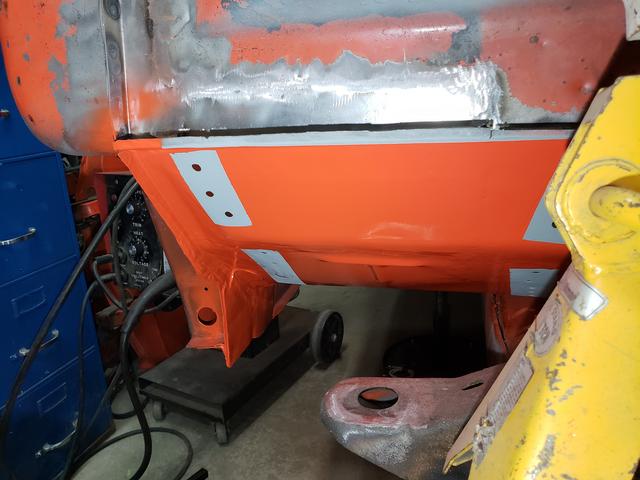
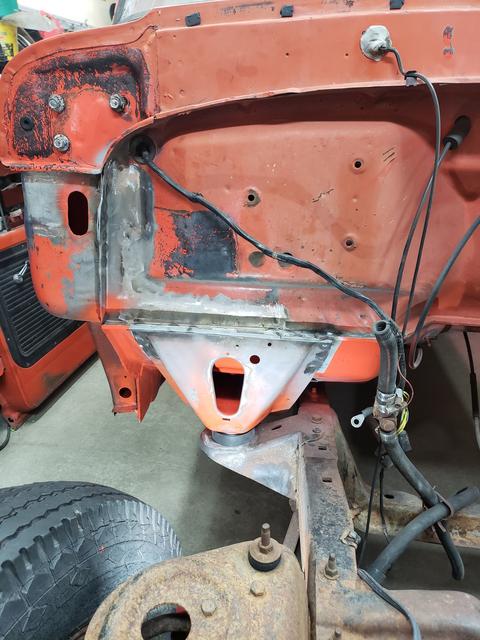
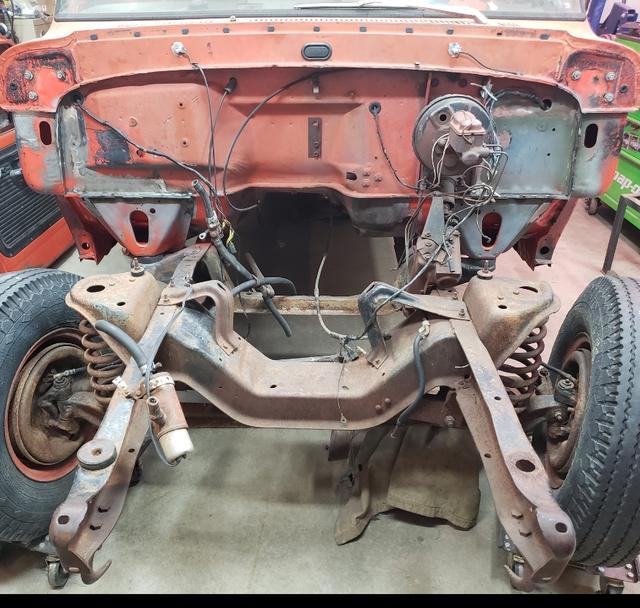
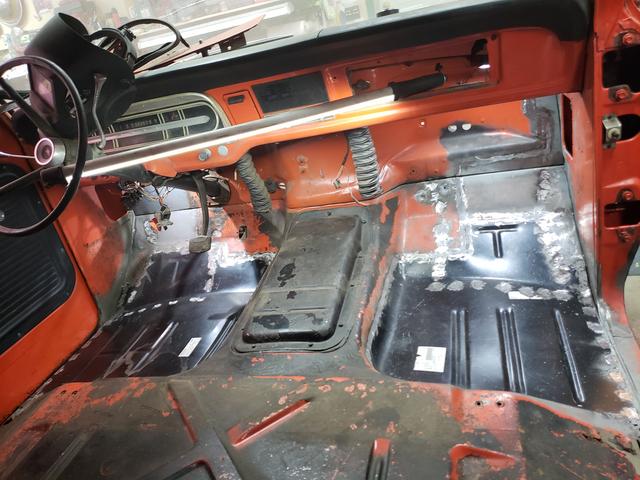
Thanks for the complements! It's turning out better than I had expected. A couple weeks ago I purchased a 36" metal brake and a sheet of 18 gauge steel. I made the last missing piece of the firewall with the brake. To my surprise it was easier, and turned out better than I had expected for my first attempt at making a patch panel from scratch. I finished fixing the cab mount frame bracket, and welding and grinding on the floor pan. The cab mount is installed and the cab is finally sitting the way it should! The next step is replacing the outer floor supports and making a couple corner floor pieces above the supports, then I'll call the cab done for now.

Val406 thanks for the color information, I'll have to look into it some more. It's possible the paint code will be listed in the Marti report as well.


2
Member Projects / Re: 1970 F250 Crew Cab Pickup
« on: December 14, 2018, 08:25:00 PM »
Thanks! and yes, I'm working on the truck and my dad is working on his Torino next to it. I'm sure he will post some progress on his car at some point.

3
Member Projects / Re: 1970 F250 Crew Cab Pickup
« on: December 13, 2018, 10:42:49 AM »
Passenger side is starting to look like something again. I still have to make a couple small firewall sections, then ill install the cab mount.


4
Member Projects / Re: 1970 F250 Crew Cab Pickup
« on: November 20, 2018, 11:55:48 PM »
The passenger side is going good so far, I have the floor, cab mount, and rusty firewall sections cut out. The inner rocker pannel was rotten in a few places so I removed it to work on it. Unfortunately all of the 1967-1972 replacement inner rockers that I've found are re packaged 1973-1979 inner rockers which are similar in shape, but far from correct for 1967-1972s. I removed the inner rocker from the 1978 doner cab and cut it up to make patch sections. I cut the patch section out, welded it flush to the bottom of the weather strip channel, then cut the top off, cut a section off the bottom of the top piece and re welded the top back on to match the height of the original weather strip channel. The lower section of the doner rocker was shorter due to the weather strip channel being taller so I cut the bottom off the patch section, cut a larger bottom section from another area and weld it in. This was repeated in a few other places. The front door pillar section is another piece that had to be somewhat fabricated. Once again all of the pillar patch sections I could find were re packaged 73-79 pillars which aren't right either. I happened to have a 73-79 pillar pannel and ended up cutting the inner edge out, massaging it a bit, cutting the lip off, welding on a larger lip section, welded the patch in, rolled the edge to match and cut off the excess. The front of the door pillar also had some rust spots along with the air vent box. The passenger side cab mount bracket was also rotted in the same places as the driver side. Hopefully will be able to get the inner rocker in soon then on to the firewall and floor.


5
Member Projects / Re: Intro and new rusty pickup project
« on: November 02, 2018, 09:42:38 AM »
That's a pretty clean looking truck,  I've always liked the camper special tool box on the side. I never understood why that didn't catch on more and become an option on the newer trucks.

6
Member Projects / Re: 1970 F250 Crew Cab Pickup
« on: November 01, 2018, 10:28:03 PM »
The driver side firewall section, floor pan, and cab mount are almost done. I cut the old floor pan out along with the rusty section of the inner rocker that the floor pan sits on, made a new inner rocker section and welded it in. The new floor pan didn't fit quite as nicely as I had hoped, but after some relief cuts and persuasion it didn't turn out too bad. I cut out the rotten cab mount frame bracket section and welded in a plate then cut a new hole. After pre fitting the cab mount a few times I ground down the welds on the outside of the floor pan, primed, seam sealed and painted. Tonight I finished grinding the rest of the welds, but I have a couple spots that I want to do some touch up welding on, then I'll start on the other side.


7
Member Projects / Re: 1970 F250 Crew Cab Pickup
« on: September 30, 2018, 09:09:09 PM »
I've been slowly working on repairing the firewall and cab mounts. I haven't done a lot of body work so a lot of this is new to me and it's kind of slow going. I cut out the patch pannels I needed for the firewall along with the cab mounts. I sand blasted the mounts and firewall pieces then painted the insides of the cab mounts. I also recieved the floor pans and inner rockers, unfortunately the LMC inner rockers are wrong and look to fit 1973-1979 trucks but not even close to the 1967-1972s. The channel that the weather strip sits in is nearly a half inch taller then what it should be, and the rear where it kicks up has a protruding triangle stamping that should be flat. Unfortunately LMC is the only company to offer inner rockers so I'll either have to do a lot of cutting and welding on them, or see if I can salvage sections out of a rusty scrap truck I have. I really only needed a small section so I wasn't planning on using the entire pannel anyway. I decided to start on the slightly less rusty side, after I cut out the rusty firewall section and cab mount, I found some more rust by the floor vent where it meets the pinch weld seam. I cut out another patch section and welded it in. I sand blasted the inside of the air vent box and the pinch weld seems then primed and painted. I managed to get the firewall section fitted and welded in, but ran out of time tonight to get the cab mount welded in. Last week I ordered inner fenders, core support, and rubber cab mounts with hardware from Dennis Carpenter, so as soon as I get the cab fixed it should be ready for reassembly.


8
Member Projects / Re: 1970 F250 Crew Cab Pickup
« on: September 09, 2018, 01:37:16 AM »
Last weekend I started cleaning and disassembling the cab. While cleaning it out, I found a couple little bits of paper that looked like what was once a build sheet, I also found a cool CN knife behind the rear seat! I started with removing the seats and gas tank, the front seat is in tough shape,  the driver side is shreded down to the springs and the seat back is bent a bit. The rear seat is useable as is with a good cleaning, the vinyl is a little hard but will be ok for now. One of the rear seat belts was still wrapped in plastic and somewhat rolled up behind the seat. Then I looked up at the head liner above the rear seat and found some writing that says "What you looking up here for" I thought that was kind of funny. After removing the seat belts, door sill plates and rubber floor mats I pressure washed the inside of the cab. I found a nice clean hood on craigslist that was even the right color orange so I hopped in the 1968 F250 and picked it up for $50! I also managed to acquire a doner cab that has rust free factory cab mounts, along with some good firewall sections. Then a friend of mine was cleaning out his garage and gave me a nice bench seat out of a 90s ford truck, eventually I will fix the original seat, but this one is nice and will work for the time being. Throughout the week I started removing the front clip and placed an order for floor pans and inner rocker pannels. The inner rockers are pretty solid, but the top edge where the floor pan sits is gone in spots on the right side, left side isn't as bad. Today I finished removing the front clip, removed the heater box and the firewall insulation, Then pressure washed the front end and the rest of the underside of the truck. Some more rust was found in spots other than just the toe board above the floor pans, but the doner cab should have most of the needed patch sections. Next step is removing the cab mounts from the doner. Here are a few more pictures.


9
Member Projects / Re: 1970 F250 Crew Cab Pickup
« on: September 01, 2018, 01:04:27 PM »
Lurking I was and I finally succeeded in logging back in! I've known about the CN truck for a few years and had been trying to buy it from my uncle ever since I saw it. It was last registered in 1985 and was sitting in a field with a tree growing through the front end. Last weekend I was able to make a deal and we extracted it from the field. Plans for now are to just fix what's needed and get it driving again. I have a decent running 4 barrel 390 with C6 that came out of a 76 f250 that I scrapped out a few years ago that I plan to put in for the time being. I have a nice 1967 grille with brush guard that will be installed as well. It needs the usual cab mounts floor pans, core support, and inner fenders, some of which I have laying around, over all it's pretty rough but savable. I do plan on getting the Marti report, but was able to decipher some of the information on the data plate using the information on the fordification website. I know it's a 2x4 style side truck that came from the Ontario Canada plant, was built in June 1970, came with a 2 barrel 360 and c6 with a dana 60 4.10 listed as T.S. locking. The exterior color was left blank but the color in the door jams looks like calypso coral even though that color wasn't available on a truck until 1971. The DSO code is interesting and doesn't seem to match any of the listed locations. The model number and GVW also don't seem to match any of the listed options. I  found a couple of old cab cards laying on the floor, the one from 1971 is still readable. I'll try to post updates as the project continues. Here are a couple pictures of where it was the first time we saw it, along with the cab card, and grille that I have set aside for it.


10
FE Technical Forum / Re: FE Dizzy & Ignition System
« on: June 15, 2011, 11:24:52 AM »
I used the Accell/Mallory Unilite conversion on mine, Still using the original distributor and cap so it all looks factory

11
FE Technical Forum / Re: 390
« on: June 06, 2011, 06:42:07 PM »
The 390 GT engine was a pretty anemic engine, and didn't do Ford's reputation any good back in the 60s.  I'm not sure where you come up with the intake and exhaust manifolds limiting power on the engine to 275 HP though; can you explain your reasoning?  I don't think that the stock HP ratings are unachievable with the S intake and the 390 GT exhaust manifolds, although I can't say I've ever dynoed a stock 390 GT engine.

I only have good dyno data on one stock bore/stroke 390; almost all the people that I know who've built these engines turn to a stroker kit, for the reasons that you specified in your post.  The 390 I tested had C6AE-R heads that were given a mild porting job, so that they flowed about like 428CJ heads.  It had a 270S Comp solid cam, Performer RPM intake, a 600 cfm carb, and the truck headers.  It made just at 400 HP and 440 lb-ft of torque.

Jay I believe you are talking about my motor, if so Im actually running  C8AE-H Truck heads from a 360 out of a 72 half ton truck, It was a little more then a mild port job though. I found my flow sheets and my Intake flow number on the one port with the little bump up in it was 242.40cfm at 0.500 lift, we aren't exactly sure how much that bump affects the flow but we were guessing the others were around 248cfm at 0.500, I was hoping he was going to flow them closer to 0.600 lift because as fast as the numbers rose as lift increased they would have probably flowed 248-250cfm just by increasing the lift 0.050 even on the bad port.
The Exhaust flowed 206.72cfm at 0.500 lift, and probably would have been closer to 212cfm.  We could have gotten more out of them with a little more port work but this is where we stopped. This was also using the stainless steel 428 Edelbrock valves and springs, These are the ones that came in the Performer RPM heads, then I did a 3 angle grind on the intakes and a two angle grind on the exhaust valves. My Iron truck heads flow about the same as stock aluminum Edelbrock performer RPM heads on the intake and the exhaust actually flows better then the performer heads.

I would really like to know what the HP numbers are now with the Holley 830 Annular carb. Switching from the 600 double pump to the 830 was a pretty noticeable difference along with better throttle response and slightly better gas mileage when driving nice, its not even properly tuned yet, just bolt on strait out of the box and it doesn't seem to run rich even on the warm days, infact it was running a bit lean when it was cooler out. Do you still have my dyno data with your 750, or was it the 800? I never got copies of my dyno sheets.

12
Well I got my Comp Cams rods today, They to are different from the rest of the rods here. They dont have a press in ball like the other ones, The cup is also different, the walls on the cup is quite a bit thinner but i dont think that will be an issue being it has the correct cup size and angle. Are there any pros or cons to the cup or tip on these rods?


13
I had thought about canceling my comp cam order and using yours and the 4 correct melling rods but Sean said to keep all the melling rods because hes pretty sure we can get our money back. At this point i just want to make sure i have enough of the correct rods here so i can get the motor put back together early this weekend, that and i really dont want to put any of the melling rods correct or not back into my motor.

14
Jay thanks again for the rods, I actually ended up ordering another set of comp cams rods, the number 7530-16 that you gave me was the correct number, only problem was they only had 3 singles and wouldn't be able to get the 4th one to me by the weekend, so I ordered a whole new set of 16.

So here comes the interesting part that I over looked both when I assembled the motor and when I took the rods out.

So I had a brand new box of melling rods when I put that motor together. Tonight I went back out to the garage to compare your comp cam rods to the melling out of my motor. I grabbed a random melling rod out of my organizer/Dr Pepper box and I compared it to your comp cam rod and for some reason they looked identical... Thats not right they were WAY different, so i put it back and grabbed another one, that one was way different. I ended up with 4 rods in my batch of melling rods that look exactly like your comp cam rods. Same diameter, same length, same cup size, same ball I also noticed that most of my melling rods had part numbers on them, a few didnt but they were the melling rods.

So I looked at the 4 oddball rods closer and I find that they have the same MPR-78 Melling number on them as the incorrect melling rods, Melling must have changed their rod design for that part number and Im not sure witch one is the newer one, the four odd ball ones I have are correct and identical to the comp cams rods only they have melling part numbers, the other melling rods I have that came in the same box have the same number but the wrong cup, smaller diameter rod, and a different ball on the end.

Check out the pictures, the one on the far left is the defective MPR-78 Melling rod, the one in the middle is one of my odd ball MPR-78 Melling rods and the one on the far right is the Comp Cam rod.


15
FE Technical Forum / Broke & Bent Melling MPR-78 Push Rod in my 390
« on: May 23, 2011, 01:16:53 AM »
Well Ill start off by saying what I have. 405hp 390 with a 270s Comp Cam, solid lifters with melling MPR-78 push rods, stock adjustable rockers and rocker shafts with end stands.
So on saturday I went to take the truck into town like every weekend, got into town, started accelerating around a corner, 1500-2000rpm not getting on it at all, then all the sudden POP POP POP POP through the carb. Thought it was possibly a broken valve spring, so dad pulled me home. Got home pulled the valve covers to find that the exhaust side push rod on cyl 5 had a broken cup and the rocker was sliding along side of the push rod, intake valve on cyl 5 got bent from trying to open with a pressurized cylinder. So we got to looking at it further and It appears that the ball on the stock rocker arms do not sit all the way down in the melling push rod cups. They seem to ride really high up on the sides of the cup instead of sitting down in them causing them to crack. the only two push rods in my motor that are cracked are the two on cyl 5 but all the other ones appear to be riding high on the rod cups as well. Im not exactly sure what is going on, even the ball end of the melling rods do not sit all the way down in the cup ends of the rods, I tried to take a picture of the ball of the melling rod sitting high on the cup of the broken rod. On the broken one it does sit lower just because half the cup is gone but it still sits really high up. Has anyone else had this kind of problem with these rods? I have two replacements already but I don't want to put it all back together with these rods only to have this happen again in an embarrassing environment, I took the intake off and found the broken pieces, but would like to find a good solution to this. The motor doesn't even have 2,500 miles on it and the rev limiter is set at 5,800rpm so it doesn't really get over revved, and its not like I bounce it off limiter, it has hit it a few times but not for very long. Here are some pictures of the broken and bent rods, If you look close you can also see the wear mark on the cups where the ball is riding along with the crack.

Pages: [1]