Author Topic: Upgrades to my R-code Mach 1...  (Read 43342 times)

0 Members and 1 Guest are viewing this topic.

cobracammer

  • Hero Member
  • *****
  • Posts: 1165
    • View Profile
Re: Upgrades to my R-code Mach 1...
« Reply #45 on: November 28, 2014, 03:56:19 PM »
Sweet Mary!  I love the "thumpity" sound on that cam!  and the exhaust makes it all the more sweet.  Congratulations on squeezing in some fun rides before the winter!  Beautiful car
Jason
2005 Saleen S281 (427 SOHC 2 X 4 EFI swap), T56 Magnum XL 6 speed, 9" Currie rear with 3.89 Gears

cjshaker

  • Hero Member
  • *****
  • Posts: 4462
    • View Profile
Re: Upgrades to my R-code Mach 1...
« Reply #46 on: November 30, 2014, 01:34:42 PM »
Thanks, Jason. The sound from the videos really doesn't do it justice. I'm going to buy a small mic to help with the GoPro sound quality and that should make a big difference. The cam IS pretty "thumpity" and draws attention wherever you go :)
Doug Smith


'69 R-code Mach 1, 427 MR, 2x4, Jerico, 4.30 Locker
'70 F-350 390
'55 Ford Customline 2dr
'37 Ford Coupe

cjshaker

  • Hero Member
  • *****
  • Posts: 4462
    • View Profile
Re: Upgrades to my R-code Mach 1...
« Reply #47 on: March 27, 2016, 07:05:04 PM »
In prep for this years Reunion and later, Drag Week, I finally got around to doing something I should have done years ago, adding sub-frame connectors to my Mach 1. I had looked around at all the different types and finally settled on the Tin Man Fabrications connectors. There seems to be advantages and drawbacks to each type, but I felt these would look the most "factory" when completed. Personally, I would have preferred the type that requires cutting a slot through the floor pan and keeping the tubing exactly in-line with the factory rear frame rails, but I didn't want to totally destroy the floorpans, so these are what I settled on. I am happy with the results though.

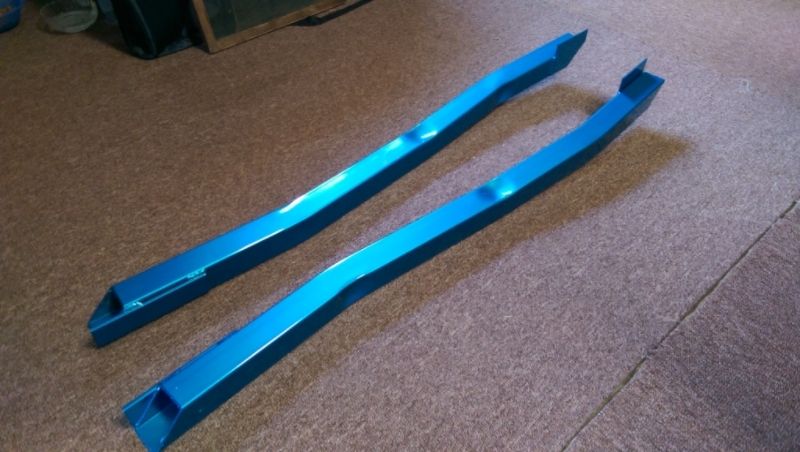
Here's what they look like after I got them, prepped them and painted them to match the car.


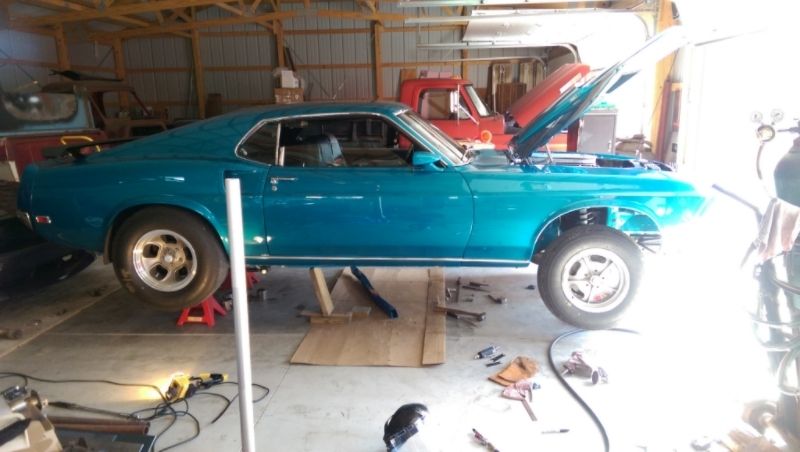
The first thing I did was to raise the car on jack stands as high as I could get it. Then, knowing that my floor is perfectly flat, I carefully measured at each corner of the car, on the frame, and made sure that it was not twisted while in the air. I didn't want to weld it into a twist. Surprisingly, each corner matched the other side perfectly and I didn't have to adjust the height anywhere.

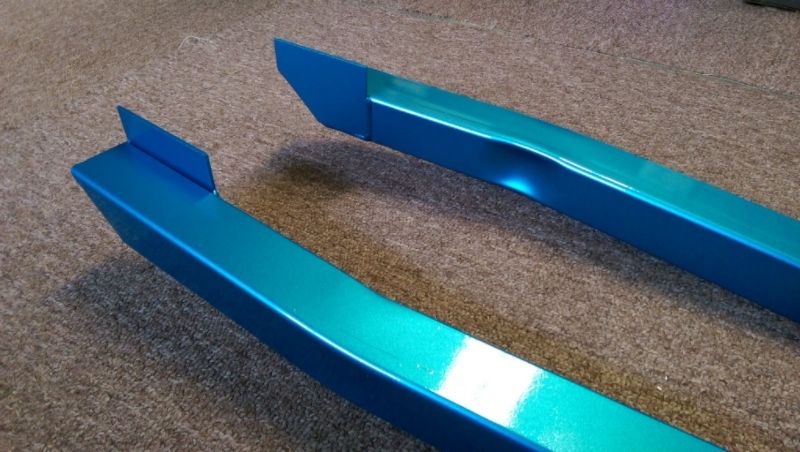
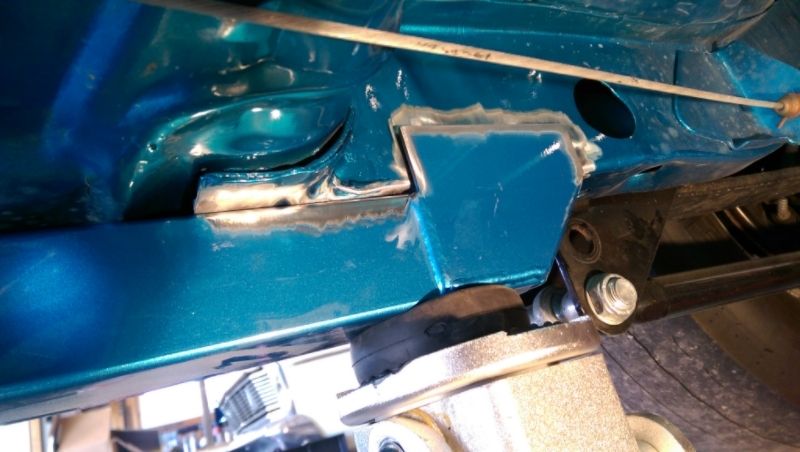
The Tin Man connectors actually slide into the front frame rails about 6". That requires cutting off the rear tab of the front frame rail. It's the only cutting that you have to do, but regardless, once they are welded at the back, they're pretty much permanent anyway. I took my cut-off wheel and chisel and opened up the back while leaving the top portion of the tab. Most guys cut that rear tab completely off, but that leaves a big gap at the top that has to be dealt with since the Tin Mans are 2"x2" and the factory frame rails are more like 2 1/4" x 2 1/2".


They have a 1/4" piece of stock welded to the sides of the front to make up that difference and make them a snug fit along the sides. There's a reason for that. They recommend that you drill 2 holes on each side at 2" and 4" so that you can plug weld the sides and add a lot of torsional strength.

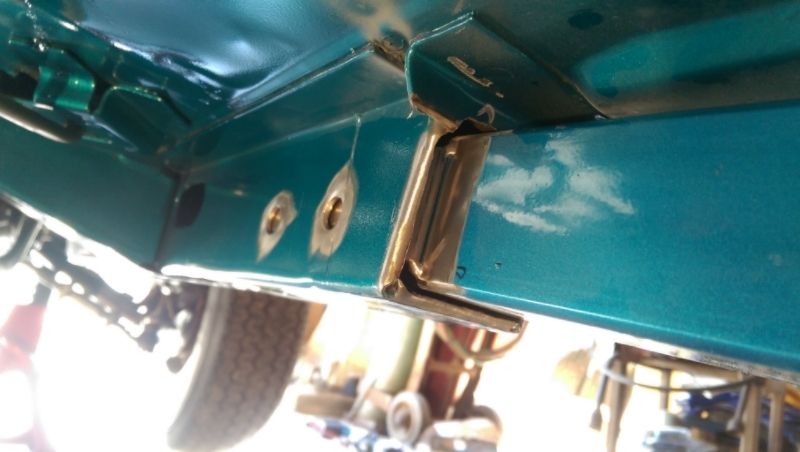
Here's a picture after I got them in and fitted after doing some fine tuning with a die grinder.


And here's a couple pictures after drilling the side holes and dressing the area in prep for welding.


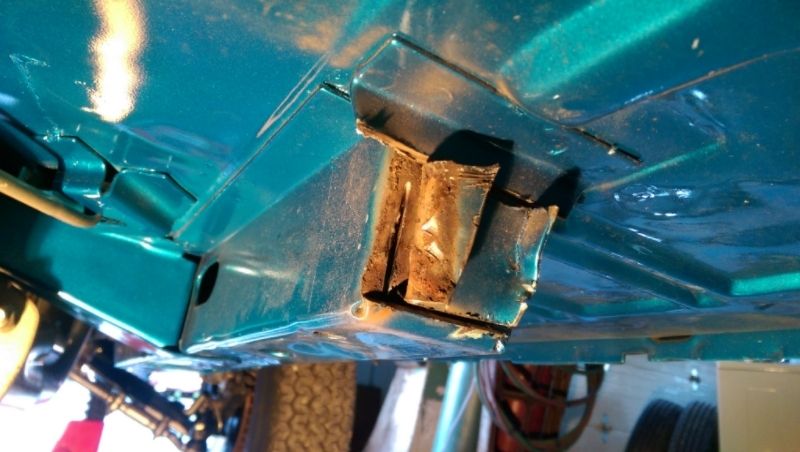
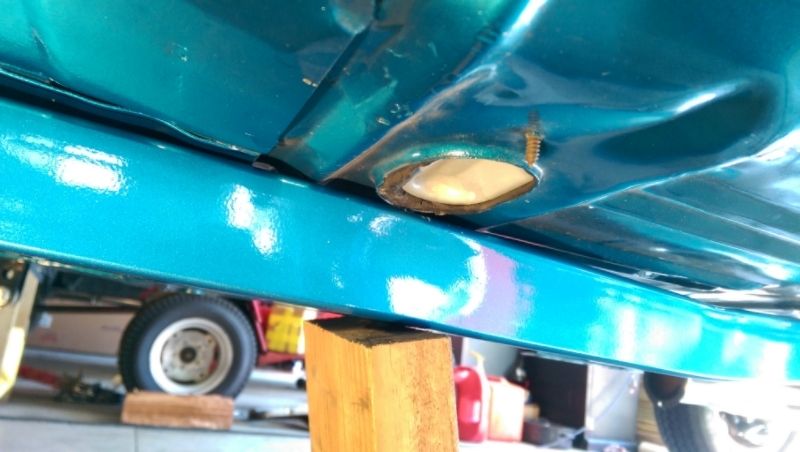
Then I re-fitted them and marked at the rear where the paint needed removed for welding. I had one issue where the rear floorpan plug and screw were keeping the connector from fitting flush with the floorpan. I ground off the tip of the screw and gently persuaded the holes stamped edges a little flatter with a hammer. That was good enough to get a flush fit.

Here's a few pictures of fitting and dressing the rear.


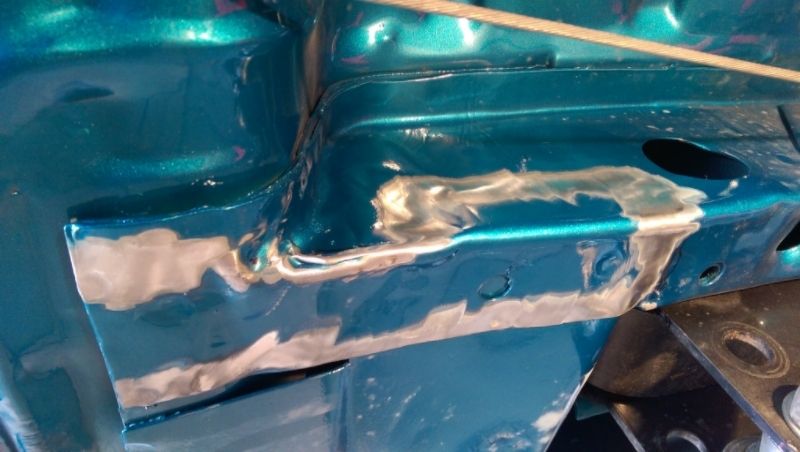
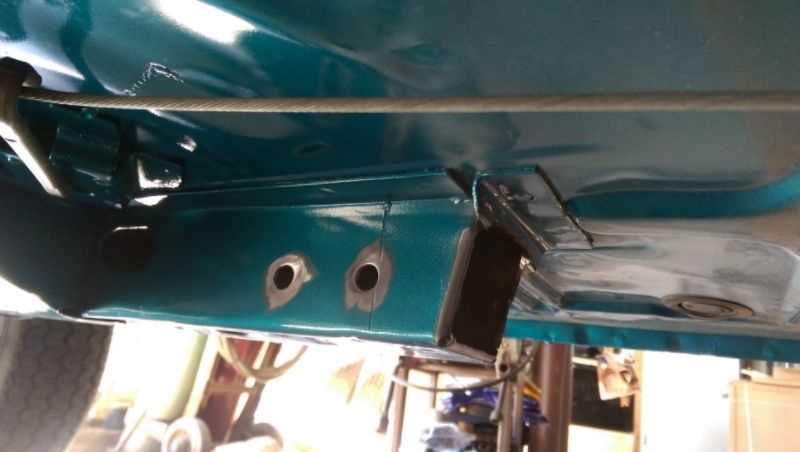
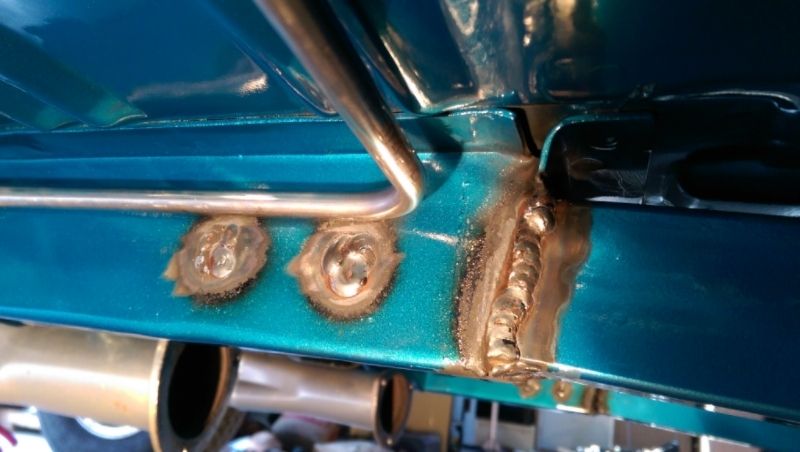
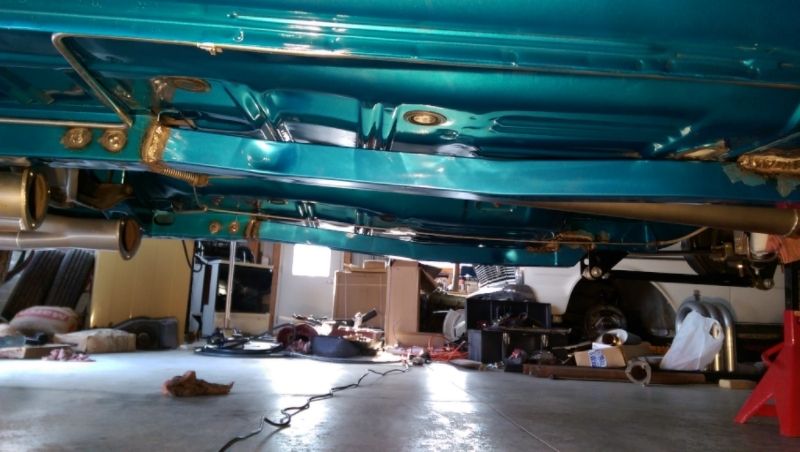
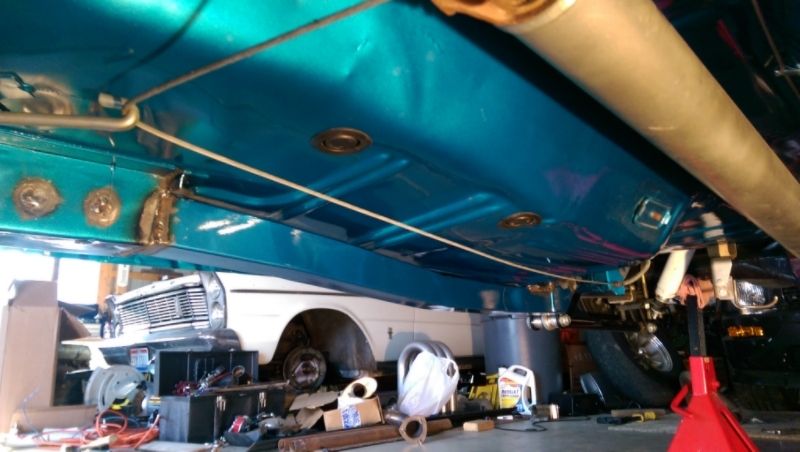
And some pictures of them after being welded and wiping stuff down. Now all I need to do is lightly touch up a couple of places on the welding and then touch up the paint.


By the way, if you're wondering how I dealt with the fuel line right above the plug holes, I found the easiest way to deal with it was to worry about it, think about how to protect them, and then totally forget about it while I was welding.  That seemed to work out quite well. :o :o ::)

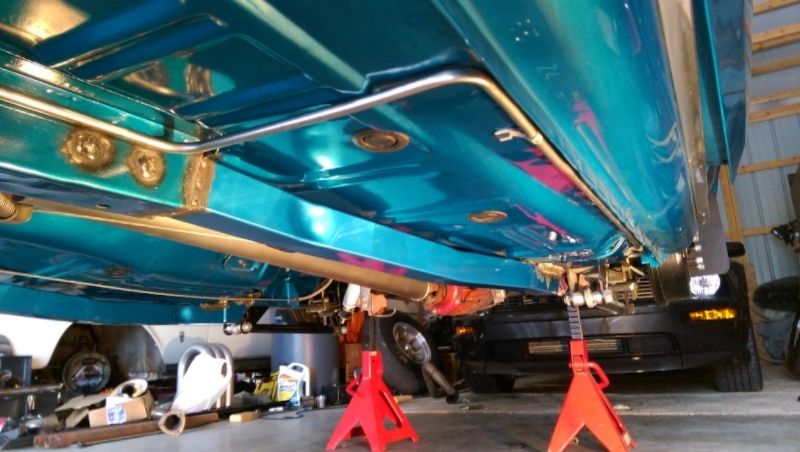
I was a little concerned about how low they would hang and if they would be easily noticeable after the installation. When I mocked them up, I stood back a ways and took this picture. Unless you are about 30' away, you can't even see them. They do hang down a bit in the back, which I'm not real keen on, but they won't be all that noticeable unless you're crouching and looking at the bottom.


Overall, I'm pretty happy with them and was able to finish the job in one day, minus the paint touch-up. It would have gone alot quicker if I had a lift. Doing this kind of work on your back, welding overhead, just plain sucks. I'm spoiled with my lift at work, and I really need to get one for my garage! I'm kind of anxious to see how they make the car feel, but while I've got it up in the air I'm going to finish making a front driveshaft loop, and I'm also considering adding a set of exhaust cut-outs. The cut-outs will have to wait until after the Reunion though. I've got too many other things to finish in the meantime, like getting my line-lock on and finishing the truck.

« Last Edit: March 05, 2018, 08:40:17 PM by cjshaker »
Doug Smith


'69 R-code Mach 1, 427 MR, 2x4, Jerico, 4.30 Locker
'70 F-350 390
'55 Ford Customline 2dr
'37 Ford Coupe

turbohunter

  • Hero Member
  • *****
  • Posts: 2509
    • View Profile
Re: Upgrades to my R-code Mach 1...
« Reply #48 on: March 27, 2016, 07:13:26 PM »
Those are indeed pretty darn clean.
I like that they insert into the frame.
Marc
'61 F100 292Y
'66 Mustang Injected 428
'66 Q code Country Squire wagon


427Fastback

  • Hero Member
  • *****
  • Posts: 603
    • View Profile
Re: Upgrades to my R-code Mach 1...
« Reply #49 on: March 28, 2016, 12:17:39 AM »
I put frame connectors in the 68 circa 1988 when the 427 swap was planned and in motion.I felt the difference in body movement inside of 50 feet...Did you feel the difference right away.??
1968 Mustang Fastback...427 MR 5spd (owned since 1977)
1967 Mustang coupe...Trans Am replica
1936 Diamond T 212BD
1990 Grizzly pick-up

My427stang

  • Hero Member
  • *****
  • Posts: 3943
    • View Profile
Re: Upgrades to my R-code Mach 1...
« Reply #50 on: March 28, 2016, 06:07:11 AM »
I put frame connectors in the 68 circa 1988 when the 427 swap was planned and in motion.I felt the difference in body movement inside of 50 feet...Did you feel the difference right away.??

Same here, mine was night and day difference.  In fact, just jacking the car up from the front you could see the difference!
---------------------------------
Ross
Bullock's Power Service, LLC
- 70 Fastback Mustang, 489 cid FE, Victor, SEFI, Erson SFT cam, TKO-600 5 speed, 4.11 9 inch.
- 71 F100 shortbed 4x4, 461 cid FE, headers, Victor Pro-flo EFI, Comp Custom HFT cam, 3.50 9 inch

cjshaker

  • Hero Member
  • *****
  • Posts: 4462
    • View Profile
Re: Upgrades to my R-code Mach 1...
« Reply #51 on: March 28, 2016, 06:45:28 AM »
I just did this yesterday and haven't had a chance to drive it yet since putting them on. I put the wheels on Saturday and changed the oil, then took it for its first spring drive. It will probably be a week or two until I drive it again while I do some more work to it.
Doug Smith


'69 R-code Mach 1, 427 MR, 2x4, Jerico, 4.30 Locker
'70 F-350 390
'55 Ford Customline 2dr
'37 Ford Coupe

machoneman

  • Hero Member
  • *****
  • Posts: 3854
    • View Profile
Re: Upgrades to my R-code Mach 1...
« Reply #52 on: March 28, 2016, 08:08:40 AM »
Nice parts and a nice install. I did the frame connectors long ago on my '70 Mach 1 with pieces from Competition Engineering's (C/E) weld-on square tubes but I like your slip-ins better. And yes, they did vastly tighten up the handling. An export brace and Monte Carlo bar is also highly recommended to really fix things up.

One trick: on a non-connected Stang, jack the car up right under the front's  L or R front strut rod box. Once that side's tire comes off the ground, it'll take another 6" to 8" of lift to get the opposite side's tire to lift off the ground! 

With sub frame connectors, a Monte Carlo bar and export brace.....only 1-2"! 

I also added the shock tower reinforcement plates ala' the OEM Ford Boss 302 Chassis Manual (worth buying) as shown in this link. That and most of the mods shown as well.

http://www.sancospecialties.com/mustang.htm
 
« Last Edit: March 28, 2016, 08:19:44 AM by machoneman »
Bob Maag

My427stang

  • Hero Member
  • *****
  • Posts: 3943
    • View Profile
Re: Upgrades to my R-code Mach 1...
« Reply #53 on: March 28, 2016, 08:09:54 AM »
Doug, do you run a Monte Carlo bar and an export brace?  Those also help tie up the front end significantly

Although, not a big deal for drag racing, as soon as the truck is back together, I am building a bolt on removable cross member between the lower control arm mounting points too.  First benefit is to allow me a single point to jack up the front end, but I also want to tie together the mounting points for strength in the corners.
---------------------------------
Ross
Bullock's Power Service, LLC
- 70 Fastback Mustang, 489 cid FE, Victor, SEFI, Erson SFT cam, TKO-600 5 speed, 4.11 9 inch.
- 71 F100 shortbed 4x4, 461 cid FE, headers, Victor Pro-flo EFI, Comp Custom HFT cam, 3.50 9 inch

cjshaker

  • Hero Member
  • *****
  • Posts: 4462
    • View Profile
Re: Upgrades to my R-code Mach 1...
« Reply #54 on: March 28, 2016, 09:29:57 AM »
Ross, I do have the one piece export brace, but not the Monte Carlo bar. It just gets in the road too much since I like to fiddle with stuff all the time. I could do without the export brace also, but I know the car needs it. My car is certainly not set up for corners, so it's not that big a deal to me. This summer, I plan on adding a 6 point cage, so that will pretty much take care of any remaining flex issues. I'm just trying to figure out a way of doing it without cutting holes in my rear interior panels. Good originals are impossible to find and reproduction ones don't fit worth a crap.

A way to tie the lower arm mounting points together is a great idea for anything that cuts corners. The benefit of a central jacking point would be a big plus also.

Bob, my car is an original R code car, so it already has the extra shock tower bracing.
Doug Smith


'69 R-code Mach 1, 427 MR, 2x4, Jerico, 4.30 Locker
'70 F-350 390
'55 Ford Customline 2dr
'37 Ford Coupe

afret

  • Guest
Re: Upgrades to my R-code Mach 1...
« Reply #55 on: March 28, 2016, 12:39:10 PM »
Great job as usual.   :)

« Last Edit: March 30, 2016, 11:20:15 AM by afret »

427Fastback

  • Hero Member
  • *****
  • Posts: 603
    • View Profile
Re: Upgrades to my R-code Mach 1...
« Reply #56 on: March 28, 2016, 12:56:34 PM »
When I ran the stock suspension in the 68 I did box the lower part of the towers as per the Boss 302 Chassis book.I made my own wrap arounds (69 style) and  welded them in.I also made the lower crossmember that the boss 302 T/A's used.All of this was done in the early 90's..The crossmember is now available from Cobra Auto..
I make my own monte carlo bars and they are adjustable and easily removed to do work..


1968 Mustang Fastback...427 MR 5spd (owned since 1977)
1967 Mustang coupe...Trans Am replica
1936 Diamond T 212BD
1990 Grizzly pick-up

cjshaker

  • Hero Member
  • *****
  • Posts: 4462
    • View Profile
Re: Upgrades to my R-code Mach 1...
« Reply #57 on: March 28, 2016, 02:16:08 PM »
Earl, that is exactly what I had in mind. Since I have the fold-down rear seat, I was going to curve them over the back and make my own rear bottom panel. I can carpet it then and it would look pretty stock. I may just eliminate the rear seat though. It adds a lot of weight and won't serve any purpose once the roll bars are in. Or I could just remove the seating and keep it folded down for a nice flat storage area. Thanks for those pictures.
Doug Smith


'69 R-code Mach 1, 427 MR, 2x4, Jerico, 4.30 Locker
'70 F-350 390
'55 Ford Customline 2dr
'37 Ford Coupe

machoneman

  • Hero Member
  • *****
  • Posts: 3854
    • View Profile
Re: Upgrades to my R-code Mach 1...
« Reply #58 on: March 28, 2016, 03:09:07 PM »
Bob, my car is an original R code car, so it already has the extra shock tower bracing.
[/quote]

Sorry, but I think you misunderstood what I was saying, common for folks who weren't around when Ford factory raced the '69's and 70's in Trans-Am long ago.

The tower braces I'm talking about and are in the link I supplied and aren't anything I believe Ford put on at the factory, R code or not. If you do have an R code with these plates, it's a first as I've never seen any OEM 'Stang with them! 

If fact, Kar Kraft and the Parnelli Jones team added same mid '69 season as they noted outer portion of the towers at their bases was flexing. The simple yet shaped pieces of steel are welded on outside of the engine compartment at the base of the towers at an angle to clear the upper A-arm on rebound. Easy enough to make btw as I did to mine.

http://www2.cougarpartscatalog.com/towerbrace.html

This and some other tricks make it worthwhile to grab a copy of that Boss 302 Chassis Manual.
« Last Edit: March 28, 2016, 03:14:05 PM by machoneman »
Bob Maag

rcodecj

  • Sr. Member
  • ****
  • Posts: 474
    • View Profile
Re: Upgrades to my R-code Mach 1...
« Reply #59 on: March 28, 2016, 03:36:34 PM »
I have those outside braces on my 67.