Author Topic: Intro and current project  (Read 90034 times)

0 Members and 1 Guest are viewing this topic.

turbohunter

  • Hero Member
  • *****
  • Posts: 2509
    • View Profile
Re: Intro and current project
« Reply #120 on: June 20, 2014, 11:21:52 AM »
That fuzzy picture is getting into my head more and more.
All the junk on the deck is annoying me.
The one side is so clean.
See all the stuff around the outside of the cylinder?
Also at the feed hole itself there is the wisp of a channel toward the bolt hole.
Would you guys comment on the amount of crap on the surface?
Is that surface crud normal in a FE?
Marc
'61 F100 292Y
'66 Mustang Injected 428
'66 Q code Country Squire wagon


cjshaker

  • Hero Member
  • *****
  • Posts: 4462
    • View Profile
Re: Intro and current project
« Reply #121 on: June 20, 2014, 02:47:18 PM »
That fuzzy picture is getting into my head more and more.
All the junk on the deck is annoying me.
The one side is so clean.
See all the stuff around the outside of the cylinder?
Also at the feed hole itself there is the wisp of a channel toward the bolt hole.
Would you guys comment on the amount of crap on the surface?
Is that surface crud normal in a FE?

That's what I was commenting on. To me it does not look like it was sealing right in that area. Too much discoloration from fluids. There is also carbon present outside of the head gaskets sealing ring which indicates it was not sealing combustion pressure properly either. Do you have a straight edge to check the deck and head for any warpage? I would start there to verify that you have a good sealing surface. If it checks out ok, then look further toward the oil passage and head gasket itself.

Can you give a detailed shot of the head gasket in that area, and perhaps a better shot of that oil hole? I still wonder what that black area is around it. I'm beginning to think it is also carbon. So it may just be a bad head gasket....but you'll need to figure out why it went bad. Was it the gasket itself, or was there a cause for it to fail.

edit: It's nearly impossible to determine bolt torque from disassembly, so you may also want to check that head bolt for possible stretch (probably impossible due to mixing them up) and even check the threads out in the block to make sure they are not pulling out or stripping. It's happened before. Concentrate your detective work in that whole general area.
« Last Edit: June 20, 2014, 02:53:36 PM by cjshaker »
Doug Smith


'69 R-code Mach 1, 427 MR, 2x4, Jerico, 4.30 Locker
'70 F-350 390
'55 Ford Customline 2dr
'37 Ford Coupe

turbohunter

  • Hero Member
  • *****
  • Posts: 2509
    • View Profile
Re: Intro and current project
« Reply #122 on: June 20, 2014, 03:44:23 PM »
Thanks for clearing the picture Doug.
Marc
'61 F100 292Y
'66 Mustang Injected 428
'66 Q code Country Squire wagon


turbohunter

  • Hero Member
  • *****
  • Posts: 2509
    • View Profile
Re: Intro and current project
« Reply #123 on: June 26, 2014, 07:09:19 PM »
Must say, this detective work is fun.
Sat down with my engine today to let it talk to me.
Took my time and just looked at stuff.
Had the feeling it's not the block.
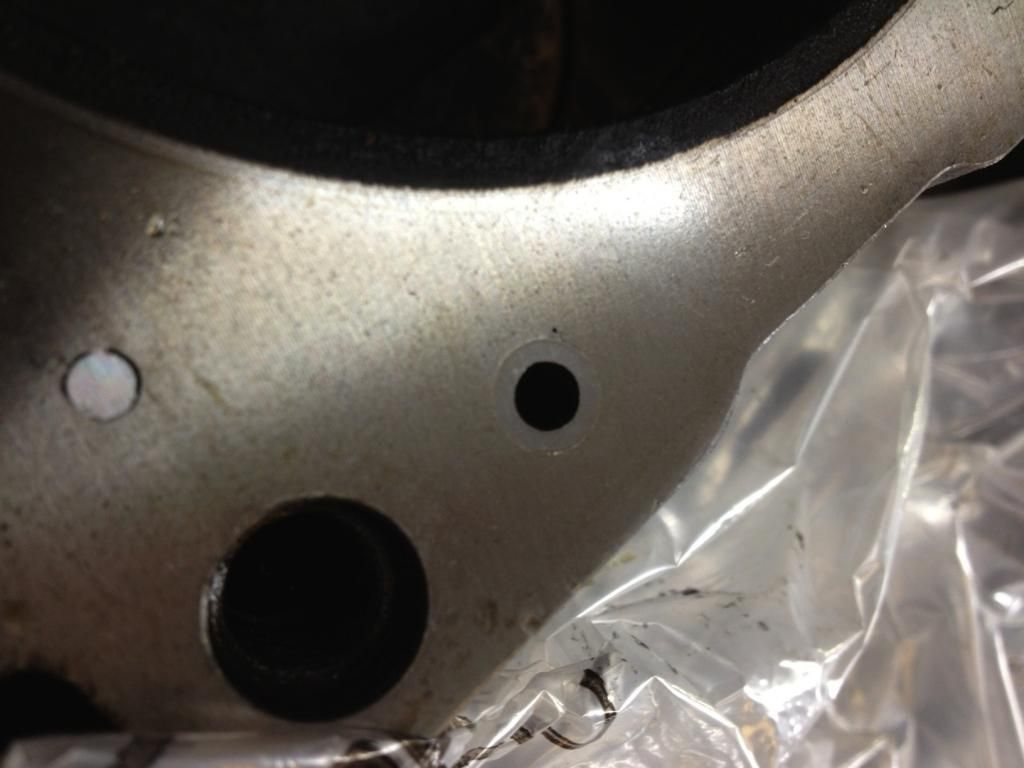
Took a good hard look at the oil galley from the cam and it hit me.
Those holes don't look the right size.
Got the camera down there to take a pic and the camera could see what my eyes could not.
Different metal.
These passages have been sleeved already.
That's not a gasket mark that's different metal.
3/16 passage.
Which cracks me up because the top of this engine is absolutely flooded with oil even with smaller galleys AND restriction in the head.


You can really see the sleeve here.


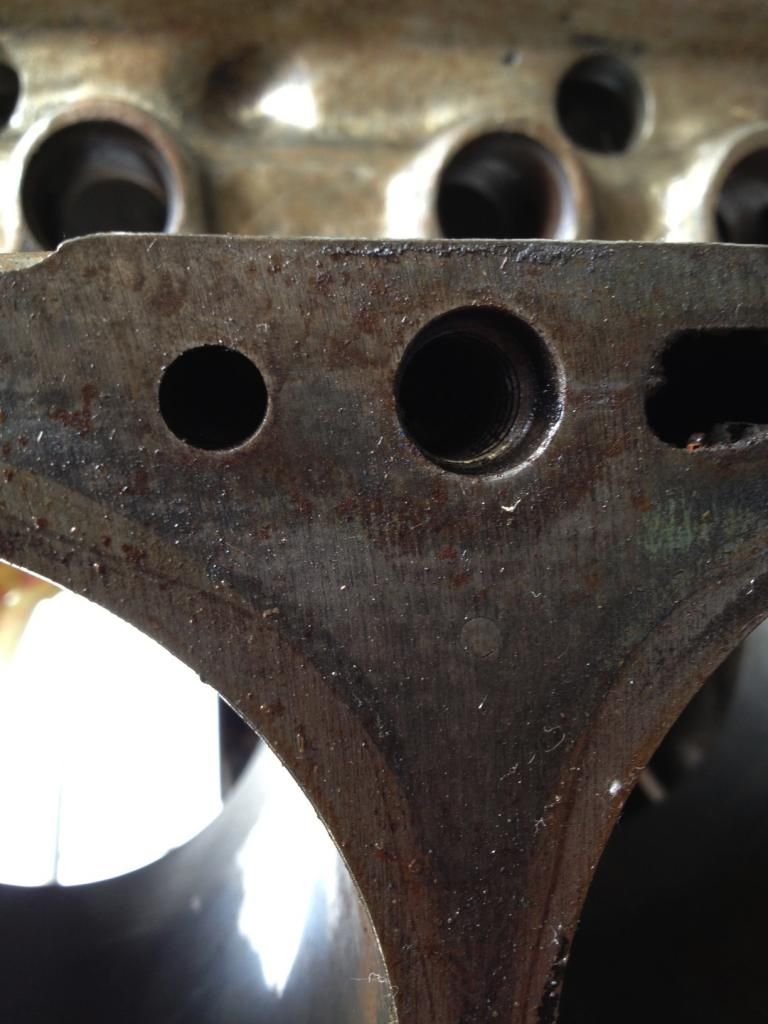
Normal passage on another block. 5/16.


Ok so we know along with that and the fact I couldn't get it to leak with compressed air, it's prolly not the block, at least there.

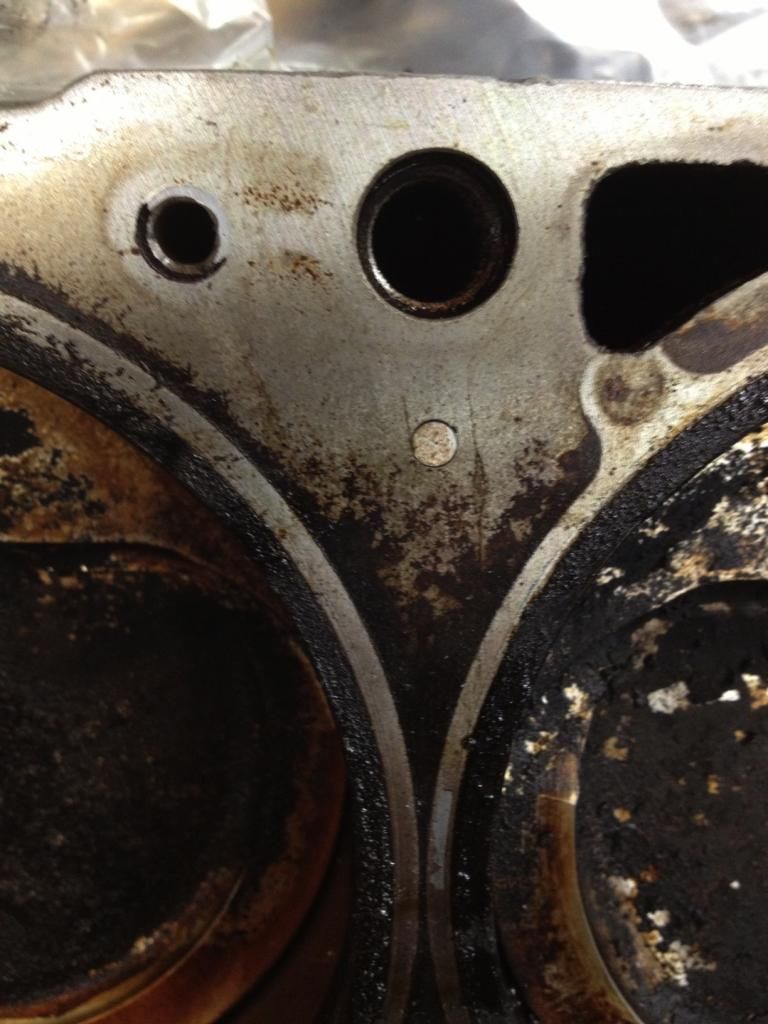
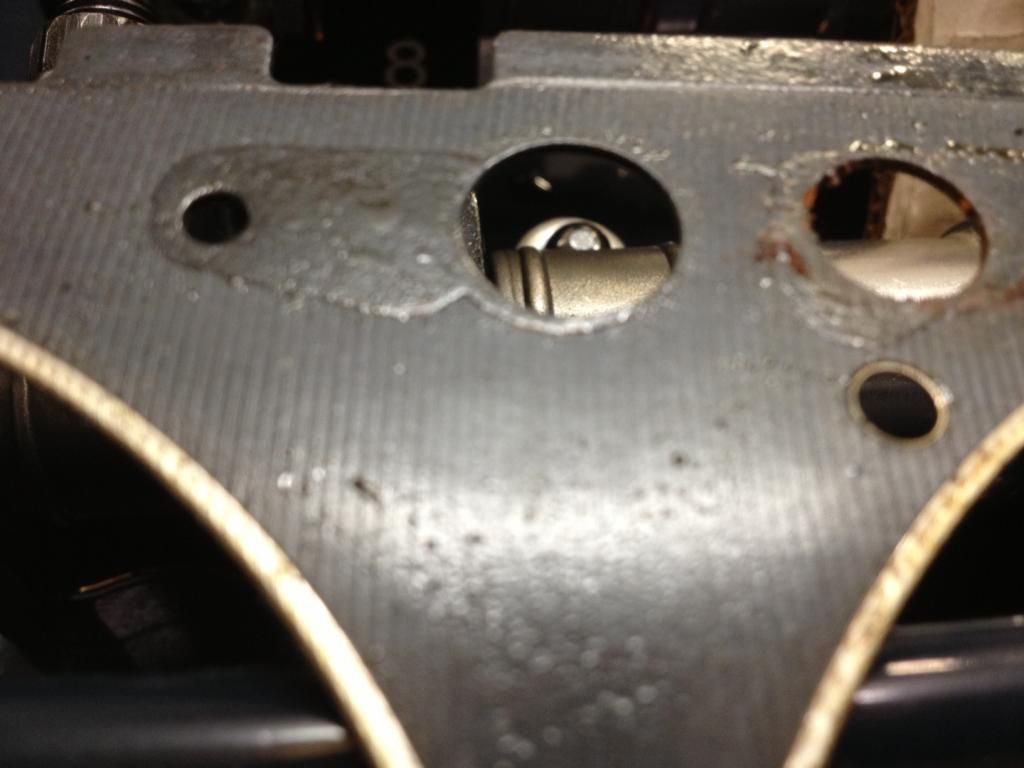
Next I started looking at all the crud on on the dirty side.
It's really built up down the middle of the head.
Also notice the small channel from the oil riser to the bolt hole.


Also, the guy that originally did my heads used a decking machine that is old as the hills.
It's an old Storm Vulcan.
I'll leave it to you machinists to comment on how precise they are if they are from the dawn of time.
Notice the marks on the head side of the gasket.


Upshot of that session is that I took the heads over to be pressure checked.
If that checks out I'll have them re decked.
I'm figuring it is a decking problem that helped or led to the gasket giving up.
Whatchy'all think?
Marc
'61 F100 292Y
'66 Mustang Injected 428
'66 Q code Country Squire wagon


turbohunter

  • Hero Member
  • *****
  • Posts: 2509
    • View Profile
Re: Intro and current project
« Reply #124 on: October 22, 2014, 07:26:05 PM »
Well she's finally back together and running.
If I said that I had to clean out every little crevice that oil could go I would be understating heavily.
It was a bitch to clean everything out.
I haven't said anything online except to a few guys but since my brother is a gasket company (SCE) we worked on a new gasket for FEs. BTW Thank you guys for your comments.
It is a composite of aluminum, steel, and a mil spec coating (called nitrophene) from a gov contractor that is branching out. Also has beads around the water and oil passages. The first run is 4.250 bores with a compressed thickness of .040. We took out the metering hole between the block and head so there is nothing for the oil to push against and maybe work under. Overkill, maybe, but why not take it out since everybody meters the oil in the head or the block anyway these days. With the high volume/pressure oil pumps these days why give the oil a possible place to sneak in between the block and head.
These pics are on a 428 block I have in the garage not the truck engine.


Here's the vid of the truck running again.

https://www.youtube.com/watch?v=LDiEzQxS3EM

« Last Edit: October 22, 2014, 07:28:38 PM by turbohunter »
Marc
'61 F100 292Y
'66 Mustang Injected 428
'66 Q code Country Squire wagon


jayb

  • Administrator
  • Hero Member
  • *****
  • Posts: 7411
    • View Profile
    • FE Power
Re: Intro and current project
« Reply #125 on: October 22, 2014, 08:47:50 PM »
Congrats Marc!  Great to be back on the road...
Jay Brown
- 1969 Mach 1, Drag Week 2005 Winner NA/BB, 511" FE (10.60s @ 129); Drag Week 2007 Runner-Up PA/BB, 490" Supercharged FE (9.35 @ 151)
- 1964 Ford Galaxie, Drag Week 2009 Winner Modified NA (9.50s @ 143), 585" SOHC
- 1969 Shelby Clone, Drag Week 2015 Winner Modified NA (Average 8.98 @ 149), 585" SOHC


turbohunter

  • Hero Member
  • *****
  • Posts: 2509
    • View Profile
Re: Intro and current project
« Reply #126 on: October 22, 2014, 08:52:31 PM »
Great to be back on the road...

Indeed it is. Thanks Jay.
Hope your SOHC repairs go well.
Marc
'61 F100 292Y
'66 Mustang Injected 428
'66 Q code Country Squire wagon


thatdarncat

  • Hero Member
  • *****
  • Posts: 1868
    • View Profile
Re: Intro and current project
« Reply #127 on: October 22, 2014, 09:21:26 PM »
Let me say thanks to you and your brother for the FE gasket development. I don't know if it's too late, tooling wise, or possible, but I just wanted to point out a feature of most FE headgaskets. The original Ford gasket and the aftermarket ones I'm familiar with have a "notch" on the lower rear edge of the gasket. The purpose of the "notch" is to let the engine builder know that the gasket is installed properly with the closed water passage at the front. If the gasket is put on correctly a corner is visible at the front of the assembled engine. If the gasket is not installed correctly the corner is not visible at the front. It's a known FE feature mechanics check if an overheating engine is reported. The gasket you have shown looks like it is made to accommodate a SOHC oil drainback which would interfere with the notch section, but on a standard gasket that wouldn't be an issue. An original Ford SOHC headgasket was "bulged" past the straight edge of the gasket for the oil drainback, which also would be visible if the gasket were installed incorrectly. Certainly not something that affects the function of the gasket, but a feature I wanted to make you aware of. This picture is just to illustrate the notch I'm talking about. The pictured gasket is upside down. Looking forward to seeing what else you guys develop.

Kevin Rolph

1967 Cougar Drag Car ( under constuction )
1966 7 litre Galaxie
1966 Country Squire 390
1966 Cyclone GT 390
1968 Torino GT 390
1972 Gran Torino wagon
1978 Lincoln Mk V

turbohunter

  • Hero Member
  • *****
  • Posts: 2509
    • View Profile
Re: Intro and current project
« Reply #128 on: October 22, 2014, 09:30:37 PM »
I'll pm you my brothers info and you can yak away with him.
He would be glad to here from you.
He is very aware of the FE world and wants to contribute.
He still has to do tooling for different bore sizes so it's not to late to throw some ideas around.
Glad you noticed the drain backs.
Also notice the huge "FRONT".
He did the gaskets as a mirror so that there is no way to screw it up. ;) Hopefully.
Marc
'61 F100 292Y
'66 Mustang Injected 428
'66 Q code Country Squire wagon


Bolted to Floor

  • Hero Member
  • *****
  • Posts: 596
    • View Profile
Re: Intro and current project
« Reply #129 on: October 23, 2014, 05:30:56 AM »
I bet that's a good feeling when the truck moves under its own power. Here in the next year and a half, I should find out what it's like with the Mustang.
Cool gaskets, it's always good to see more parts and pieces coming available for these motors.
John D -- 67 Mustang 390 5 speed

My427stang

  • Hero Member
  • *****
  • Posts: 3943
    • View Profile
Re: Intro and current project
« Reply #130 on: October 23, 2014, 06:59:13 AM »
Good stuff!  Glad to see it's running again.
---------------------------------
Ross
Bullock's Power Service, LLC
- 70 Fastback Mustang, 489 cid FE, Victor, SEFI, Erson SFT cam, TKO-600 5 speed, 4.11 9 inch.
- 71 F100 shortbed 4x4, 461 cid FE, headers, Victor Pro-flo EFI, Comp Custom HFT cam, 3.50 9 inch

machoneman

  • Hero Member
  • *****
  • Posts: 3854
    • View Profile
Re: Intro and current project
« Reply #131 on: October 23, 2014, 07:15:10 AM »
Great news but....was it solely the old head gaskets that caused the leakage?
Bob Maag

turbohunter

  • Hero Member
  • *****
  • Posts: 2509
    • View Profile
Re: Intro and current project
« Reply #132 on: October 23, 2014, 11:02:12 PM »
Great news but....was it solely the old head gaskets that caused the leakage?
I put a real straight edge on the head and I couldn't see anything.
But when I had them redecked another shop said they were a bit sloppy. Plus if you look at the deck pics it sure looks like the middle of the head (length wise) didn't clamp.
Take that for what it's worth. The finish was pretty rough but I understand (was told) that's a normal finish with an old machine.
You can see it on the Felpros.
I know that the first valve job was a leaker and the guides scratched the hell out of a few stems.
This by a shop that has many years of experience and is well known and well thought of. We found those problems before the first build and fixed them.
I'm gonna have to say it was a combination of a few things. But I keep going back to that picture of the deck with the fire ring tab extending into the water jacket and the stain of oil into it.
I tell you what, I sure have learned a lot about what to look for, like the 4.400 bore size of the Felpro with my little 4.125 bore.
And dirty gas.
From now on it's my fault. But that's what I wanted from this engine is to learn. Boy have I. :)
Now on to my next class in FEs.


« Last Edit: October 23, 2014, 11:05:17 PM by turbohunter »
Marc
'61 F100 292Y
'66 Mustang Injected 428
'66 Q code Country Squire wagon


turbohunter

  • Hero Member
  • *****
  • Posts: 2509
    • View Profile
Re: Intro and current project
« Reply #133 on: November 07, 2014, 04:20:44 PM »
Well, good news to report.
After cleaning the engine out as much as possible while apart, I filled it with water to run it and check.
Had a few drops of oil float back up to the top of the radiator. Ran it a few days then today emptied the entire system while still almost hot (block and all).
A little oil out of the rad but nothing out of the block.
So filled 'er up and will run water again for another week or two then drain again.
But it looks real good.
Also my brother turned me on to a set of exhaust gaskets that work real nice.
No exhaust ticks at all.
Also changed valve covers.
Never really got used to the black deals and they are a pain to get off even with the fins under the a/c ground off.
Had a set of Offy's just hangin' around the garage and put those on.
They actually fit the engine room scheme better but were dead bare so had to build baffles and drill new oil and pcv holes.
Also ground the fins off the rear under a/c and they go on and off real well.
One other observation, and this may be old news to most of you but new to me.
I've never run a fuel pressure regulator before, but had a bit to much pressure off the pump ( 9+).
So put one inline and had to trial and error it for a few days to get the float bowls to like a pressure.
Ended up at about 7.5 and the bowls seem to be holding a nice level.
I've read it both ways online that fuel pressure does not and does affect bowl level.
Certainly seems to me that it does.
What have you gentleman experienced?
Bottom line is she's running great again.


Marc
'61 F100 292Y
'66 Mustang Injected 428
'66 Q code Country Squire wagon


jayb

  • Administrator
  • Hero Member
  • *****
  • Posts: 7411
    • View Profile
    • FE Power
Re: Intro and current project
« Reply #134 on: November 07, 2014, 04:32:54 PM »
Those valve covers look nice; they were worth the effort.
Jay Brown
- 1969 Mach 1, Drag Week 2005 Winner NA/BB, 511" FE (10.60s @ 129); Drag Week 2007 Runner-Up PA/BB, 490" Supercharged FE (9.35 @ 151)
- 1964 Ford Galaxie, Drag Week 2009 Winner Modified NA (9.50s @ 143), 585" SOHC
- 1969 Shelby Clone, Drag Week 2015 Winner Modified NA (Average 8.98 @ 149), 585" SOHC