Last Sunday night I had set a schedule for getting to the track in three weeks, and that schedule called for me to be pretty much done with the mechanical work on the car this weekend. I was going to get the electrical work done by next weekend, and have the car running and driving, so that by the following weekend I could go to the track. Unfortunately that schedule went out the window almost immediately this week, for a variety of reasons, including lack of availability on the Accufab throttle bodies, and the need for some rear end components to match up with the pro gears I'm installing in the car. Also, the garden variety stuff I needed to get done to get the car assembled took a lot longer than I expected, so I'm still pretty far from having it put together. Nevertheless I did get a lot accomplished; just not enough. I would say at this point that making it to the track on July 26 is questionable, but I will keep plugging away and see what happens.
After doing an inventory of the parts I needed on Sunday night, I made the calls at lunch on Monday to get the rear end components I needed, and the Accufab throttle bodies. I called Accufab first, and found out that they were out of stock. After calling a bunch of their distributors I found that none of them had the throttle bodies in stock, so I called Accufab back and placed the order. They say they will be shipping tomorrow (Monday), but we will see. Since I wasn't going to have the parts to get the car mechanically completed, I elected not to pay for next day air for the rear end parts that I needed from Mark Williams; those shipped on Monday but did not arrive until Thursday. Friday at lunch I took all the rear end components over to my pal BradFORD, and he should have the pumpkin ready to go with the pro gears by the middle of this week.
I also planned to revamp the plenum of my intake to make it lower, but maintain about the same volume by making it wider. After figuring out exactly what I was going to do on Monday night, Tuesday I ordered a couple of hunks of aluminum plate, one 12" X 22" X 1/2" piece for a new top plate, and one 12" X 22" X 2" piece for the new plenum spacer. Most of this material is going to be machined away, of course, but I decided to machine it from a solid piece rather than weld some smaller pieces together, because I suck at welding aluminum, and I'm pretty good with the CNC

The aluminum dealer told me I could pick up the material on Friday.
As usual time was short to work on this project during the week, and Friday night the wife had plans for me, but Saturday morning I got going early. Last weekend we had just dropped the engine and transmission into place, so the first thing I did was crawl under the car to put the motor mount bolts in. You'd think this would be relatively painless, but of course it wasn't. I had purchased new motor mounts for the engine, and apparently the distance between the flanges on the mounts, where they fit over the frame mounts, were significantly smaller than the frame mounts themselves. The engine was probably up 1/2" over where it needed to be, and the weight of the engine wasn't enough to put the mounts down into position. I struggled with this for quite a while, and finally ended up using a big C-clamp to pull the mount down into position over the frame mounts. I had to point the ends of the motor mount bolts and pound them through to get them into place, but finally after about two hours I had the engine bolted down. Sheesh, what a battle; the only positive thing on this was that the engine was actually sitting a little lower now.
Next I took a little break, and programmed one of the CNC machines to start cutting out my plenum spacer. Here's a picture of the top side being cut:
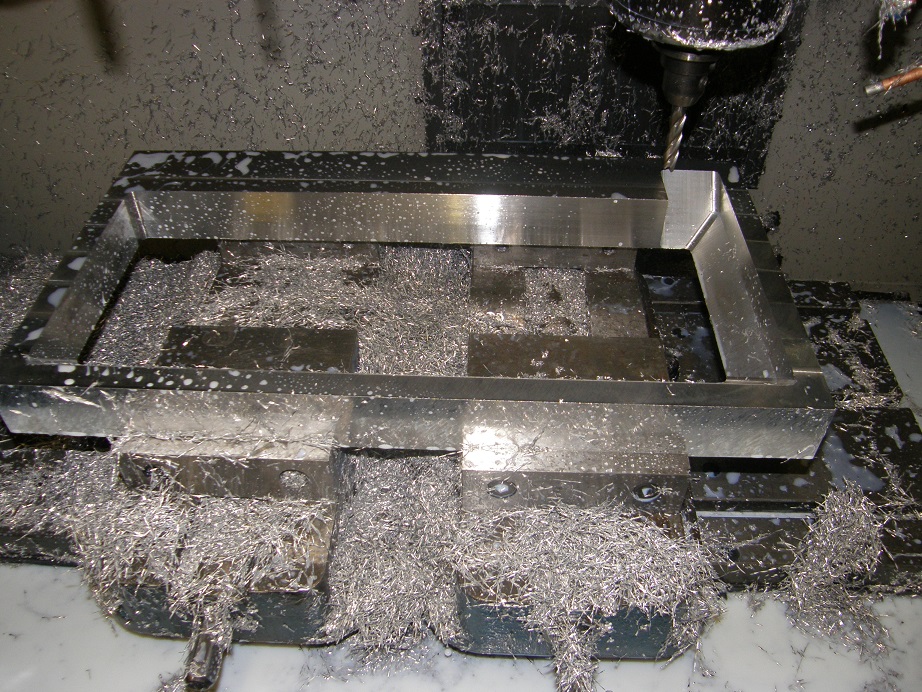
That picture was taken after the center was cut out of the 2" thick plate, and the angled sides of the plenum spacer are being machined. Sure were a lot of chips from that little project LOL!
After getting the CNC machine running I got back to the car, and the next project, which was to put the steering rack and lower control arm mount up into position. This one is always a pain on this car, and let me warn anybody who is thinking about a Fat Man Fabrication strut conversion setup for an early Mustang that it is not a good kit, doesn't fit well, moves the wheels inboard 2" without telling you, etc. etc. There are two big 1/2" through bolts that go through the rack and lower control arm mount, and also go through the original Ford lower control arm mounts on the car. As you install the bolts you need to put three spacers on each side in place, and there's not a lot of room to work, so you end up doing this kind of blind. And of course you have to assemble the steering linkage while you are doing this. Another three hours of horsing around and I finally got this stuff all finished up. Next up were the headers, which are also a very difficult installation on this car. The biggest issue is getting the headers themselves to line up with each other and hook together. There are twelve separate pipe sections on these headers, with tabs holding them together, and as you install them in the car, for some reason they don't like to line up with each other. They were easy on the dyno, but the car presents a whole new set of problems. I got the left side done, and a start on the right side, before midnight rolled around and I decided to call it a night.
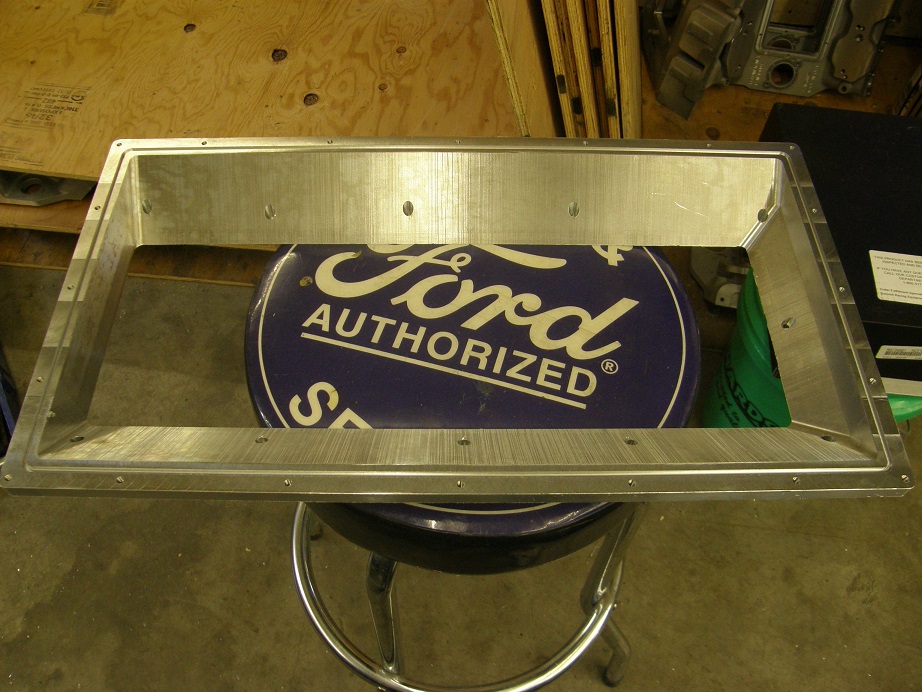
Sunday the first thing I did was flip the plenum spacer over in the CNC machine so I could machine the bottom side. This took a while, but finally around 6:00 PM it finished up. Here's a picture of the completed spacer:
When I get the Accufab throttle bodies, hopefully this week, I can do a drawing and machine the top plate, and then the induction system will be ready to go.
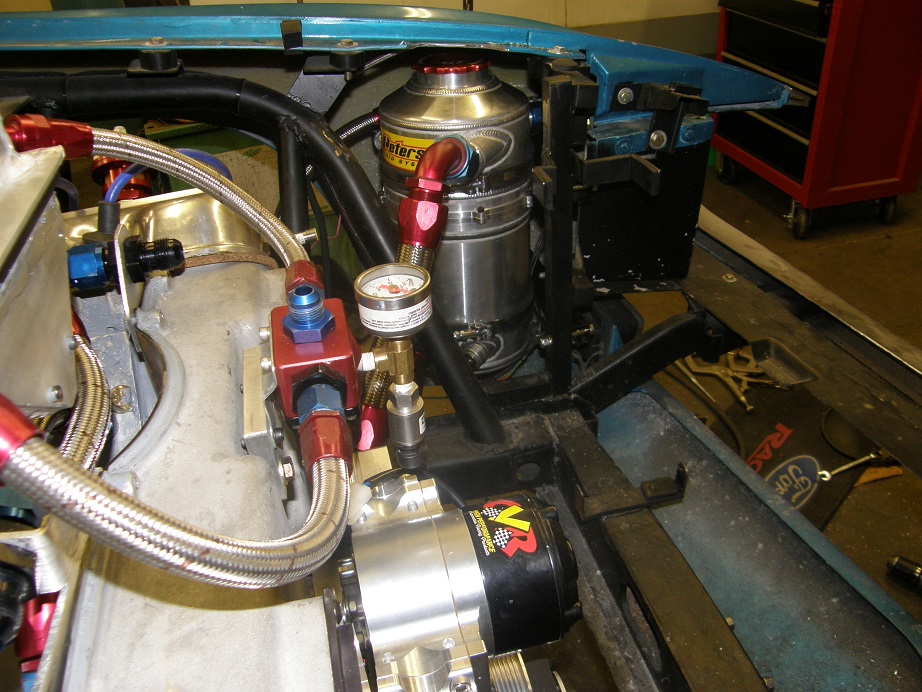
Next I got going on the right side headers, and by noon I had that side finished. I spent the rest of the day today modifying the front left corner of the car, fabricating a mount to fit the dry sump tank, remote oil filter, and breather can. This also took a lot longer than I thought (imagine that), but by the end of the day today I had that pretty much under control. The following picture shows the dry sump tank; behind it out of sight and up under the fender is the remote oil filter adapter. I still haven't done the mount for the oil catch can, but I know where its going to go and it shouldn't be too tough to get that mount finished up.
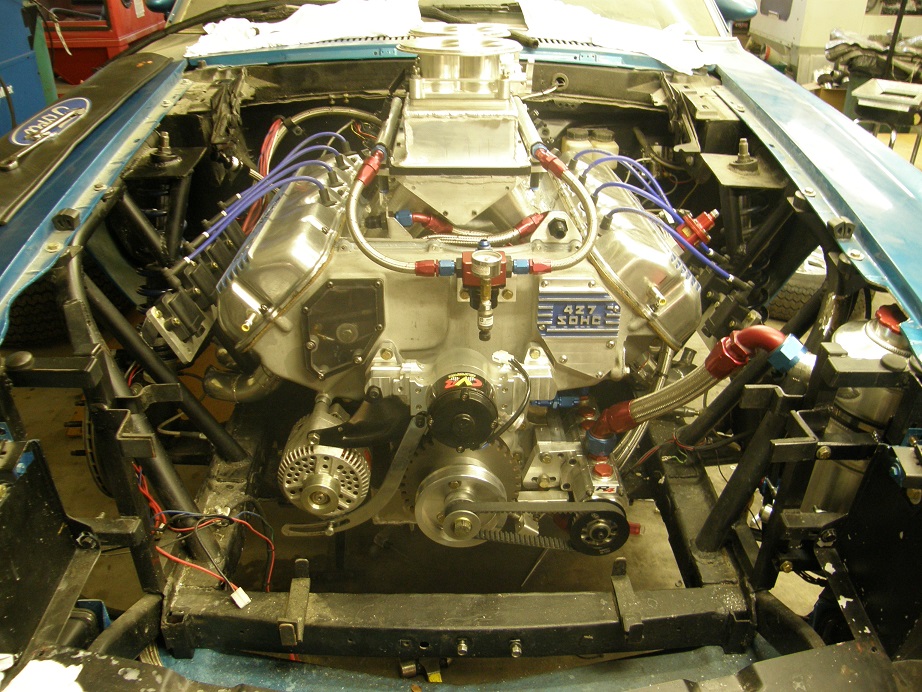
Finally here's a picture of the engine in the car, as it sits right now:
Next week if all the parts come on schedule I should finally have the mechanical work done on the car by Saturday. This leaves me Sunday to do the wiring, get the car running, etc. etc. Don't know if I'll make that or not, but I will do my best. I'll post another update next weekend.


