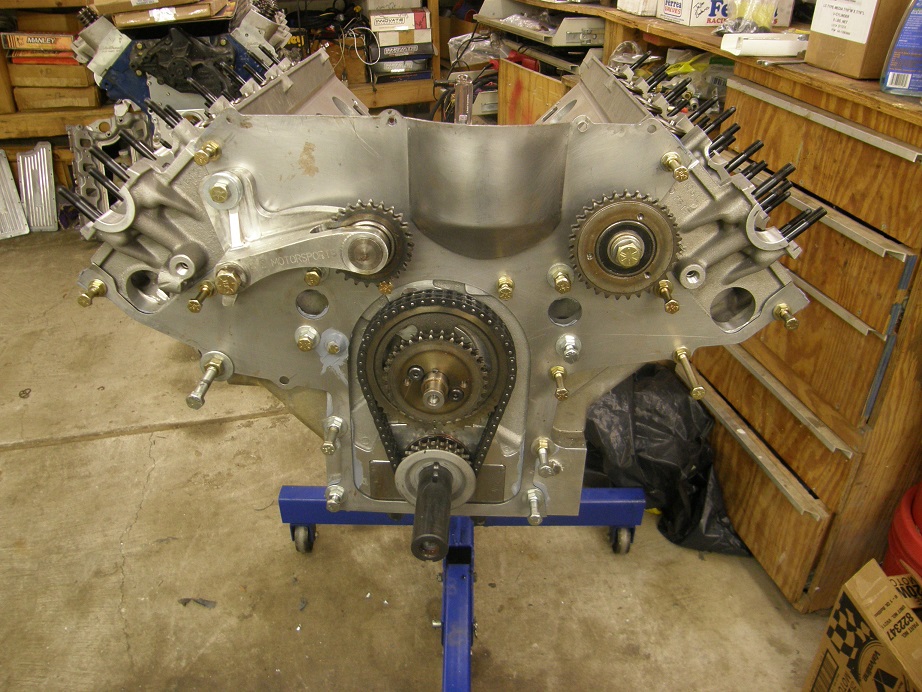
More progress on this project this weekend, but at this point I'm stalled until the new cams arrive. Jason had emailed me earlier in the week, expressing some concern about the threads in the front of each head that hold the fuel pump gear and stand on one side, and the chain tensioner on the other side. On Saturday morning I checked them and sure enough, they were looking pretty marginal. I tested-tightened them and the threads pulled right out, so I heli-coiled both sides to address that issue. Then I got the backing plate cleaned up and flattened out, and installed it on the engine. Picture is below. The engine is going to stay looking like this until the new cams arrive.
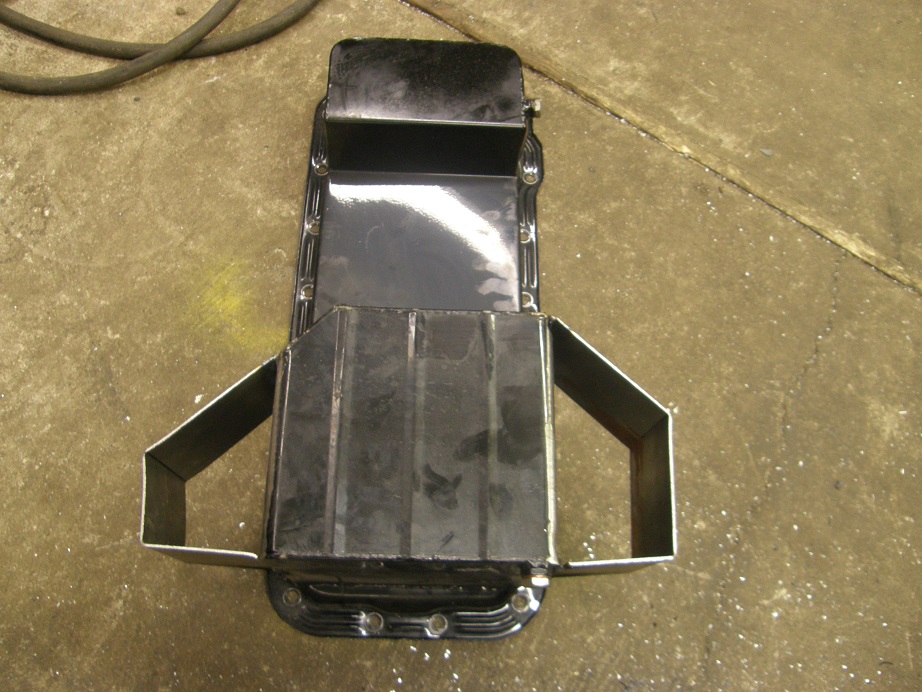
On Sunday I decided to tackle the oil pan project. Because of the necessity of using a rear pan in Jason's installation, he is using a Canton pickup truck pan. I have some experience with this pan, having used it on my first SOHC for my Galaxie back in 2008. Unfortunately, it is not a good performance oil pan. The oil volume that it contains is simply not enough to support one of these engines, and in fact when I dynoed with this pan in 2008, the oil pressure would nearly always fall off at the end of the pull, indicating that the engine was running out of oil. I ended up removing the pan from the engine and adding some sheet metal to increase capacity, and then everything was fine. I felt we should do the same thing for Jason's engine. A picture of the pan before modifications is below:
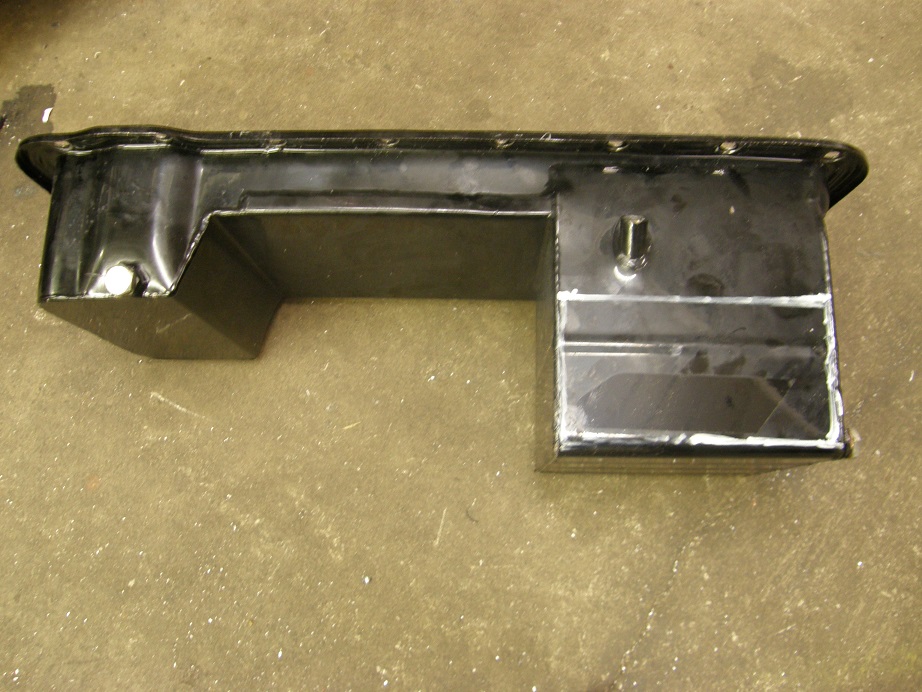
This is advertised as a six quart pan. I did some calculations based on the measurements, and found that the front sump, where the oil pump goes, could hold 1.5 quarts, less the volume of the pump itself. The rear sump, if filled all the way up to the flat bottom in the middle of the pan, would hold 5-1/2 quarts. I wanted to increase the capacity of that rear sump, so that we could put 8-9 quarts in this engine and be sure we weren't running out of oil in the car.
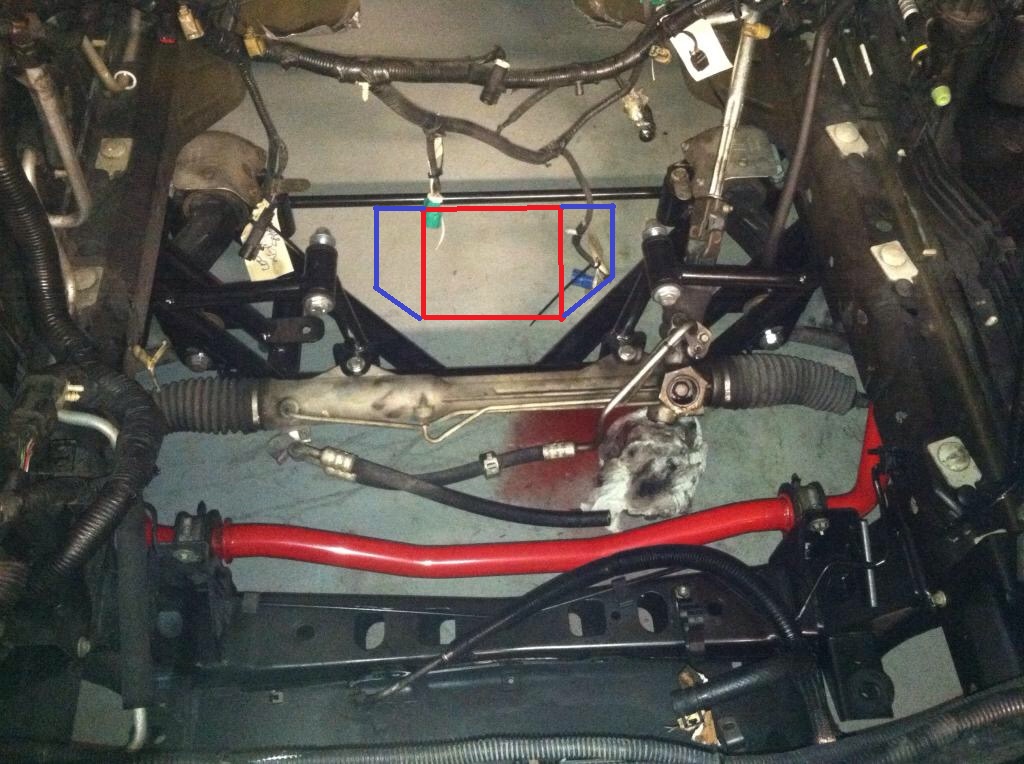
Jason had sent me a picture of the engine compartment in his car, so that I could see where the rear sump of the pan was located. I took that picture and drew the outline of the existing sump in red, and then drew some kickouts I wanted to put on the sides of the plan in blue:
After making some measurements on the pan and calculating some volumes I decided to add kickouts that extended 3" on either side of the pan, and were 4" high. This would add just about 2 quarts of capacity to the rear sump. First step was to cut some windows in the side of the pan:
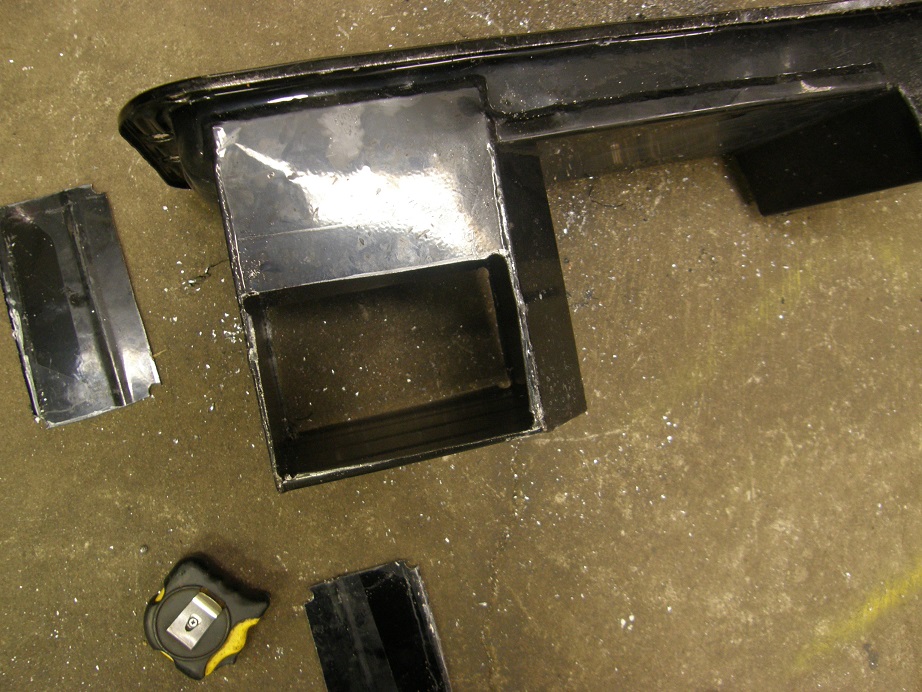
Next I took some sheet steel, and cut and bent it to shape in my brake, and tacked the pieces onto the pan:
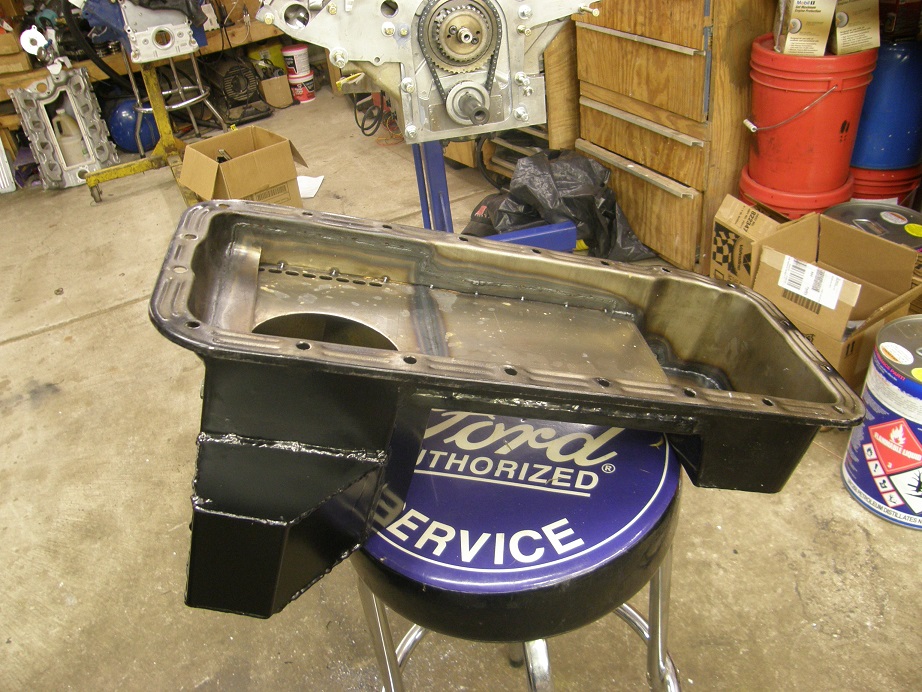
Notice how one side of the pan had that angle cut out of the corner as delivered. I didn't want to take a chance on getting too close to the crossmembers under the car, so I just continued that angle. It leaves the pan looking a little asymmetrical, but that won't matter.
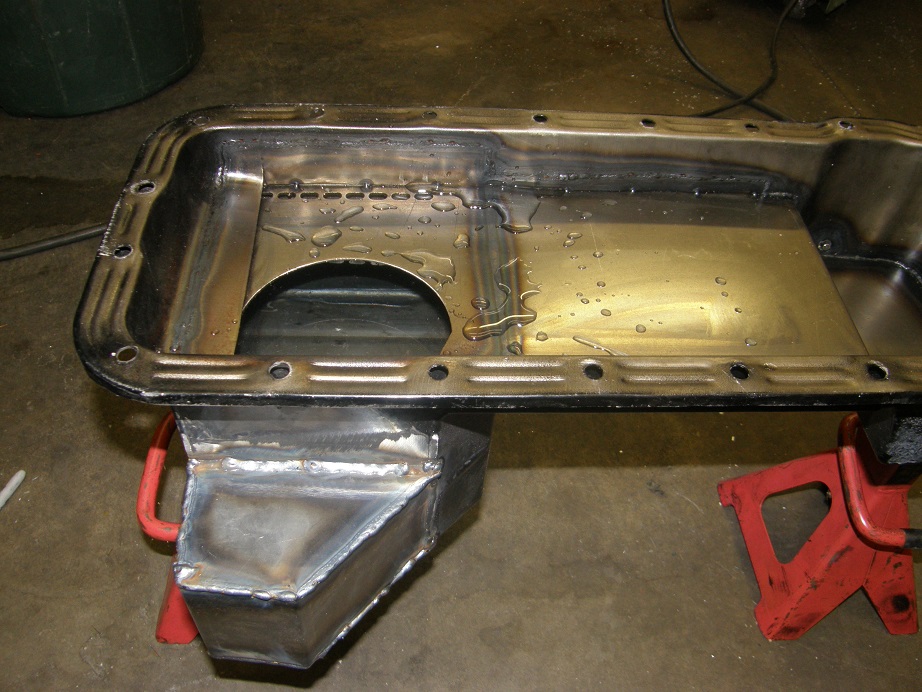
Next I cut the rest of the metal for filling in the top and bottom of the kickouts, and welded it all in place. I've probably built 20 oil pans and gas tanks over the years, and after the initial welding I always fill them with water to check for leaks. This is the first one I've done that didn't leak at all on the first test! I couldn't believe it LOL! Picture of the pan holding the water below:
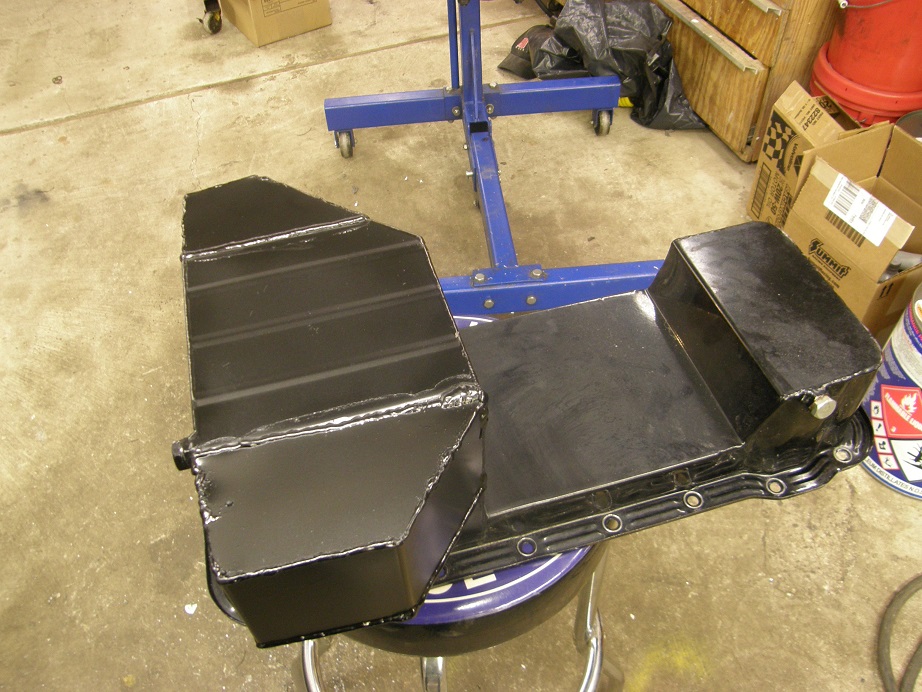
After clean up and paint it looks pretty good, and I don't think we will have an oil capacity issue now with the modifications:
I'll post some further updates once the cams arrive and we start getting the engine the rest of the way together - Jay


