Show Posts

This section allows you to view all posts made by this member. Note that you can only see posts made in areas you currently have access to.


Topics - cjshaker

Pages: 1 ... 9 10 [11] 12
151
Non-FE Discussion Forum / RC 400cc P47 Thunderbolt plane...
« on: July 09, 2014, 02:58:54 PM »
I used to really get into RC planes when I was a kid. Things have come a loooooong way since the single cylinder Cox glow plug engines! These days they're using real honest-to-goodness radial and rotary engines.


Here's a 1/4 scale P47 Thunderbolt with a 400cc 5cyl radial engine. They look and even darn near sound just like the real thing! They are really amazing and cool to watch. At the 3:00 mark he does a slow fly-by and then does one of the best landings I've ever seen.

http://www.youtube.com/watch?v=qPsHhWALh-w

152
FE Technical Forum / Removing pilot bearing for a roller set-up...
« on: July 09, 2014, 10:08:36 AM »
I need to remove my pilot bearing in my crank in preparation for installing a roller bearing. Usually I'll just knock it out, but this is a pretty new bronze bearing so I'd like to save it if possible, so I was wondering if you guys had any tricks for safely removing them without destroying it. I tried a slide hammer with a small bolt and washer on one end to try and hook it, but that didn't work.

And since this is the first time I'll be installing the rollerized set I was also wondering if there were any tricks to installing it. I've had bronze ones that were a tad loose and would "ping" them to get them tight. Obviously I can't do that with the roller set-up, so I was wondering if you guys used Loctite or anything to make sure they didn't move?

153
FE Technical Forum / Toploader tubular shift rod availability?....
« on: June 17, 2014, 09:14:19 PM »
Does anybody still make the tubular shift rods for the toploader? And if they are available, do they pose any interference problems? I haven't been able to find any anywhere, except for custom made jobs. I'll make them if I have to, but I'm wondering why Ford made them so oddly bent if they didn't need to be. My engine and tranny is out so I can't check and see what any issues there may be.


154
FE Technical Forum / Fuel gauge not working on my '69 Mach....
« on: June 02, 2014, 07:37:08 PM »
My '69 R-code Mach has a fuel gauge problem that is driving me totally nuts. I did a total rotisserie restoration on it several years ago and my fuel gauge at first would start to work, then it would creep back to empty, fluctuating slowly. It went on like this for a while until it just stopped working. With the engine out I took the time to go through and finish a few details that were bothering me. First and foremost is my fuel gauge.

First, knowing that restorations can lead to bad grounds with painted surfaces, I was careful to double clean all grounds when reassembling the car. I have not had a problem with anything else working because of a ground.

As for the fuel gauge, I checked the sending unit and it is giving good ohm readings at half and full. Right now it reads 15 ohms with a full tank. When I grounded the wire the gauge does not respond at all, so next I went to the dash. I replaced the circuit board and voltage regulator during the restoration, so I looked there first. The circuit board seemed ok but I replaced it with a newer reproduction anyway that seemed a little nicer than the older one I had. No change. All my dash lights and other circuits work but I can't check my other low voltage gauges because the engine is out. The oil pressure and temp gauges seemed to work before the engine pull though, just not the fuel gauge. Although I have Autometer gauges that I depend on for temps and oil pressure, I only have ONE fuel gauge. Of course I checked power to the fuse and the fuse itself. They are good with power coming on when I turn the key.

Since it's nearly impossible to get to the circuit board with the cluster plugged in, and since I have NO confidence in reproduction parts, I replaced the voltage regulator with another one. Still no change, which I expected. Next I tested the gauge itself. It reads about 14 ohms which indicates it is good as all of the low voltage gauges I've tested read the same. I have cleaned every terminal, ground, contact (including the contacts on the circuit board feed AND the circuit board. I can even see the "contact" points where the connector is making contact with the circuit board connections). I have temporarily double and even triple grounded all grounds to make SURE that is not causing my problem.

I noticed in my wiring diagram that it is a resistor wire that feeds the cluster, but when I check the wiring harness "tang" at the plug-in I get 12.6 volts. What is the resistor wire for if I'm getting 12 volts at the plug in? Further, when I pull the gauge cluster out with it plugged into the harness and with the key ON, and with the connector at the regulator unplugged, I get 12.6 volts on the "hot" side of the connector (the 9volt battery type connector). BUT when I plug the connector back onto the regulator it then drops to a millivolt reading?? ??? ???

What gives here? Is my ignition switch giving me a "ghost" reading when a load is applied? I was going to pop the fuse out and feed 12 volts to the gauge side of the fuse and see if that was the issue, but I'm puzzled about that resistor wire in the diagram. A resistor should drop voltage, yet I get full voltage at the cluster plug-in.  ??? What suggestions do you guys have to go from here? I apologize for the long post, but this is driving me absolutely insane!! I need to get this figured out before I drive it again (already ran it out of gas once.....and that is ONE TO MANY TIMES!

Thanks for any help you guys can give me. At this point I'm ready to fly in some electrical guru to help me figure this out....if I could afford it. I have never had such a hard time figuring out a problem like this.  :( :(

155
I love them both so I was pretty surprised to come across these videos of big railroad steam engines going at it. I suppose the old addage, "if it's got wheels somebody's gonna race it" applies here. A new one on me, but pretty impressive how these monster machines take off. Torque is off the scale for steam power, and it shows.

Of course in true old fashioned steam drag racing, they use a flagman instead of a tree 8)
http://youtu.be/luB3qFQoW1E

156
FE Technical Forum / Cutting off exhaust ports?...
« on: May 05, 2014, 08:32:41 PM »
I've been brainstorming my parts list for a drag engine and began to think about any tricks I could pull to gain some HP. While thinking of the old Pro Stock 351C trick of cutting off the exhaust port and making a port plate to raise the exit location, has anybody tried cutting off the exhaust ports on an FE? Being that the exhaust ports are exposed so far back into the head, there would be a lot to gain in exhaust exiting and header design....in a non-shocktowered car of course.

I know there is a water jacket behind the outside of the head surface, but knowing a very good TIG welder, it would be possible to weld on a port with a much more friendly upward cant on an aluminum head. With a little extra weld built up, it could be ported nicely for a smooth port exit. Anybody ever tried or seen this done on an FE head design? Or am I just nuts (feel free to skip that last question).

157
Don't know if any of you guys have seen this video or not so thought I'd share it. It's an old 1929 video of a Fordson tractor with a special snow drive system. This thing can go through (or over) some pretty serious snow! Pretty good at hauling some heavy weight also. Just all around cool....

http://youtu.be/zBjlSJf4274

158
Several years ago, I got tired of the loud noise my compressor makes (2 stage, 80gal Quincy...so it's plenty loud). Knowing that a lot of the sound comes from the intake, and not wanting to route it outside to the cold moist air (and picking up a ton of water in the process), I decided to come up with something different. I took the old air cleaner housing from the '64 Mercury 390 I took out to build for my '68 F-250 and decided to rig it up for an air cleaner for my compressor.

Turns out the compressors air cleaner base fit PERFECTLY into the base of the 390 air cleaners housing. Lucky! Not only do I get a ton more filter area (after about 15 years now, it still looks clean), but it gave it a cool deep throbbing sound and got rid of that extremely annoying higher pitched sound that drowned out all but a passing freight train. I still need to get a 390 sticker for the housing to finish it off though.  :)


159
Some of you may remember the Jeff Gordon Pepsi MAX "test drive" prank that they pulled on a car salesman. If not, here's the original prank....
https://www.youtube.com/watch?v=S7jmhxuIh3Y

Many people said the prank was a hoax, but Pepsi and Jeff Gordon insisted it was real. To prove it to one of their most skeptic reviewers, they set out to show him that it was indeed a real prank. I think they pulled it off pretty effectively! You can't fake his reactions ;D
https://www.youtube.com/watch?v=4CVzHip_QFQ

160
FE Technical Forum / My new Canton oil filter...
« on: April 18, 2014, 04:30:06 AM »
I don't want this to sound or come across as a sales pitch, just wanted to share something new I decided to go with on my engine.

After some lengthy discussions and talks with people much smarter than me, I came to the realization that pretty much all oil filters with by-passes in them go into a "float" mode when you have high oil pressure. In other words they pass unfiltered oil through to the engine, usually when it's cold. That much I always knew. But if you have high oil pressure, which I'm a fan of healthy oil pressure, then the filter will remain in that "float" mode and pass unfiltered oil even when it's warm. That would explain some pictures of trash in crank and rod journals that I've seen over the years, as debris can pass through the filter and even the pump, and make it to your bearings.

I didn't like that idea, so it came up about the Canton full flow oil filters which had no bypass, but could flow plenty of oil cold due to a much bigger filter area that can flow 45 gallons a minute. I decided to try one out. They have replaceable cartridges and are easily disassembled so you can check it easily for any metallics in the filter media.

Here's a couple shots of it....


Seems to be a pretty nice piece, quality made. It's a little on the heavy side....about double the weight of a stock filter due to it's thick aluminum housing. It's narrower but taller. It filters down to 8 micron which seems to be the consensus for minimum filtration for wear particles. And it's expensive! But I figured I had enough effort invested in everything that I didn't mind spending a comparably small amount to know it will have full filtered oil all the time. It's also a little too "bling" for my tastes ::). The only other billet piece on the whole car is the MSD distributor, but I guess I can live with that. At least it's Ford blue 8)
It also does not have an anti-drainback valve, but I don't believe that's even an issue with a vertical oil filter.

I'm not saying there is anything wrong with regular oil filters. They've worked just fine for me for years. And I wouldn't put this on any old street car. It would be near impossible to justify the expense for a daily driver. I just wanted to try something different on my 427 that I saw was an extra step of insurance.

161
Member Projects / Upgrades to my R-code Mach 1...
« on: April 10, 2014, 10:50:41 PM »
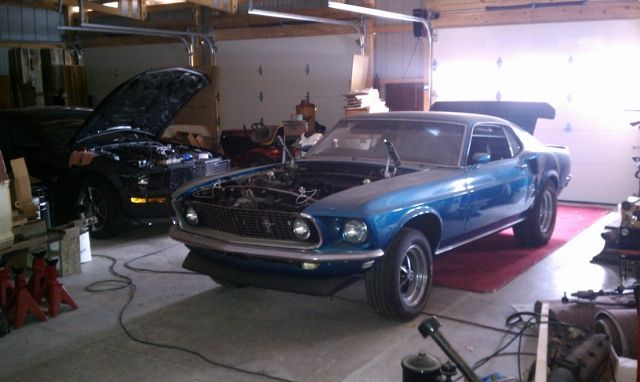
Decided to change my front and rear suspension on my 427 SO equipped R-code Mach 1 while I had the engine out waiting for a different one....but still another 427 SO. I wanted to get away from the stiff aftermarket coils (620s I think) I had originally put on the car when I restored it. They rode fine with the iron head/block weight of the 427, but there was NO front end rise when you got on it. It would just instantly roll the tires. Of course the BF Goodrocks didn't help ::)

My starting point....


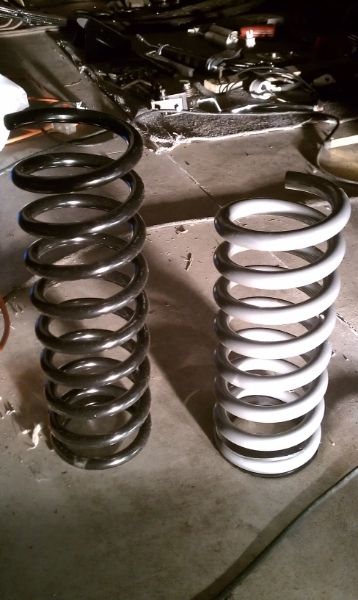
My old coils went right in with a tap from a rubber mallet. I could see that wasn't going to be the case with these. They were quite a bit taller.


My old homemade spring compressor used a plate that went over the shock tower and a threaded rod that dropped through the spring. It worked really well, but the threads had started to strip after a several times use, so I decided to get one of the newer types and save having to make another one. I think I'll make another one like my old one....I did NOT like using the new one. It was a royal pain getting the darn think compressed on the floor enough to get it in the tower!!

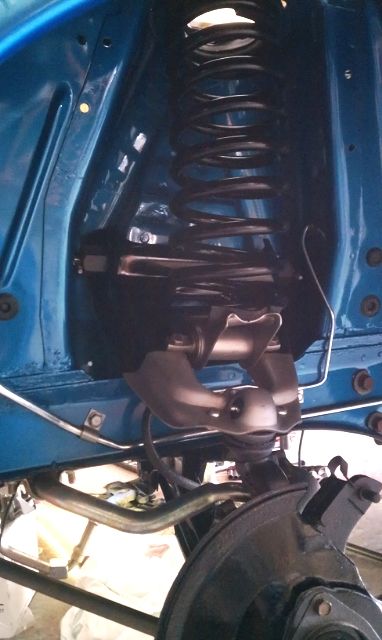
Gave me a chance to clean the underside of the chassis and wheel wells while I had everything apart.


Well I'm glad THAT'S over with!! Besides being nervous using the compressor and holding about a ton of compressed force in my hands, when I started to jack the upper A-arm up to hold the spring in place I didn't realize I was taking so much weight off the jack stands (with no engine weight).....and suddenly the car moved and shifted towards me!! I thought for sure it was going to drop off the jacks and right down onto the floor!!! :o  I immediately pushed against it and it stopped. When I looked underneath, the frame rail was sitting on about 1/2" of the outer lip of the stand!! Holy Cow!! I got really lucky there :o

I immediately got the jack under it and repositioned the stands and checked the rears. Won't make THAT mistake again! But got it all back together and everything cleaned up real nice.


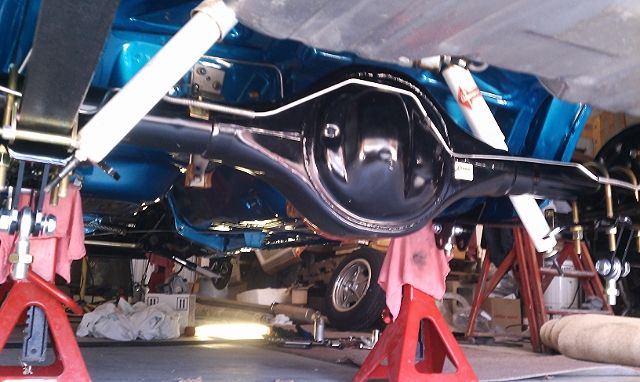
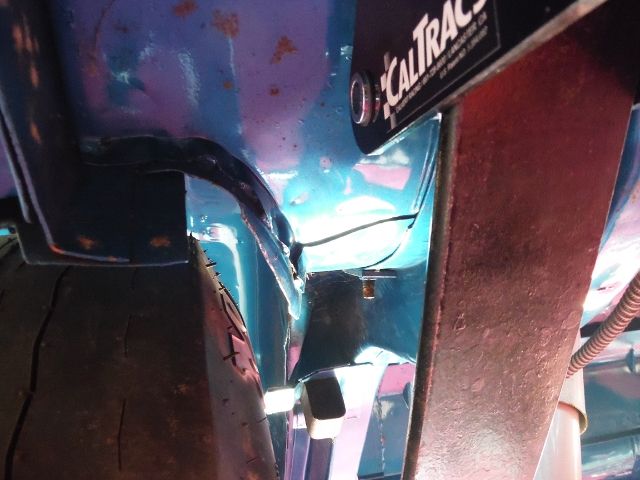
Getting the CalTrac rear suspension on was a piece of cake compared to the front springs :)  Again, it gave me a chance to clean everything really well, and again I was surprised at how nicely everything cleaned up. It looked like I had just done the car. The AMK chassis bolt system I had used really was holding up well. All the bolts still had a nice phosphate coating. Along with the DP40 epoxy primer I used on everything, which they quite selling after the government decided it was too "deadly", the chassis still looked like a million dollars....which is just a couple dollars shy of what I have in the car ;D ;D

I really like the quality and fit of the CalTracs. And they have GREAT customer service. After talking with Travis there, he was extremely helpful and a pleasure to talk to. Great people.


So after I had the front and rear suspension done, I couldn't stand it....I had to throw on my rims to check them out. I was nervous about finding a set of rims that I thought looked "old school", but still looked right on a '69. Most people think, and I agree, that Magnums are about the best looking and ONLY correct looking wheels on a '69. But I was just getting tired of having the same look as everybody elses car. I wanted something different....something period looking....something cool. I think they nailed it!! At least I'm happy with them, and that's all that counts ;D

I didn't have the center caps on yet....


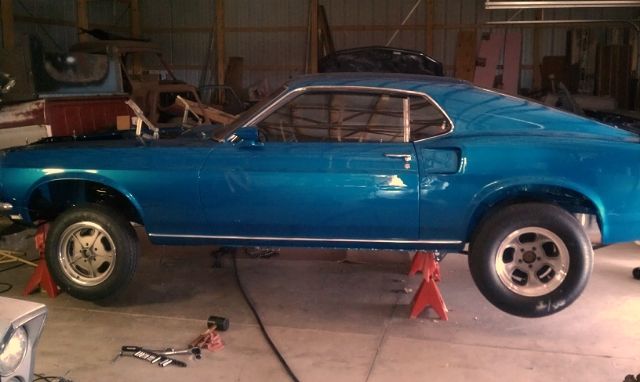
I'm really glad I had the rear narrowed 1" on each side because the rims had 1" less backspacing than my Magnums. It put the tires out where they would have originally been. But now I wish I had had it narrowed 2", then it would have that "tucked in" look that I like. But then I would have trouble putting the Magnums back on with 275-65/15s, so I can live with it. It still gives me enough clearance that I don't think rubbing will be an issue.


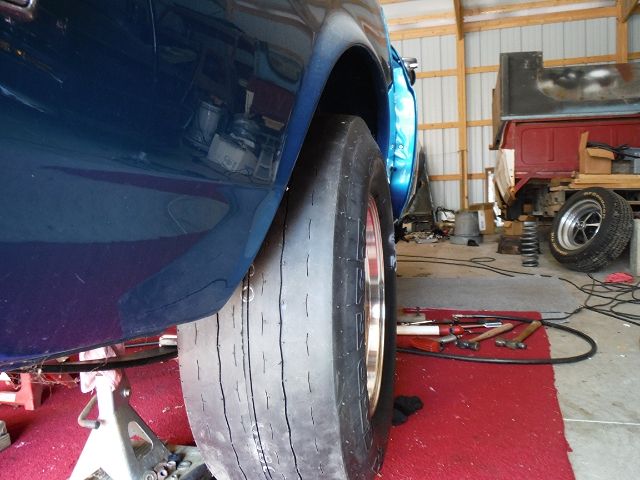
Still plenty of room too at the front inner section of wheelwell where they always get close. The Magnums were actually a little tight here with the 1" more offset. The M/T ET Street tires I chose are actually about identical in size, so I figured everything would work good. I love it when a plan comes together :)  And that is NOT rust on the bottom. Just dirt that easily washed off and looked good as new again when dried :)


So then I tackled the truck. All new rubber hoses, belts, vacuum lines etc. New front tires after replacing the old split rims with one piece....that I had to track down and drive 60 miles to get :o  Those suckers are getting hard to find in my area! New front shocks, rebuilt the carburetor, rebuilt the distributor, oil change, all filters replaced, new plugs etc. etc. etc. She should be ready make the haul. Of course it never hurts to take along some spares, like alternator, distributor, fuel pump etc. And the cool part is they all work on either of my vehicles. I was laughing with my Dad telling him I could replace just about anything on the side of the road and be back on my way. He said like the days of the old Model T :)
She ain't pretty, but it's darn near bullet proof.


Now I'm just sitting, nitpicking details....waiting on a call from the engine guy....after 4 months :(


162
NIB Comp Cams 282S cam and solid lifters. Never used or installed. Lifters are still sealed in the box. Comes with all original packaging and cam eccentric pin.

Lobe:                            .331/.331
Lift::                             .571/.571
Duration:                       282/282
Lobe Seperation:          110
Intake Centerline:        106

Here's a link to Comps cam spec page for this cam....
http://www.compcams.com/Company/CC/cam-specs/Details.aspx?csid=946&sb=2

$170 plus shipping. That's a good $50+ cheaper than anywhere you can buy them from that I can find.


163
Selling off a few things to help fund the changes I'm making to my Mach 1. Shipping charges will be on top of the posted prices. I'll answer any questions, but the first "I'll take it" to post here will get a hold put on it until I receive payment. I prefer USPS Money Orders or bank checks but will accept a personal check....however, if you're a "newbie" here or somebody I don't recognize, I will wait 1 week for the check to clear. I hope you understand.

First, a brand new, still sealed in the plastic Blue Thunder 2x4 Medium Riser intake. It has never been removed from the plastic, and I wasn't going to cut it open to take pictures. Known for their extremely high casting and machining quality, Blue Thunder is the best. This one is perfect, no surface corrosion or anything. Still like new and often hard to find due to limited low production runs. In fact I don't believe anybody has been able to sell them for some time due to this. $600 plus shipping. (Sold to Barry R, pending payment)


Also for sale, a factory C3 aluminum intake I believe is for a '63 375hp/390. This one has been painted by the previous owner, so it would require a bead blasting or shot blasting to make bare aluminum again. NO stripped threads or issues to be seen. Very little corrosion around water ports. Much better than most I've seen. Heat shield is in place and underside is very clean. The intake was cleaned before it's prior use. Has carb studs and a chrome vent tube and cap which I'll leave on. Has some light impressions around intake bolt holes from washers, but that is the way they came from the factory from my experience. The front water bypass tube is useable, but in my opinion should be replaced with a brass unit for security and peace of mind. No other issues at all that I can see. $250 plus shipping.


164
Getting ready to install my CalTrac setup on the Mach now that it's warmed up a bit. Got the complete package with front and rear shocks.

My car now has the aftermarket BB springs, but I know they won't work good for weight transfer so I'll be changing them out. Most of what I've read and researched says that the Moroso front springs aren't good for any type of street use. While I want to get the best traction I can, I also don't want to lose the ability to drive it on the street. From what I have gathered and read, the small block Moog springs seem to be a good alternative. Leaning towards the Moog part #8306, listed for 67-70 6cyl w/o AC, but would like some feedback from you guys. My car has a factory iron 427 block, iron MR heads and factory 2x4 intake, no AC. I also have a factory deep sump pan and Hooker headers so I have to consider them on ride height.

Also another question, this one on front tires. While I can always throw my BFG TAs and Magnums back on for extended street driving and use, I'd like to be able to drive on the street occasionally with the new rims I bought for racing. I'm leaning towards the MT ET Streets in 28X11.50-15LT on 15x8 rims for the rear. I just bought 15x5 front rims and was wondering if the MT Sportsman Front tires will fit on the 5" wide rim? Can't find any info on recommended rim size on their web sight.
Also, I see suppliers list them in 26x7.50-15, 26x7.50-15 8 ply and 28x7.50-15. I like the idea of the smaller 26" for stance and looks but will that put my front too low? And if they WILL work, is the 8 ply better for my heavy nose?

165
Non-FE Discussion Forum / This white stuff is getting really old....
« on: February 07, 2014, 02:04:00 PM »
And putting a HUGE damper on my FE Reunion plans >:(

Two months to get a lot of work done on my car, install an all new front and rear suspension, reinstall the engine, rebuild the toploader.....update the '70 F-350 with some brake work, tune-up, replace shocks, new tires and front rims (two piece) and get it ready for a long haul.....replace wiring, bed boards and tires and add tie-downs on the trailer....all before mid April.

Endless snowfalls, temps averaging in the teens to negatives and no end in sight.....this is getting to be a bummer. At this rate I won't make it in time. Because all my time and resources have gone into rebuilding the house since I bought it 7 years ago, my new garage doesn't have insulation or heat yet, so I can't get anything done in these temps. It's really starting to bum me out.

My F-350.....buried under an avalanche of snow.

Pages: 1 ... 9 10 [11] 12